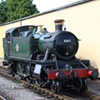
Airfix 48xx with High Level Kits chassis
-
Daddyman
- Posts: 745
- Joined: Sat Jun 03, 2017 1:09 pm
Re: Airfix 48xx with High Level Kits chassis
Thanks for a bit of teatime reading, Paul. Could I ask how the HL clip-on brakes work? Just wondering if there might be a technique I could borrow when a kit's top hanger holes aren't close enough to the wheel.
-
Paul Willis

- Forum Team
- Posts: 3044
- Joined: Sun Jul 20, 2008 6:00 pm
Re: Airfix 48xx with High Level Kits chassis
Daddyman wrote:Thanks for a bit of teatime reading, Paul. Could I ask how the HL clip-on brakes work? Just wondering if there might be a technique I could borrow when a kit's top hanger holes aren't close enough to the wheel.
<ahem>
If I said that I had "mislaid" the 48xx instruction sheets... Ah! I may have just thought where they are. Nope, not in the logical place of the 48xx pages of the Russell bible
Anyway, the 48xx is slightly different, in that you build the brakes and rigging as a sub-assembly (as in the previous post) and it is fixed by a short piece of wire through a forked joint on the brake lever under the cab, and the hangers clip up around the frames. In this case, there is no positive fixing, but the inherent strength of the assembly should hold them in place. However, I may apply a speck of superglue to each joint where they butt to the frames, just to hold them in place, but it is a joint that is easily broken if it ever becomes necessary.
These pictures are quite cluttered, but I've just popped the brakes in place in the hope that you can see what I'm talking about.
The more usual High Level arrangement is to use thin brass wire pegs on the ends of the hangers to engage in holes or lengths of tube in the frames to hold the brakes and rigging in the correct place. This is the relevant illustration from the Neilson tank instructions:
I intend to use this method of wire and thin tube on all future loco builds, if the kit as designed suggests a permanent fixing. I'll let you know when I next start something
Cheers
Paul
You do not have the required permissions to view the files attached to this post.
Beware of Trains - occasional modelling in progress!
www.5522models.co.uk
www.5522models.co.uk
-
Daddyman
- Posts: 745
- Joined: Sat Jun 03, 2017 1:09 pm
Re: Airfix 48xx with High Level Kits chassis
Thanks a lot, Paul. So am I right in thinking that the 48xx has no upper cross shafts holding the hangers in place? I can't quite see how it's done. The system on the Neilson looks fairly conventional.
-
Will L

- Posts: 2524
- Joined: Sun Jul 20, 2008 3:54 pm
Re: Airfix 48xx with High Level Kits chassis
Daddyman wrote:... Just wondering if there might be a technique I could borrow when a kit's top hanger holes aren't close enough to the wheel.
I have a post which covers the whole topic or removable break gear, which employs the same methods as Paul and HL. However the later part of this covers exactly what I did when I found the hanger holes were in the wrong place on my Buckjumpers.
See Part 6a - Removable Brake Gear.
-
Dave K
- Posts: 247
- Joined: Sun Jul 20, 2008 6:11 pm
Re: Airfix 48xx with High Level Kits chassis
Paul Willis wrote:The pick-ups themselves were lengths of trusty phosphor bronze wire, bent to shape and soldered to the copper-clad. I used the rear driving wheel to transmit the current from the front driving wheel to the motor. There are separate contacts at the front and rear. Whilst this is not as robust in engineering terms as running a separate wire to feed to the motor from the front wheel, it seems to work, and front wheel collection is a bonus anyway.
Paul,
Can you tell me what gauge phosphor bronze wire have you for the 48xx pick-up’s.
Dave
-
Paul Willis
- Forum Team
- Posts: 3044
- Joined: Sun Jul 20, 2008 6:00 pm
Re: Airfix 48xx with High Level Kits chassis
Dave K wrote:Paul Willis wrote:The pick-ups themselves were lengths of trusty phosphor bronze wire, bent to shape and soldered to the copper-clad. I used the rear driving wheel to transmit the current from the front driving wheel to the motor. There are separate contacts at the front and rear. Whilst this is not as robust in engineering terms as running a separate wire to feed to the motor from the front wheel, it seems to work, and front wheel collection is a bonus anyway.
Paul,
Can you tell me what gauge phosphor bronze wire have you for the 48xx pick-up’s.
Hi Dave,
It's 0.35mm straight p/b wire, from Eileens. Boggo stuff that seems strong enough and flexible enough to do the job. Shaped just by tweaking it with some flat bladed modelling pliers.
Cheers
Paul
Beware of Trains - occasional modelling in progress!
www.5522models.co.uk
www.5522models.co.uk
-
Paul Willis
- Forum Team
- Posts: 3044
- Joined: Sun Jul 20, 2008 6:00 pm
Re: Airfix 48xx with High Level Kits chassis
Daddyman wrote:Thanks a lot, Paul. So am I right in thinking that the 48xx has no upper cross shafts holding the hangers in place? I can't quite see how it's done. The system on the Neilson looks fairly conventional.
That's right. And Will's posted reference covers much the same points.
I still can't find the 48xx instructions. I now recall exactly where I put them. Inside one of two issues of the GWRJ that cover the 48xx in detail. Now, where I put those two copies when we moved house and everything went into (and came out of) storage units is an unsolved question...
Cheers
Paul
Beware of Trains - occasional modelling in progress!
www.5522models.co.uk
www.5522models.co.uk
-
David Knight
- Posts: 819
- Joined: Sun Jul 20, 2008 6:02 pm
Re: Airfix 48xx with High Level Kits chassis
Perhaps this might be of some help:
https://b7a49983-e761-43c1-ba2b-2bfa1bd ... 2723f9.pdf
Chris has very thoughtfully posted downloads of all instructions on his website. Useful for deciding which kit to buy next too
Cheers,
David
https://b7a49983-e761-43c1-ba2b-2bfa1bd ... 2723f9.pdf
Chris has very thoughtfully posted downloads of all instructions on his website. Useful for deciding which kit to buy next too
Cheers,
David
-
bécasse
- Posts: 377
- Joined: Sun Jun 17, 2018 8:26 am
Re: Airfix 48xx with High Level Kits chassis
Having downloaded one of Chris's sets of instructions (or indeed those of other manufacturers), I find it helpful to go through them, striking out sections that won't be applicable to the model I intend to build and highlighting tasks that it would be easy to overlook - punching through rivet heads or broaching out holes for example. I also add my own short notes on any additional work that I might want to do during construction, fitting pick-ups and coupling mountings or using metal blackener, for example, and finally I make a note of the intended painted number (or range of painted numbers if I haven't already homed in on an individual loco) and any particular class variations (brake arrangements, top-feed fitment, LNER class part no., for example).
It is both a useful discipline when initially reading through the instructions and a useful tool when undertaking construction.
It is both a useful discipline when initially reading through the instructions and a useful tool when undertaking construction.
-
Paul Willis
- Forum Team
- Posts: 3044
- Joined: Sun Jul 20, 2008 6:00 pm
Re: Airfix 48xx with High Level Kits chassis
David Knight wrote:Perhaps this might be of some help:
https://b7a49983-e761-43c1-ba2b-2bfa1bd ... 2723f9.pdf
Chris has very thoughtfully posted downloads of all instructions on his website. Useful for deciding which kit to buy next too
Ah, thank you! I hadn't realised that Chris now had all the instructions on his website. It must have been part of the revamp that he did when the business was shut down during last year's lockdown. They hadn't used to be there...
How do I know? When I bought the GER Coffeepot kit from Chris, he had accidentally packed the paper instructions for the very similar Neilson saddle tank in the box. I had bought the kit to take to a Missenden weekend, and hadn't checked it in detail before going there. I got as far as stage 3 or so in the instructions and realised that what I was looking at was slightly different to the GER kit - remember that the GER locomotives were based on the original Nielson design.
So on Friday evening, or maybe Saturday morning, I emailed Chris. Within an hour or so, I had an emailed copy of the correct GER instructions, and I could proceed. Excellent customer service, and having a laptop with me meant I could easily use them for the rest of the weekend before printing them out.
Those 48xx instructions refreshes the memory, and explains a mystery. The tops of the brake shoes are fixed to the chassis in the correct place by 0.5mm wire, through the brake shoes and then through holes in the chassis.
Having primed and then painted the chassis black, the holes in the frames are currently pretty much closed up. Now that I know where to look, I can see them clearly, and can easily open them up with a poke from a fine broach to clear the holes. Then I can finally fit the brakegear permanently in the final stages.
Cheers
Paul
Beware of Trains - occasional modelling in progress!
www.5522models.co.uk
www.5522models.co.uk
-
Paul Willis
- Forum Team
- Posts: 3044
- Joined: Sun Jul 20, 2008 6:00 pm
Re: Airfix 48xx with High Level Kits chassis
bécasse wrote:Having downloaded one of Chris's sets of instructions (or indeed those of other manufacturers), I find it helpful to go through them, striking out sections that won't be applicable to the model I intend to build and highlighting tasks that it would be easy to overlook - punching through rivet heads or broaching out holes for example. I also add my own short notes on any additional work that I might want to do during construction, fitting pick-ups and coupling mountings or using metal blackener, for example, and finally I make a note of the intended painted number (or range of painted numbers if I haven't already homed in on an individual loco) and any particular class variations (brake arrangements, top-feed fitment, LNER class part no., for example).
It is both a useful discipline when initially reading through the instructions and a useful tool when undertaking construction.
All excellent advice. I also take photocopies of reference pictures, and annotate them with the details that I don't want to overlook:
Cheers
Paul
You do not have the required permissions to view the files attached to this post.
Beware of Trains - occasional modelling in progress!
www.5522models.co.uk
www.5522models.co.uk
-
Daddyman
- Posts: 745
- Joined: Sat Jun 03, 2017 1:09 pm
Re: Airfix 48xx with High Level Kits chassis
Will L wrote:Daddyman wrote:... Just wondering if there might be a technique I could borrow when a kit's top hanger holes aren't close enough to the wheel.
I have a post which covers the whole topic or removable break gear, which employs the same methods as Paul and HL. However the later part of this covers exactly what I did when I found the hanger holes were in the wrong place on my Buckjumpers.
See Part 6a - Removable Brake Gear.
Thanks, Will - very helpful. I suspect the Connoisseur Buckjumper holes are going to be in the wrong place too...
Who is online
Users browsing this forum: ClaudeBot and 1 guest