Having just posted a question in the Locomotives section of the Forum about detailing the body of the 48xx, it makes me realise that I've fallen a little behind in writing up key points of the build. So here are a couple more tips, as I went along...
Coupling rods. Nothing too unusual about that. Needed by almost all steam locomotives unless they are an elegant single wheeler (the GER designed some gorgeous ones) or a weird Sentinel thing. But the key thing is that on the prototype they are gurt big lumps of steel...
Which is why I always pay particular attention to the finish of them on a model. They are usually built up of two or maybe three layers of etched nickel silver. I do two things to enhance them:
When soldering them together, I make sure that I flood the top and bottom surfaces of the rods, and the outside of the knuckles with solder. This means that the joins between the laminates should be well covered.
I then draw file (https://www.wonkeedonkeetools.co.uk/files/what-is-draw-filing ) to reduce all the ridges from the etch cusp and produce a smooth finish.
This will help them look like a solid lump of metal, rather than made up from laminates. It takes only a few minutes, but I see a lot of folk who don't do it, and it does stand out if you look as such a prominent part of the locomotive.
It was then onto setting up the hornblocks for the driven axles. This was done using my own "Red Box" (I like the term) or rather the Avonside jig:
The challenge with the 48xx build is that by this point you will have already attached the outside frames for the trailing wheels, so the mainframes won't sit flat against the jig. I got around this by using a couple of bits of rubber that I keep in my tool caddy. They are just offcuts, but are generally used for holding down parts that are likely to get hot during soldering. In this case, I used them to space the frames up to keep them parallel to the jig. Sometimes you have to improvise,,,
So this is the assembled chassis. Just a quick picture to show the grooves that I always put in the top of axle bearings. That's so when I'm fettling them for a smooth sliding fit in the hornblocks (not that much is ever needed with High Level stuff) I know which was is up.
Next, the inside motion...
Cheers
Flymo
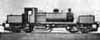
Airfix 48xx with High Level Kits chassis
-
Paul Willis

- Forum Team
- Posts: 3043
- Joined: Sun Jul 20, 2008 6:00 pm
48xx - coupling rods and hornblocks
You do not have the required permissions to view the files attached to this post.
Beware of Trains - occasional modelling in progress!
www.5522models.co.uk
www.5522models.co.uk
-
davebradwell
- Posts: 1179
- Joined: Fri Jan 18, 2019 3:48 pm
Re: Beer and Buckjumpers
I hope you number the axleboxes, too.
DaveB
DaveB
-
steve howe

- Posts: 912
- Joined: Sun Feb 01, 2009 10:16 pm
48xx and topfeeds
Paul, a bit premature of me to discuss body works, but I saw from you earlier post on lampirons that you're making the early verison of the 48xx, does that imply you will be removing the top feed? I did on mine because the loco was numbered as one of the St Blazey engines that came more or less new to work the Fowey branch. Removing the top feed and associated pipework is a PITA to be honest, but worth if for the earlier versions. I used the Rice designed Mainly Trains detailing kit (now available from Andrew Hartshorne) which has all the right bits including the correct smokebox front and chimney, but you probably have one stashed already!
Makes me want to start my second one now!
Steve
Makes me want to start my second one now!
Steve
-
Paul Willis
- Forum Team
- Posts: 3043
- Joined: Sun Jul 20, 2008 6:00 pm
Re: Beer and Buckjumpers
davebradwell wrote:I hope you number the axleboxes, too.
DaveB
Mais naturalement!
And colour them as well. Orange dots on one side, blue dots on the other. Or whatever colours I have to hand.
Here are some under my Y6:
Cheers
Flymo
You do not have the required permissions to view the files attached to this post.
Beware of Trains - occasional modelling in progress!
www.5522models.co.uk
www.5522models.co.uk
-
bécasse
- Posts: 377
- Joined: Sun Jun 17, 2018 8:26 am
Re: Beer and Buckjumpers
I file little notches across the bottom of the bearing, one for the first, two for the second, etc and then I fill the base slot with paint to indicate left or right (or port or starboard) side - left being red, right green, sailors among you will recognise why. Quickly done and foolproof!
-
Andy W

- Posts: 884
- Joined: Thu May 21, 2009 8:11 am
Re: Beer and Buckjumpers
Paul. Interesting to read about your approach to coupling rod thickness. I was checking the running of my shelf of shame chassis and only one didn’t run too well which had thinner (I.e. one layer) rods. Perhaps, even at our small scale, there are stresses involved?
Make Worcestershire great again.
Build a wall along the Herefordshire border and make them pay for it.
Build a wall along the Herefordshire border and make them pay for it.
-
Paul Willis
- Forum Team
- Posts: 3043
- Joined: Sun Jul 20, 2008 6:00 pm
Re: Beer and Buckjumpers
steve howe wrote:Paul, a bit premature of me to discuss body works, but I saw from you earlier post on lampirons that you're making the early verison of the 48xx, does that imply you will be removing the top feed?
Hi Steve,
Yes, mine will be without topfeed. Indeed, if I jump ahead a little bit in the story of the build, you'll see it already has gone:
steve howe wrote:I did on mine because the loco was numbered as one of the St Blazey engines that came more or less new to work the Fowey branch. Removing the top feed and associated pipework is a PITA to be honest, but worth if for the earlier versions.
It completely changes the character of the locomotive. I actually think they look quite ugly with the topfeed. They don't seem to have the delicacy of the early engines.
The removal of it all was quite brutal. First, it was roughly hacked away using some Xuron rail cutters. Then the debris was whittled down with a scalpel. And the final finishing was done with progressively finer sanding pads - the type backed with foam, and flexible, which helped with the curve of the boiler.
steve howe wrote:I used the Rice designed Mainly Trains detailing kit (now available from Andrew Hartshorne) which has all the right bits including the correct smokebox front and chimney, but you probably have one stashed already!
Makes me want to start my second one now!
I have already consumed a good 50% of the detailing kit
Last night was spent preparing the lost wax castings for the various train pipes and underframe gubbins. The Mainly Trains instructions could be a bit more clear though I made one "whoops!" error in cleaning up one component. Nothing that can't be fixed, and I'll tell the full story in due course. But a bit more guidance in what to cut off, and where would have prevented mistakes, and a certain sense of making it up as I go along.
I have eclectic tastes in modelling - hence this straying from my usual GER 1909 area and period for this - so I won't be hurrying back to build another one soon, as there is too much else to do. But I do have sitting in the loco cabinet a second P4 14xx in GWR livery that I picked up second hand that really needs a better chassis one day...
It has the original Airfix chassis, just rewheeled with P4 wheels.
Cheers
Flymo
You do not have the required permissions to view the files attached to this post.
Beware of Trains - occasional modelling in progress!
www.5522models.co.uk
www.5522models.co.uk
-
Paul Willis
- Forum Team
- Posts: 3043
- Joined: Sun Jul 20, 2008 6:00 pm
Re: Beer and Buckjumpers
bécasse wrote:I file little notches across the bottom of the bearing, one for the first, two for the second, etc and then I fill the base slot with paint to indicate left or right (or port or starboard) side - left being red, right green, sailors among you will recognise why. Quickly done and foolproof!
Absolutely!
It's a case of whatever works for you. And to be honest, it doesn't even need to be a permanent solution, as you would hope that once the axleboxes are in the frames, and the wheels are on the axles, it never has to come apart again.
So it really is only of relevance in that phase of a build which involves setting up the frames. Unless it all goes horribly wrong and has to come entirely apart again!
I forgot to mention that I don't even bother getting a paintbrush out - I just apply the little dots of paint with the end of a cocktail stick dipped in the pot. A wipe of the stick on a rag, back in the pot, and no need to clean up any further...
Cheers
Flymo
Beware of Trains - occasional modelling in progress!
www.5522models.co.uk
www.5522models.co.uk
-
Paul Willis
- Forum Team
- Posts: 3043
- Joined: Sun Jul 20, 2008 6:00 pm
48xx - coupling rod stresses
Andy W wrote:Paul. Interesting to read about your approach to coupling rod thickness. I was checking the running of my shelf of shame chassis and only one didn’t run too well which had thinner (I.e. one layer) rods. Perhaps, even at our small scale, there are stresses involved?
Small stresses compared to the prototype, but almost certainly they are there.
I've certainly experienced a bent end of a rod when a crankpin nut came unscrewed, and the rod clouted the track on the next revolution. That was on a rod that wasn't so solidly soldered together at the boss, and the laminates split.
And we've probably all heard stories of outside valve gear turned into spaghetti when something has jammed and tangled it up.
I may not do much proper engineering compared to many, but I still aim to make things robust as well as visually correct. The lamp-irons that I've just fitted were all drilled and pinned with nickel silver wire into the body, rather than just relying on glue. I would't pin them if I was soldering them, but its a different ballgame mixing metal and plastic.
Cheers
Flymo
Beware of Trains - occasional modelling in progress!
www.5522models.co.uk
www.5522models.co.uk
-
Paul Willis
- Forum Team
- Posts: 3043
- Joined: Sun Jul 20, 2008 6:00 pm
Well it had to happen sometime....
So where I last left the story of the 48xx chassis (before being diverted onto the subject of topfeeds and all sorts of modern exotica) was sitting on the Avonside chassis jig, having had four of the usual High Level hornblocks neatly soldered into place. There was a nice photo posted, with all safely in place.
So it's confession time - I actually soldered five hornblocks into place. Because I completely b*ggered one of them up, and had to remake it Here's the story of how, so anyone following in my footsteps doesn't do the same...
The driving wheel axles all sit in standard High Level hornblock. As I always say, they are lovely, and these days I wouldn't use anything else. However, when it comes to fitting the ones on the forward axle, the kit instructions say this:
"You'll need to trim a small amount from the leading edge of the front hornblock etches (see fig.2) so they clear the front spacer.
And fig.2 does indeed show the amount that you need to trim off the edge of the hornblock, tapering from 1mm at the top of the hornblock, to absolutely nothing at the bottom. So I sat there for twenty minutes, gently filing away, and eventually I had a hornblock which fitted. You do end up taking quite a bit off the side. You can see how much from this close-up picture of the four hornblocks in place:
Unfortunately, when I came to fit this for the first time, I ignored the bit of the instructions that said:
"...hornblock bearing, which should be lightly oiled to prevent it being soldered to the etch."
Now I hate getting oil and grease near a model under construction. I'd rather not have it there, than clear it up afterwards, before more soldering or painting. So I didn't...
And even though I had only the tiniest amount of solder on my iron, with the proximity of the front spacer to the bearing, when I came to fix that side of the hornblock, I soldered the whole lot solid!
So that was a case of take it out, throw it in the bin, and spend another twenty minutes filing up another one. A set-back, but a relatively minor one, and I always have spare hornblocks with me at Missenden, as you never know who will need one <doh!>.
So the only really lesson from this sorry tale, is "don't try and be clever!". Follow what you're told to do. As I've said before many times, Chris's instructions for High Level kits are top notch, and you ignore them at your peril. Well, I know that for real now
Cheers
Flymo
So it's confession time - I actually soldered five hornblocks into place. Because I completely b*ggered one of them up, and had to remake it
The driving wheel axles all sit in standard High Level hornblock. As I always say, they are lovely, and these days I wouldn't use anything else. However, when it comes to fitting the ones on the forward axle, the kit instructions say this:
"You'll need to trim a small amount from the leading edge of the front hornblock etches (see fig.2) so they clear the front spacer.
And fig.2 does indeed show the amount that you need to trim off the edge of the hornblock, tapering from 1mm at the top of the hornblock, to absolutely nothing at the bottom. So I sat there for twenty minutes, gently filing away, and eventually I had a hornblock which fitted. You do end up taking quite a bit off the side. You can see how much from this close-up picture of the four hornblocks in place:
Unfortunately, when I came to fit this for the first time, I ignored the bit of the instructions that said:
"...hornblock bearing, which should be lightly oiled to prevent it being soldered to the etch."
Now I hate getting oil and grease near a model under construction. I'd rather not have it there, than clear it up afterwards, before more soldering or painting. So I didn't...
And even though I had only the tiniest amount of solder on my iron, with the proximity of the front spacer to the bearing, when I came to fix that side of the hornblock, I soldered the whole lot solid!
So that was a case of take it out, throw it in the bin, and spend another twenty minutes filing up another one. A set-back, but a relatively minor one, and I always have spare hornblocks with me at Missenden, as you never know who will need one <doh!>.
So the only really lesson from this sorry tale, is "don't try and be clever!". Follow what you're told to do. As I've said before many times, Chris's instructions for High Level kits are top notch, and you ignore them at your peril. Well, I know that for real now
Cheers
Flymo
You do not have the required permissions to view the files attached to this post.
Beware of Trains - occasional modelling in progress!
www.5522models.co.uk
www.5522models.co.uk
-
Andy W
- Posts: 884
- Joined: Thu May 21, 2009 8:11 am
Re: Beer and Buckjumpers
Re soldering up what wasn’t meant to be soldered - you are far from alone. Agree oiling a piece under construction feels odd. Another way of creating a solder barrier is to use a felt tip pen. It doesn’t run and can be cleaned off easily when the soldering is done.
Make Worcestershire great again.
Build a wall along the Herefordshire border and make them pay for it.
Build a wall along the Herefordshire border and make them pay for it.
-
Paul Willis
- Forum Team
- Posts: 3043
- Joined: Sun Jul 20, 2008 6:00 pm
Re: Beer and Buckjumpers
Andy W wrote:Re soldering up what wasn’t meant to be soldered - you are far from alone. Agree oiling a piece under construction feels odd. Another way of creating a solder barrier is to use a felt tip pen. It doesn’t run and can be cleaned off easily when the soldering is done.
Absolutely, Andy. I often use that trick when building. The felt tip pen is particularly handy with valve gear. And yes, I do build the occasional thing with it. It's not all GER 0-6-0s and GWR 0-4-2s you know...
I just thought I was immune from needing to do something in this case. #hubris
Cheers
Flymo
Beware of Trains - occasional modelling in progress!
www.5522models.co.uk
www.5522models.co.uk
-
Paul Willis
- Forum Team
- Posts: 3043
- Joined: Sun Jul 20, 2008 6:00 pm
Wrapping up at Missenden - 48xx
The last part of the Sunday is always a bit weird. From lunchtime, people start to drift off to return home, particularly if they have to travel back to other countries, as some participants do.
For me, I get into the home stretch during the morning, and then gauge how far I can get with the model to a decent stopping point. After nigh on 48 hours of solid modelling (bar sleep and meals) then I'm beginning to flag. It's also a good point to wander around the other rooms and see how friends in other groups have got on, pick up a tip or two and generally have a natter. By the end of the weekend, I'm usually most impressed by the progress of the Weathering Group under Mick Bonwick. If you want to see some step by step tutorials without going to Missenden yourself, have a browse around https://www.rmweb.co.uk/community/index.php?/blogs/blog/2349-mick-bonwicks-blog/
So the home stretch in this case was to finish off with the non-working representation of the inside valve gear. I've never had a kit with this feature before, so it was definitely going to be novel for me.
So these three pictures show how it is built up, starting with slide-bars, then adding valve gear, and finally piston rods.
I was really pleased with how it built up. There was a certain element of teasing and twisting and straightening to get it all into place in the slots in the spacers, but the overall effect is very satisfying.
These are couple of pictures from the prototype 14xx, and it's very convincing how the kit looks.
It makes a huge difference to have that space between the frames "filled" and it's definitely something that I'll consider for other kits, particularly high-boilered Victorian ones of the type I like.
So at the end of the weekend, the model looked like this. The basics of the chassis were all complete. The two main remaining stages to do are the brake gear, and the motor/gearbox/compensation, but both of those come at a later stage.
If you look back to the start of this thread, and unpacking a shiny etch fresh from the box, you can see just how much you can achieve in a weekend at Missenden. And have a good laugh with your mates and learn a lot of other things from excellent modellers as well.
The build continues back at home. See you at Missenden in the autumn?
Cheers
Flymo
You do not have the required permissions to view the files attached to this post.
Beware of Trains - occasional modelling in progress!
www.5522models.co.uk
www.5522models.co.uk
-
Neil Smith

- Posts: 243
- Joined: Tue Dec 03, 2019 12:53 pm
Re: Airfix 48xx with High Level Kits chassis
Not sure which of the three current threads to post this on - but just happened across this video of the final train on the Wallingford branch. It's old 8mm silent film so the quality isn't great but still some lovely details in it.
1444 with a top feed.. (this is 1959 so corresponds with the data on the other thread) and with a lamp bracket still inside the bunker which is surprisingly clearly seen at one point. Also proves the point that 14/48xx in autotrain mode happily pushed the carriage coupled to the boiler end.
https://m.youtube.com/watch?v=RE6YF5mRTfw
All the best
Neil
-
steve howe
- Posts: 912
- Joined: Sun Feb 01, 2009 10:16 pm
Re: Airfix 48xx with High Level Kits chassis
It makes a huge difference to have that space between the frames "filled" and it's definitely something that I'll consider for other kits, particularly high-boilered Victorian ones of the type I like.
Indeed, its a very natty little set of etchings, I wonder if the ever-accomodating Wizard of Wearside might make them available as a separate etch? it would be very useful for 517 variants and quite a few others I would think.
Steve
-
Paul Willis
- Forum Team
- Posts: 3043
- Joined: Sun Jul 20, 2008 6:00 pm
Re: Airfix 48xx with High Level Kits chassis
Neil Smith wrote:Not sure which of the three current threads to post this on - but just happened across this video of the final train on the Wallingford branch. It's old 8mm silent film so the quality isn't great but still some lovely details in it.
I'll agree with you on that... Loads of nostalgia present in that footage. The mayor shaking the driver's hand, someone popping a penny on the rail right in front of the moving train...
I was up in that part of the world on Sunday. Whilst my wife was doing a training run for an ultra-marathon, I was at a loose end so I went and found the remains of Watlington station:
The carriage shed is still almost exactly as it was sixty years ago:
Neil Smith wrote:1444 with a top feed.. (this is 1959 so corresponds with the data on the other thread) and with a lamp bracket still inside the bunker which is surprisingly clearly seen at one point. Also proves the point that 14/48xx in autotrain mode happily pushed the carriage coupled to the boiler end.
Thank you - very helpful to watch. The build of the body is progressing, but I still haven't added that fiddly lamp iron yet. I'm leaving it to when I'm less likely to knock it off!
Cheers
Paul
You do not have the required permissions to view the files attached to this post.
Beware of Trains - occasional modelling in progress!
www.5522models.co.uk
www.5522models.co.uk
-
Paul Willis
- Forum Team
- Posts: 3043
- Joined: Sun Jul 20, 2008 6:00 pm
Re: Airfix 48xx with High Level Kits chassis
steve howe wrote:It makes a huge difference to have that space between the frames "filled" and it's definitely something that I'll consider for other kits, particularly high-boilered Victorian ones of the type I like.
Indeed, its a very natty little set of etchings, I wonder if the ever-accomodating Wizard of Wearside might make them available as a separate etch? it would be very useful for 517 variants and quite a few others I would think.
Steve
When exhibitions restart, we can ask him... (or if he spots this comment on here, as I know he lurks around).
I'm also thinking of doing something for GER locomotives myself. One thing that has always bothered me about my Alan Gibson T26 build is what to do with the stonking gap under the high-pitched boiler.
Now that I've seen what a difference a representation of inside valve gear makes, I'll be looking to see what information I can find for a suitable representation. I have some detailed photos sent to me from the locomotive at Bressingham, but annoyingly not one that gives the overall view, to show how it would all hang together.
Oh well, off to the reference books!
Cheers
Paul
You do not have the required permissions to view the files attached to this post.
Beware of Trains - occasional modelling in progress!
www.5522models.co.uk
www.5522models.co.uk
-
Paul Willis
- Forum Team
- Posts: 3043
- Joined: Sun Jul 20, 2008 6:00 pm
Airfix 48xx with High Level Kits chassis
So, I returned from my weekend at the Spring Missenden with an almost finished chassis. At least in terms of the basic build.
The next step to do was to solder on the lovely lost-wax castings for the outside axleboxes on the trailing wheel. For this, the trusty tool of David B came into play - the Resistance Soldering Iron.
Despite the heft of the castings, the RSU made it a simple job to attach them. First, tin the back of the casting with 145 solder. Then position on the models and apply flux. Hold in place with the RSU probe, and press the switch with your foot. Fizz, crackle, the solder flows to the edge of the casting and lift off the switch. Leave to cool, and the job is solidly done.
You may notice my "RSU plate". I'm one of those people that fall into the school of "don't make something a heatsink". So I don't use a steel plate as the negative terminal, even though I recognise the benefits of being able to hold things down with magnets. I use a piece of hardboard wrapped in turkey foil (which is thicker and tougher than normal tin foil) raided from the kitchen and held in place with sellotape. The height of sophistication! If it gets torn or dirty, I just take it off and apply a new piece.
So this is where we have got to with the chassis. Nearly done for the time being!
Cheers
Paul
You do not have the required permissions to view the files attached to this post.
Beware of Trains - occasional modelling in progress!
www.5522models.co.uk
www.5522models.co.uk
-
steve howe
- Posts: 912
- Joined: Sun Feb 01, 2009 10:16 pm
Re: Airfix 48xx with High Level Kits chassis
Neil Smith wrote:Not sure which of the three current threads to post this on - but just happened across this video of the final train on the Wallingford branch. It's old 8mm silent film so the quality isn't great but still some lovely details in it.
https://m.youtube.com/watch?v=RE6YF5mRTfw
All the best
Neil
Lovely evocative stuff
Steve
-
Neil Smith
- Posts: 243
- Joined: Tue Dec 03, 2019 12:53 pm
Re: Airfix 48xx with High Level Kits chassis
Steve that's a superb story! Crying with laughter here!
(There are some preservation era anecdotes that could respond, but might not be fair on those being singled out so better not...)
And Flymo - love those photos of Watlington. It's poignant - both lines closed in the late 50s never having quite met in the middle. Had they done, they might at least have lasted til the 1970 cull that saw off many lines including Bourne End-High Wycombe - another secondary through route.
(Despite living in Cumbria all my adult life, I was born near Taplow and spent my early years at Cookham - and can just about remember 6106 and Burton Agnes Hall running past the bottom of the garden for the Marlow Donkey centenary in 1973.)
All the best
Neil
-
David Knight
- Posts: 818
- Joined: Sun Jul 20, 2008 6:02 pm
Re: Airfix 48xx with High Level Kits chassis
Flymo748 wrote:
Now that I've seen what a difference a representation of inside valve gear makes, I'll be looking to see what information I can find for a suitable representation. I have some detailed photos sent to me from the locomotive at Bressingham, but annoyingly not one that gives the overall view, to show how it would all hang together.
Oh well, off to the reference books!
Cheers
Paul
FWIW Brassmasters does an separate etch for their 4F that might lend parts of itself to your cause. They have the instructions available for download too. Usual disclaimer etc..
Cheers,
David
-
Paul Willis
- Forum Team
- Posts: 3043
- Joined: Sun Jul 20, 2008 6:00 pm
Re: Airfix 48xx with High Level Kits chassis
David Knight wrote:FWIW Brassmasters does an separate etch for their 4F that might lend parts of itself to your cause. They have the instructions available for download too. Usual disclaimer etc..
Cheers,
David
Thanks David.
I've had a look at the various parts, and the instructions. They're a bit OTT for what I had in mind. I was after more of a representative effort, along the lines of what is in the 48xx.
I'm sure they assemble beautifully. I'll have a look at something more straightforward though.
Cheers
Paul
Beware of Trains - occasional modelling in progress!
www.5522models.co.uk
www.5522models.co.uk
-
Paul Willis
- Forum Team
- Posts: 3043
- Joined: Sun Jul 20, 2008 6:00 pm
Re: Airfix 48xx with High Level Kits chassis
So, onto the final (for now) stages of the chassis. And it turned out that this was about the most difficult/frustrating/profanity-laden part so far.
Take two lost wax sandboxes. Drill two holes in each. Insert a bit of wire and cut off to represent the handle of the filler. Leave the other hole empty until you fit a piece of wire to represent the pipe to the wheel. How difficult can it be?
Quite... is the answer.
I was using a reasonably fine drill, about 0.5mm, in my pillar drill with the sandbox held in a toolmakers vice (I think that's what they are called) to be at the correct angle. First sandbox, no problem, whizz whizz, and here it is with the wire inserted ready to be cut back.
Second sandbox, exactly the same, whizz, ping! Snapped drill. Try it with a second drill, moved over slightly. Whizz, ping. Snapped again. So I now have the bottom of the sandbox with two broken off ends of drills embedded in it.
So let's turn it over and drill the filler cap end...
And this is it in the vice so that I can pull the broken remains of _that_ drill out...
Eventually I managed it, but it took much care to drill into, and the bottom holes actually had to be drilled behind the broken bits with a much more robust 1.0mm drill. I have no idea why this casting should be so different - it was even from the same sprue - but it was an evil piece of metal to drill into.
Oh well, chassis to one side, and time to start on the body
Cheers
Paul
You do not have the required permissions to view the files attached to this post.
Beware of Trains - occasional modelling in progress!
www.5522models.co.uk
www.5522models.co.uk
-
steamraiser
- Posts: 560
- Joined: Thu Dec 31, 2009 4:49 pm
Re: Airfix 48xx with High Level Kits chassis
Have you tried putting a spot of cutting lubricant on you drill before commencing operations?
-
bécasse
- Posts: 377
- Joined: Sun Jun 17, 2018 8:26 am
Re: Airfix 48xx with High Level Kits chassis
I have found this sort of variability in lost wax castings in the past which I suspect is a result of the casting process when using alloys. As a consequence I always use a fairly substantial drill - typically 0,9mm (of which I keep a good stock as they match an AGW wire size) - and use solder to fill the gap. It does mean that one has to be a little more careful in centring the wire but if you leave it long(-ish) while soldering and then trim it isn't difficult.
And, yes, I agree about using a lubricant, saliva is adequate for small jobs like this.
And, yes, I agree about using a lubricant, saliva is adequate for small jobs like this.
Who is online
Users browsing this forum: ClaudeBot and 0 guests