Hi All
I thought a quick explanation of how I weather stuff might be of interest (other methods are available). The subject is a Hornby 50 which has had the usual treatment I apply to my class 50 fleet. That being replace the wheels with P4 ones that are the right diameter. Lower it on its bogies, replace the toy like opening bodyside louvres and replace the windscreens and roof fans with those from Extreme etches.
Once all thats done on to the weathering, I use 3 basic techniques and the first is washes. Using a picture of the real loco as a guide I paint the side in odourless turps substitute and work in tiny amounts of paint (enamels) in a method similar to the wet in wet method used for water colours. Its important to keep your streaks vertical unless your prototype pictures show different.

This loco was to be quite scruffy (for me anyway) and I was happy with how the washes came out so I left them there. Usually at this stage I wait 24 hours and then with clean thinners on a cotton bud, do my best to clean the loco (again keeping everything vertical). All I am really doing is replicating what happens in real life, Locos get dirty and are cleaned. The cotton bud cant get everywhere and you end up with build ups of dirt you cant get too, again much like the real thing.
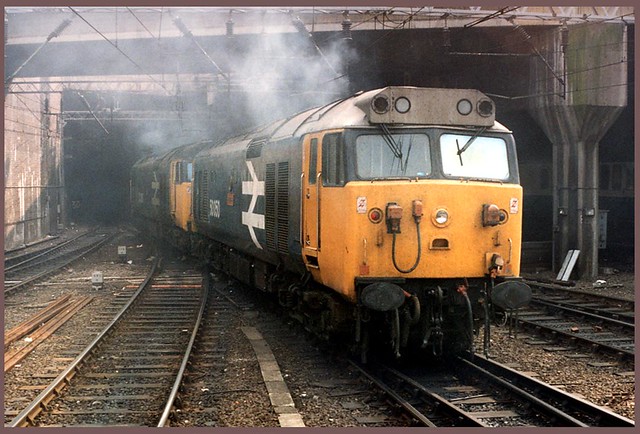
When happy with all that and the loco is dry (best to leave it for a week or so) Its on to the next stage. Airbrushing. Again refer to a photo and check that your particular class doesn't have any weird effects but I usually treat this stage as pretty generic. Using mostly humbrol 110 first to airbrush on brake dust. Followed by a mix of metalcote gunmetal and 110 (with a touch of matt black) to pick out axle boxes and equipment in a sort of dirty grease colour. Finally a mix of Gunmetal and matt black is sprayed over the roof. Always try to think of the direction the dirt hits the real loco and try to copy it. Spraying the brake dust from about 45 degrees below the model. That brings me to the stage in the picture above.
This is OK on the underframe but its also a bit generic. Each class of loco has a characteristic way that the underframe gets dirty and to turn our model from a generic dirty to a model of the real loco we need a bit more work.
This brings me to the third stage, drybrushing. This stage is very subtle and you will think a lot of it vanishes. Again referring to pictures start with the gunmetal and dry brush the top edges of things like steps and springs. this will give you a really subtle glint to the underframe and help put back in a bit of depth that the airbrushing stage flattened out. Also look for places where oil builds up which on a 50 is the base of the axle boxes, parts of the compressor, the main tanks and the battery boxes. Dry brush these on with the gunmetal. Some build up is quite heavy and you can go over these with matt black to enhance them. By now the loco looks like this...

...which is nearly there. The last stage is to add a bit more sheen for which i use the old formula Klear floor polish. You only need a few spots per loco where the oil is still wet, Don't overdo it. What you want is for all this work to disappear! You are looking for subtle glints and sparkles from certain angles that bring the model to life.

You can see a few highlights in this picture, on the compressor and the top edges of the tank. Thats really all you need but it will probably have taken you longer to read this than to do the dry brushing stage anyway so its not like hours of work that will go unnoticed by most people.
Finally a picture that goes some way to explaining the need for reference to prototype pictures.

My rendition of a gresley bogie under my class 304. I had no idea that the bogies get these dark streaks on the sides but they do and they are visible in pretty much all of the class 304 pictures I have. Its a characteristic I could have completely missed.
Hope people find this post useful.
Cheers
Jim