Brettell Road - Back to wagons - and a correction.

User avatar
Noel
Posts: 1981
Joined: Wed Jun 23, 2010 1:04 pm

Re: Brettell Road

Postby Noel » Sat Sep 30, 2017 10:04 am

Knuckles wrote:In some of my earlier videos I used a disco smoke machine bodged with aquarium pipes and holes drilled in the layout. Great for cylinder cock 'Wheeeeshing!' Works well.I plan to do it again for future layouts although maybe some fine mesh to disguise the holes this time wouldn't go a miss. Also thinking of trying funnel smoke machines instead on a switch in strategic places.


Have you seen Maindee East https://www.scalefour.org/shows/S4um2011/maindee.html, which has such a system?
Regards
Noel

User avatar
Knuckles
Posts: 1262
Joined: Fri Nov 18, 2011 9:15 pm

Re: Brettell Road

Postby Knuckles » Sat Sep 30, 2017 11:00 am

I've seen the layout in those pics before but never in person.

Is one of my favourites though. Looks similar to my various plans of Tidmouth I'm still trying to squeeze into a space too small.
“He who dares not offend cannot be honest.” Thomas Paine

https://www.sparkshotcustomcreations.com/
Mostly 3D Printed Loco kits etc.

SCC Price list (7/4/22)
https://www.sparkshotcustomcreations.co ... e77d42.pdf

User avatar
jim s-w
Posts: 2189
Joined: Wed Jul 30, 2008 5:56 pm

Re: Brettell Road

Postby jim s-w » Sat Sep 30, 2017 11:23 am

I have

I think the owner stopped using the smoke after it set fire alarms off at a show one year (possibly wells)
Jim Smith-Wright

http://www.p4newstreet.com

Over thinking often leads to under doing!

User avatar
jim s-w
Posts: 2189
Joined: Wed Jul 30, 2008 5:56 pm

Re: Brettell Road

Postby jim s-w » Sat Oct 07, 2017 1:30 pm

Brettell road seemed well received at Scaleforum and for a first show I was very pleased with how it went. That's not to say there isn't a list of things that need looking at for the future though.

Image
One of the things I did before the show that I didn't really have time to post about was this derby lightweight from a Bachmann model. I have long-term plan for a DMU but this was a quick win to have something for the show. I wired the 2 cars together and disconnected the red tail lights. A swap of the destination blinds, a few passengers and some weathering and it was good to go. I still need to redo the gangway at some point.
Image

I found at Scaleforum I had more wagons than I needed. this meant withdrawing ones that played up wasn't a problem and to be fair my cripple train is reassuringly short.
Image
The class 20 didn't have enough rotation in the bogies so that's been fixed too.

Image
I've toned down the streetlights as well as several people remarked that they were too bright.

Image
finally a quick shot of the Deeley parked up under the bridges (well why not?). I still need to finish the bedding in of the bridges so that will be a future post of its own.
Jim Smith-Wright

http://www.p4newstreet.com

Over thinking often leads to under doing!

User avatar
jim s-w
Posts: 2189
Joined: Wed Jul 30, 2008 5:56 pm

Re: Brettell Road

Postby jim s-w » Thu Oct 12, 2017 4:17 pm

As mentioned in the last post, I did get the bridges in place for Scaleforum but they weren't as bedded in as I would have liked. Well now, they are! Image
Going right to left for a change, these are the bridges over the canal.
Image
Closer view of the main branchline bridge.
Image
one of the 2 bridges for the sidings (both are the same design)
Image
The overbridges at the left hand (or Stourbridge) end.
Image
another view of the same bridges.
Image
The final view along the alleyway.
Image
And a night-time view, after all that is the point of the layout!
Jim Smith-Wright

http://www.p4newstreet.com

Over thinking often leads to under doing!

User avatar
jim s-w
Posts: 2189
Joined: Wed Jul 30, 2008 5:56 pm

Re: Brettell Road

Postby jim s-w » Thu Oct 12, 2017 5:25 pm

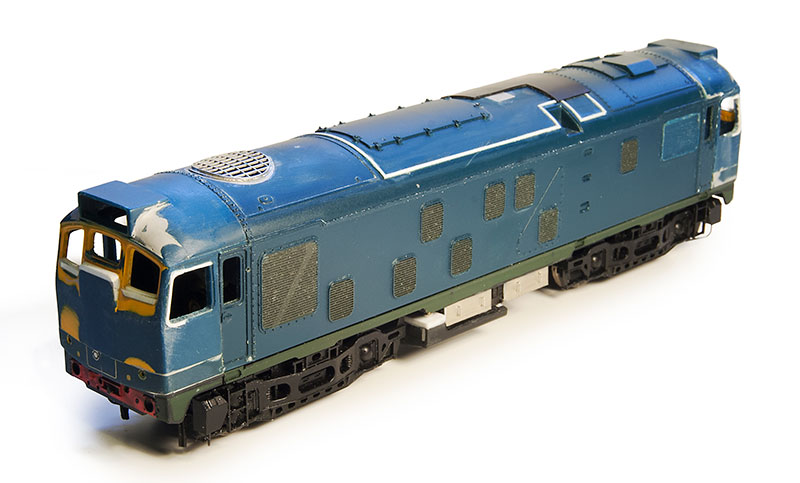
When I was a kid my mum and dad took me and my brother to Matlock for the day. I might have been one of those family away day rail tours BR did back then. I can't remember why we were there but I do remember wandering down the platform waiting for the train home and finding a little loco shed. Inside was this!
Image
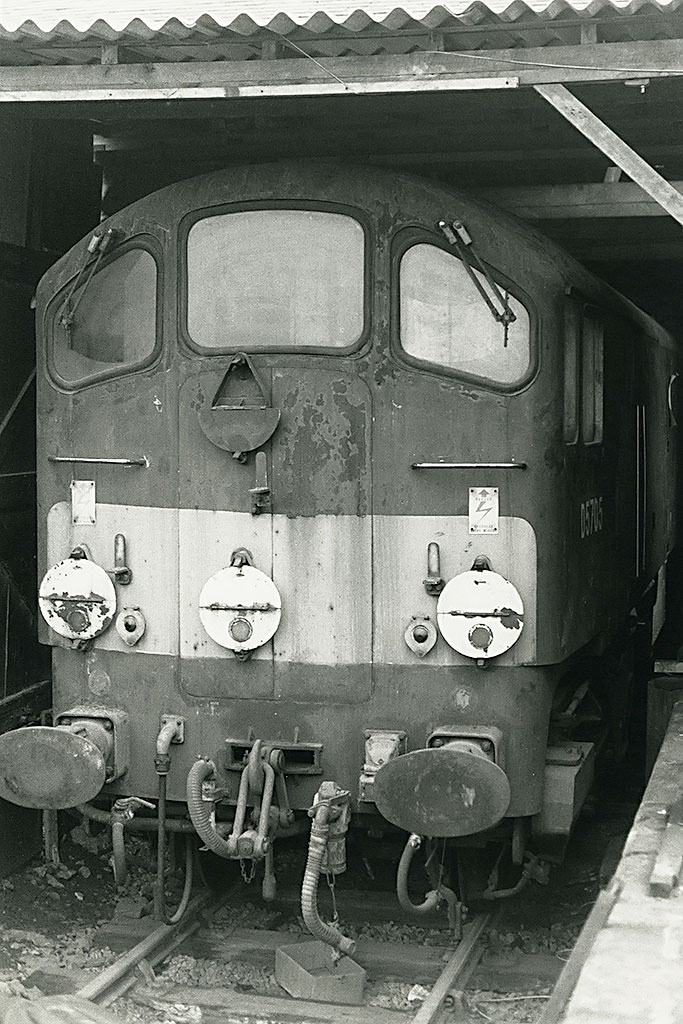
(picture © Philip Wheldale and used with permission).

I can't remember if it was exactly the same and I seem to recall some sort of tarpaulin on the roof but I had absolutely no idea what it was. I could only see the front and it looked kind of sad sitting there. On getting home and checking my early loco numbers book I found out it was the last surviving co-bo and ever since they have always held a certain appeal. definitely weird and pretty much hopeless from the very start they were like the runt of the early diesels litter, whats not to like?

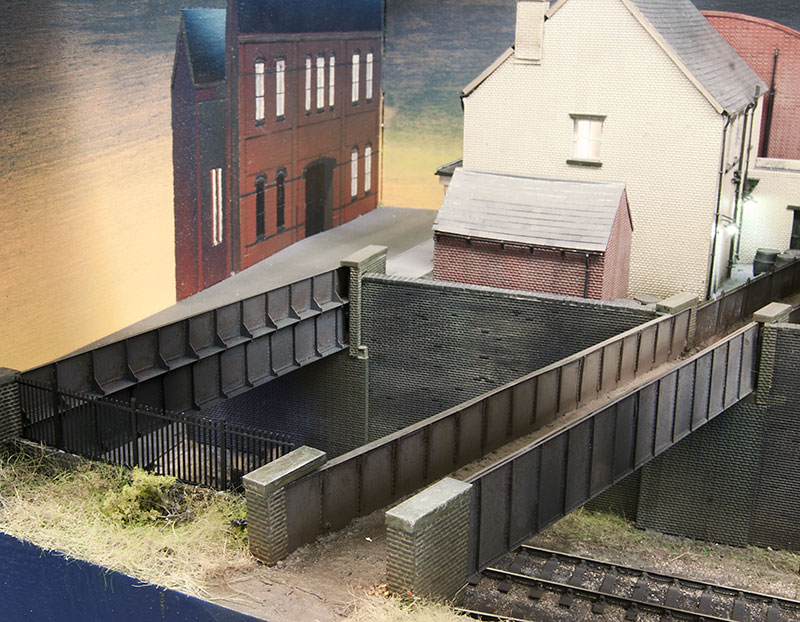
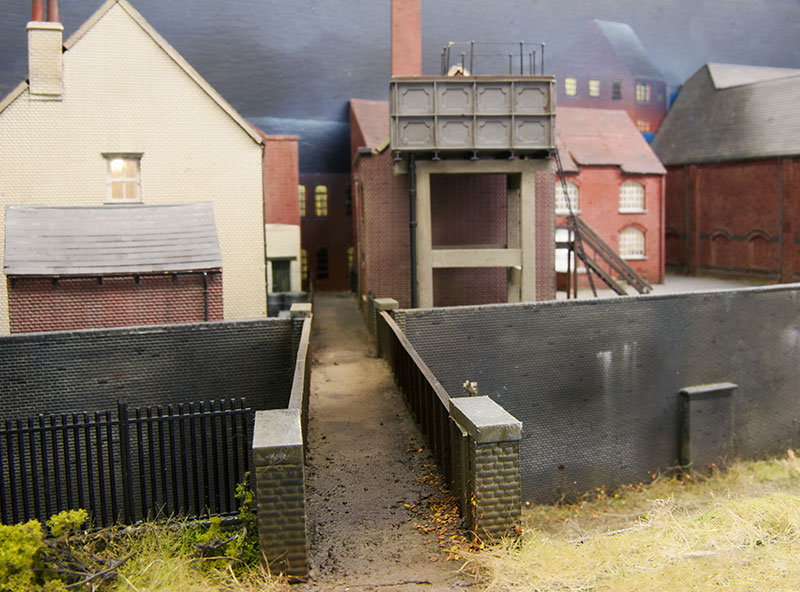
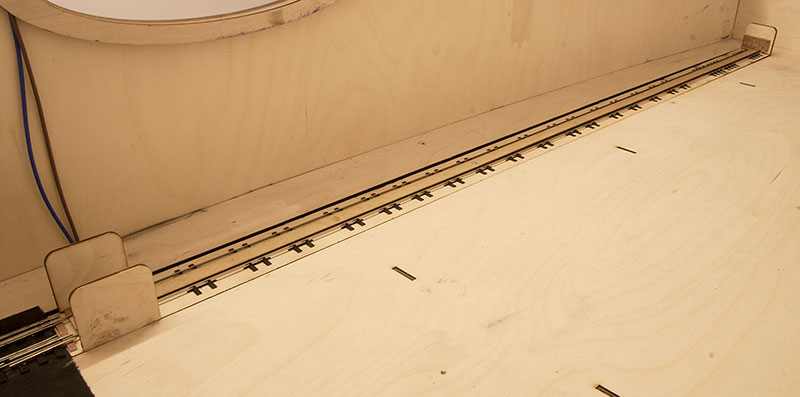
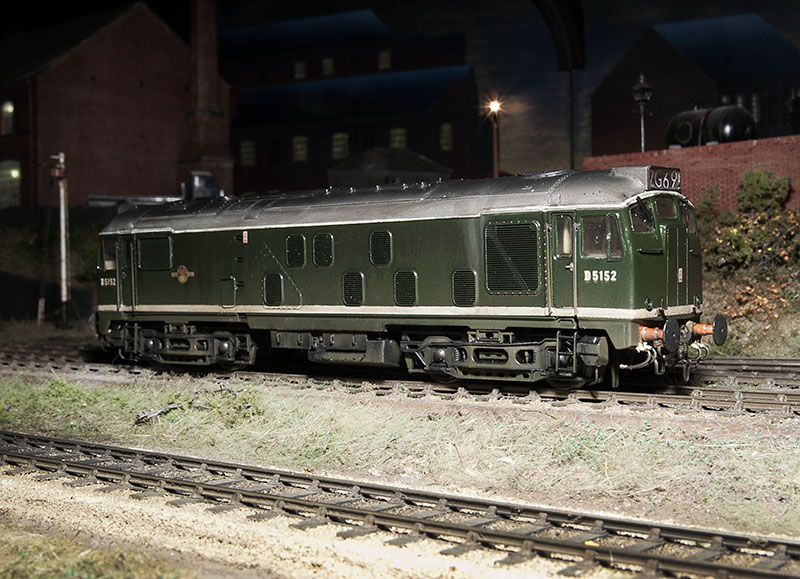
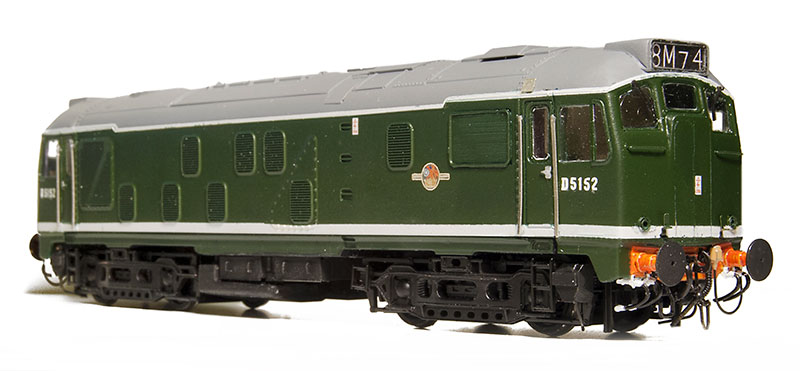
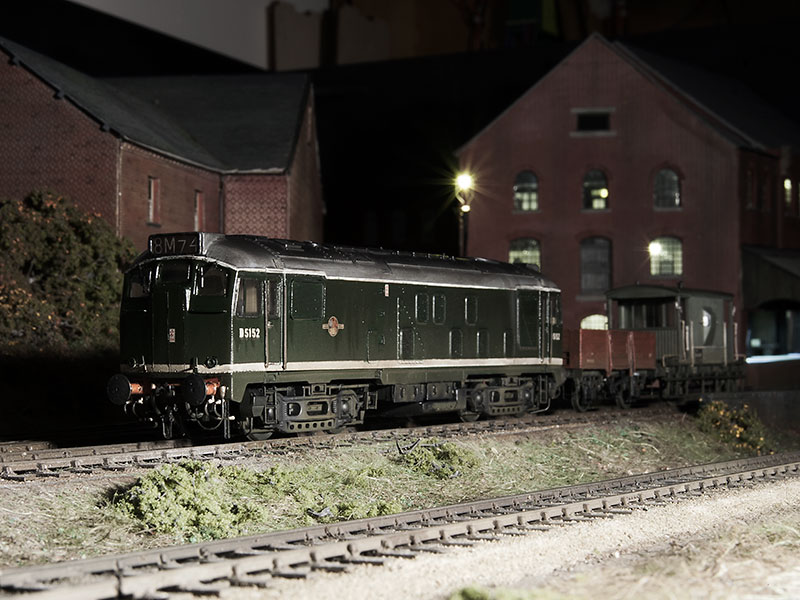
Anyway given that Brettell Road is a what if and none to serious. What if one made it to there in the late 50's? Remember I have set it to be more midland railway than it should be so it's not a leap of imagination to presume that Derby might have sent one to the area to see if they could find a use for it. So, just as Hatton's stocks of the Heljan model were dwindling I ordered one. They only had the full yellow end version left by then.

A quick win would be to stick some P4 wheels in, weather it and jobs a good-un but that would be a bit too simple really so I set to with files and opened the cab windows out to their original sizes. A bit of wire restored the framing.
Image
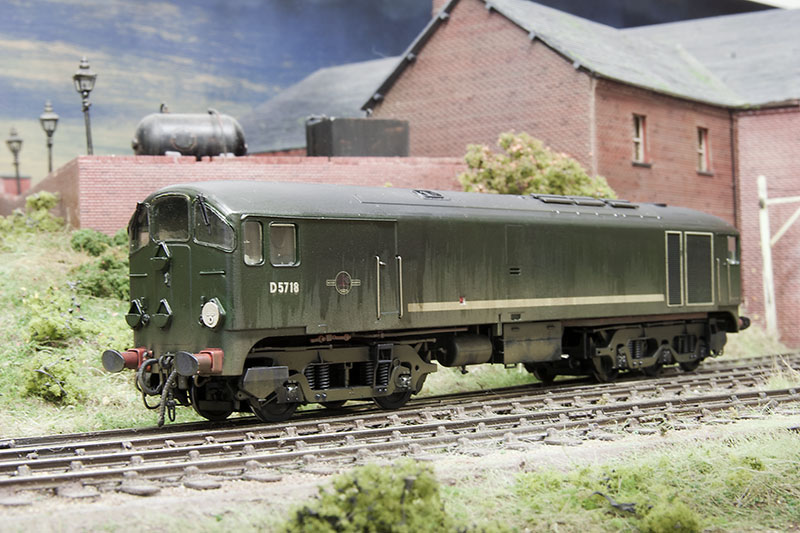
The actual windows were cut from the packaging the model came in to get the curves edges. The cab front was re-sprayed back to green (Precision locomotive green being a very close match) and then it was weathered. Ok A quick win-ish!
Image
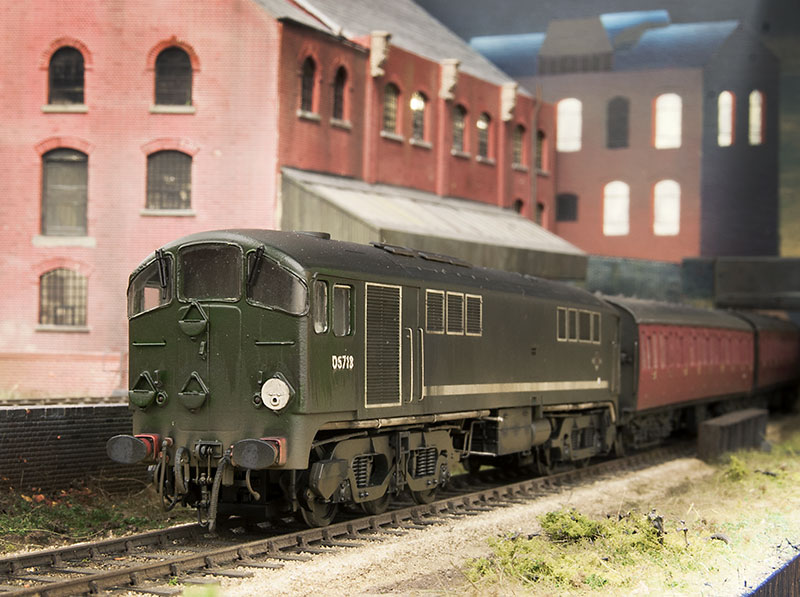
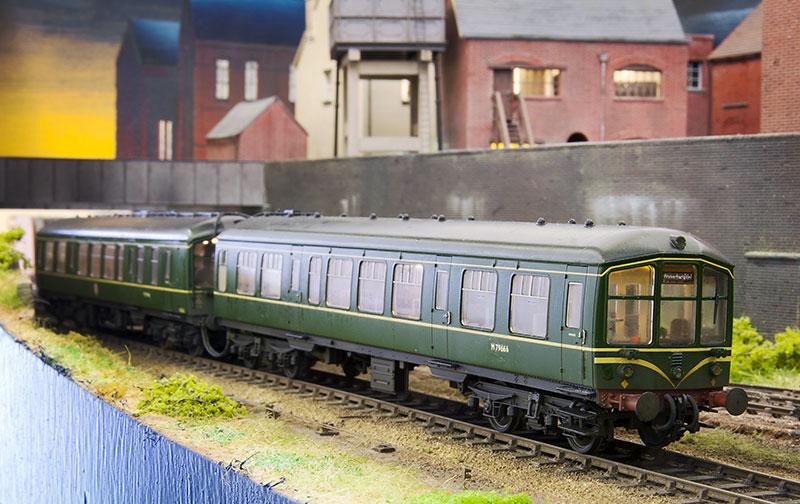
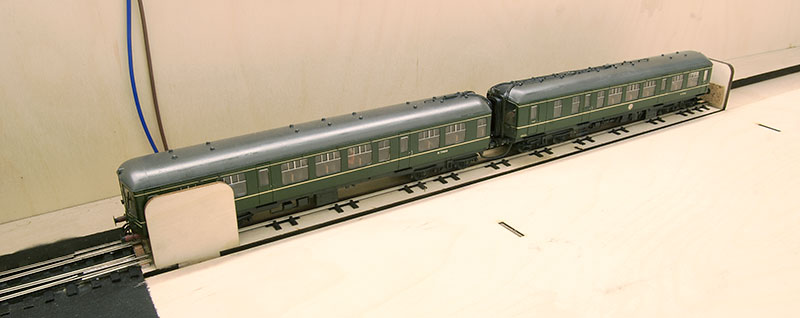
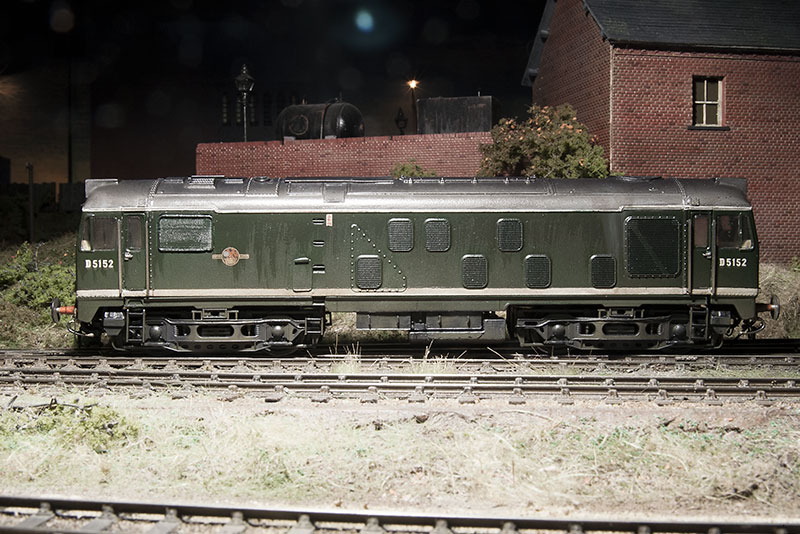
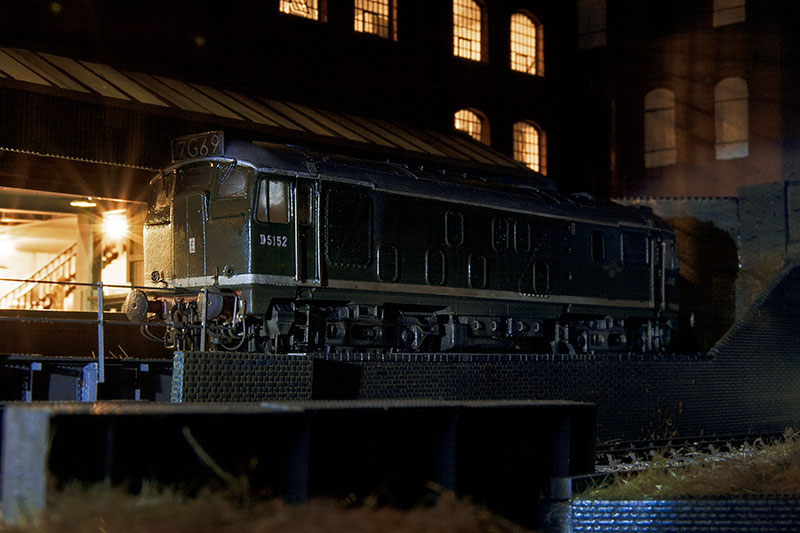
The other side (yes I know it's not the right headcode arrangement for a passenger train)
Image
Image
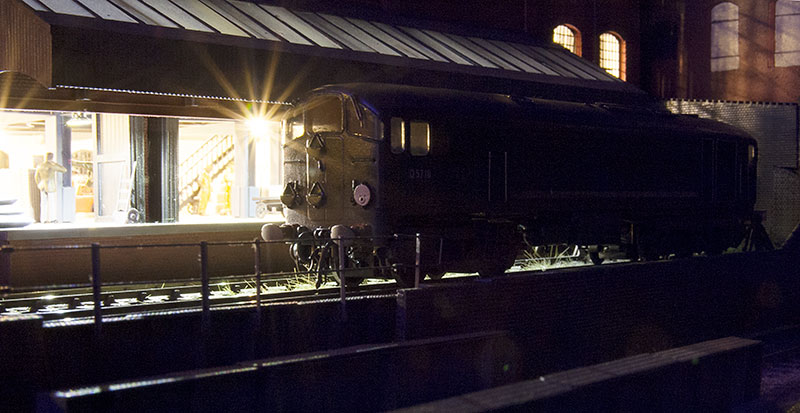
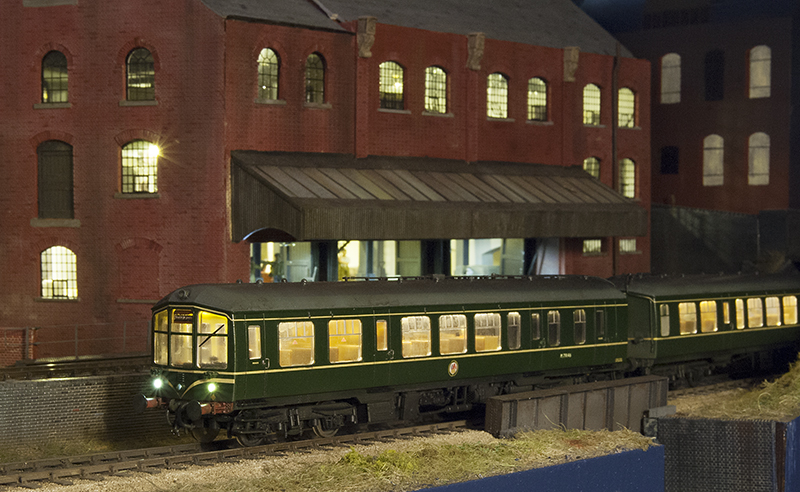
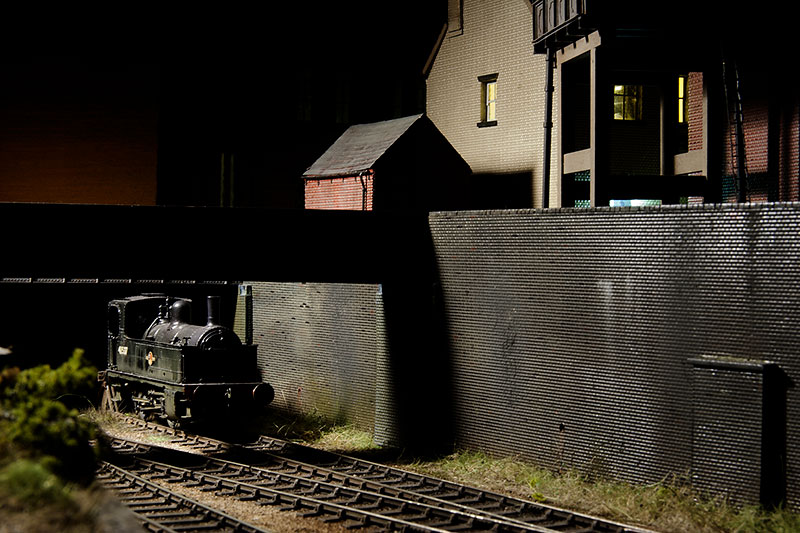
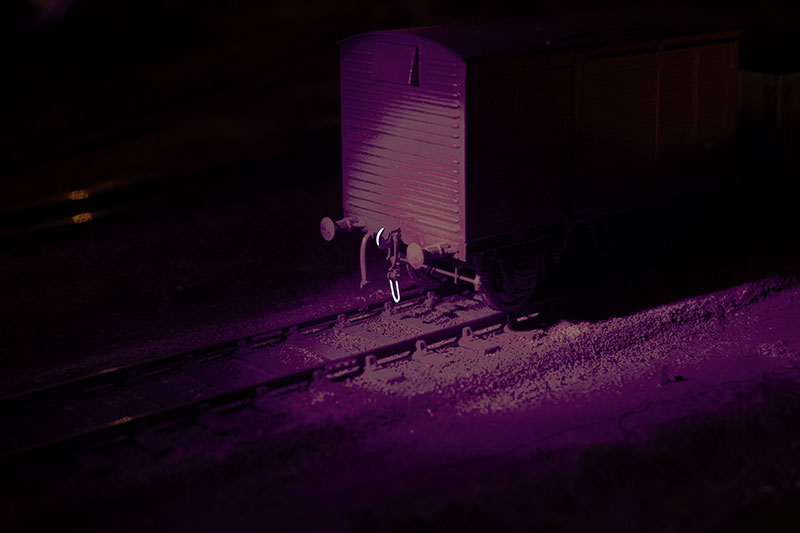
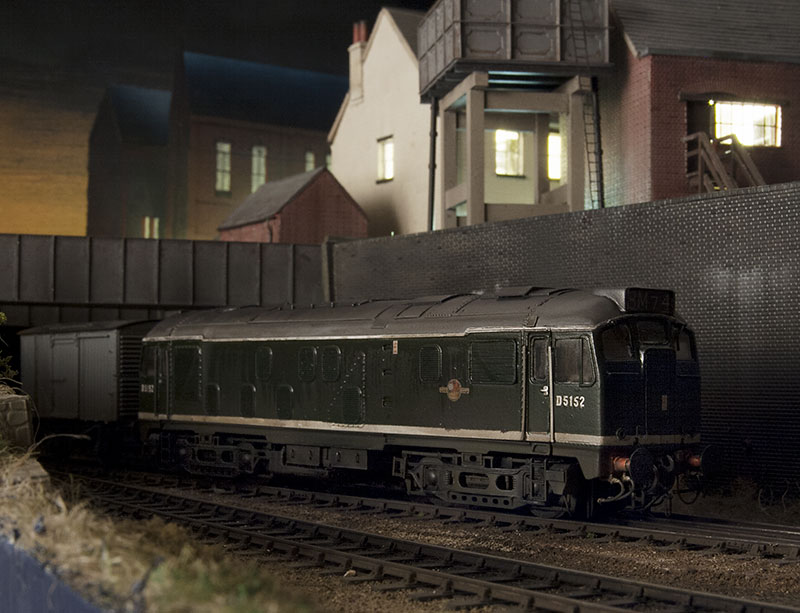
I know this shot is rapidly becoming a Cliché but I am not bored with it yet!
Jim Smith-Wright

http://www.p4newstreet.com

Over thinking often leads to under doing!

User avatar
Will L
Posts: 2524
Joined: Sun Jul 20, 2008 3:54 pm

Re: Brettell Road

Postby Will L » Thu Oct 12, 2017 7:17 pm

jim s-w wrote:One of the things I did before the show that I didn't really have time to post about was this derby lightweight from a Bachmann model. I have long-term plan for a DMU but this was a quick win to have something for the show. I wired the 2 cars together and disconnected the red tail lights. A swap of the destination blinds, a few passengers and some weathering and it was good to go. I still need to redo the gangway at some point.
Image

Jim

Impressed as I am by this nightime view, in the general spirit of getting the details right which marks your models, there is something else you need to do to this one.

I used to travel to school between Bedford and Bletchley in a fisrt generation multiple units, and we used to fight for the front seats so we could see forward past the driver... Except at night, when the blinds were drawn behind the driver to black out the cab.

Your model should have a blacked out cabs so the poor driver has some chance of seeing the signals.

For that little extra deatail, over time they seemed to get board with raising and lowering the blinds, or perhaps they broke, so it became common for the blind behind the driver, if not both sides, to be down all day.

User avatar
jim s-w
Posts: 2189
Joined: Wed Jul 30, 2008 5:56 pm

Re: Brettell Road

Postby jim s-w » Thu Oct 12, 2017 7:20 pm

Yep you are right Will. There's still a bit to do to this so I'll add them when I revisit it.

Certainly by the 80s the drivers side was always down on the tysley fleet. It was always slightly alarming how much the next vehicle moved around when 2 sets were coupled together.

Cheers

Jim
Jim Smith-Wright

http://www.p4newstreet.com

Over thinking often leads to under doing!

User avatar
PeteT
Posts: 472
Joined: Tue Jan 11, 2011 9:53 pm

Re: Brettell Road

Postby PeteT » Thu Oct 12, 2017 7:28 pm

Loving the work on the co-bo Jim! To justify one I'd have to do the same mod, and they do look better :-)

Interesting to see that the colour match is so good. I have a whiskered Bachmann 108 which I need to do a few mods to (cabside handrails for a start) and finding a good match for it would probably accelerate its trip back across the workbench.

BrockleyAndrew
Posts: 174
Joined: Wed Jan 30, 2013 12:18 pm

Re: Brettell Road

Postby BrockleyAndrew » Thu Oct 12, 2017 8:59 pm

Hello Jim,

Just wanted to say how much I like the shot from a few posts ago described "Deeley parked under the bridges". I have returned to it several times now. The harsh side lighting makes it really evocative somehow - miles away from a twee nightlights scene.

Just out of curiosity, have you any puddles on the layout - or is it light drizzle this night?

Andrew

User avatar
jim s-w
Posts: 2189
Joined: Wed Jul 30, 2008 5:56 pm

Re: Brettell Road

Postby jim s-w » Thu Oct 12, 2017 9:20 pm

Thanks Andrew

There are puddles yes. I've used baking soda (same as on the canal) to blow bubbles into them.

I planning to try and make harsh shadows a feature of New Street as I tend to asscociated the place as very much light and dark.

Cheers

Jim
Jim Smith-Wright

http://www.p4newstreet.com

Over thinking often leads to under doing!

ralphrobertson
Posts: 284
Joined: Wed Nov 27, 2013 3:57 pm

Re: Brettell Road

Postby ralphrobertson » Fri Oct 13, 2017 11:39 am

Hi Jim, I think those bridges look absolutely superb. I travelled to school every day on a Derby Lightweight too so I also have a Bachmann model to convert. Can I ask how you converted it please? Did you use the Black Beetle wheels?

Ralph

User avatar
jim s-w
Posts: 2189
Joined: Wed Jul 30, 2008 5:56 pm

Re: Brettell Road

Postby jim s-w » Fri Oct 13, 2017 2:30 pm

Hi Ralph.

Yes. Branchlines do a conversion set for the bachmann 108. You just pull the old wheels and axles off the gears. Push the new ones on and you're good to go. You can just use standard black beetle wheelsets too but there's just a little bit more to do that way, rearranging the pickups on one side.

HTH

Jim
Jim Smith-Wright

http://www.p4newstreet.com

Over thinking often leads to under doing!

User avatar
jim s-w
Posts: 2189
Joined: Wed Jul 30, 2008 5:56 pm

Re: Brettell Road

Postby jim s-w » Wed Oct 18, 2017 4:25 pm

The subject of couplings tends to come up at most shows. Each have their own ideas whether manual or autocouplings are best. I'm firmly in the manual camp and within reason I like couplings to look like the thing they are supposed to represent. Yes I know the infamous 'hand of god' grates to some but, to me, I like to suspend my belief for a second or 2 while an operator couples up rather than something looking wrong 100% of the time due to some weird design of autocoupling. On Brettell Road I have kind of the best and worst case scenario at the same time for the hand of god problem. Best case because its dark and its easier to hide it. Worst case because if the operators have any hope of seeing what they are doing you need a light! Image
I can appreciate that this might well be the ultimate per peeve for some. Bit like my own of tipped from the box road vehicles or magnificently modelled signals with a flat etch for the ladder, so is there another way? Well there might be!
Image
The couplings on this wagon have been modified do that they can be seen in the dark. in the light there are no derogatory side effects but in the dark...
Image
...and under a UV light coupling hook they are clearly visible. Potentially easier to see than inter the normal pen torch. The UV torch I have does still give out visible light so the next mission is to find a truly black light source. By marking the coupling link, the wagon hook and the end of the coupling probe with a UV marker I might have a reasonably invisible manual coupling method.
Jim Smith-Wright

http://www.p4newstreet.com

Over thinking often leads to under doing!

User avatar
jim s-w
Posts: 2189
Joined: Wed Jul 30, 2008 5:56 pm

Re: Brettell Road

Postby jim s-w » Wed Oct 18, 2017 4:27 pm

Of the 5 layouts I have regularly helped to exhibit 3 have used a cassette system and this always seems to generate interest at shows. Cassettes are one of those weird things in model railways that everyone seems to be aware of but no one ever really explains to anyone. I have to hold my hands up and say I am not really a fan of them but for Brettell Road I didn't really have a lot of options. This is how my cassette system works (other methods are available).
Image
The baseboards were designed with a recess for the cassettes.
Image
The connecting end of the cassette itself. this is the third revision. The track is only actually stuck to the cassette at this end via the copper clad. the rest is merely clamped between the cassette and the inner piece that runs down it's length.

I say third revision because the way it connect to the layout has been a tad problematic. initially I had extra rails outside of the running rails that transferred power to the copperclad sleepers by sitting over the top. This worked for the vertical alignment and at the test session at Phil's seemed to be fine for horizontal too. However in terms of transmitting the power it wasn't 100% and as Simon (one of the operators) pointed out - it was likely to wear through the copperclad at some point.

For Scaleforum I retained the extra rails for alignment but added phosphor bronze strips for electrical connection. these were better but fragile. Also oddly we had horizontal alignment problems that hadn't shown up before.
Image
This is my revised arrangement that I am happy with so far. It seems reliable in tests but until the layout goes to its next show we wont be absolutely sure. It does look a little bit more complicated than it needs to be due to 2 tracks feeding in from the layout.
Image
The basic idea is that a piece of flatbottom rail mounted sideways and into the web of the running rail does all the alignment and power transmission. you might have noticed that the rail in the cassette picture wasn't attached to the first sleeper. this is because it's slightly tweaked outwards and is held in line by the flatbottom rail. The advantage of this is that its robust but easily adjustable if needed. So far in tests the derailment problem hasn't re-occured.
Image
The cassette in place. I also have some half length ones too.
Image
Jim Smith-Wright

http://www.p4newstreet.com

Over thinking often leads to under doing!

Colin Parks

Re: Brettell Road

Postby Colin Parks » Wed Oct 18, 2017 9:55 pm

Hi Jim,

The cassettes look very neatly made and the alignment using flat bottom rails is ingenious.

You mention problems with reliably conducting power to the cassettes: what about having the contacts under the cassette (at each end if they are to be reversed) and having contacts set in the fiddle yard deck? If some recesses were incorporated to acommodate the contacts, the phosphor bronze strips ought to compress so as to avoid interfering with the horizontal alignment of the tracks.

All the best,

Colin

User avatar
jim s-w
Posts: 2189
Joined: Wed Jul 30, 2008 5:56 pm

Re: Brettell Road

Postby jim s-w » Wed Oct 18, 2017 10:33 pm

Funny you say that Colin as that was the original plan. You might notice the holes in the 'trench' the plan was to pass pins through the cassettes and fox some large headed buffers in the holes, wired to the bus.
I didn't realise I'd need the vertical control when I designed the cassettes so it seemed ok to shelve that for the moment. If I do need an option 4 then everything is in place already.
Jim Smith-Wright

http://www.p4newstreet.com

Over thinking often leads to under doing!

Terry Bendall
Forum Team
Posts: 2427
Joined: Sun Jul 27, 2008 7:46 am

Re: Brettell Road

Postby Terry Bendall » Sat Oct 21, 2017 7:25 am

Colin Parks wrote:You mention problems with reliably conducting power to the cassettes


Cassettes can certainly be useful as a fiddle yard system although in my view anything over four feet can be a bit fraught. The fiddle yard used on Elcot Road and Longcarse West is a traverser but has one road which has two foot long cassettes for two car multiple units. We do use short cassettes for moving the locos and the power is transferred by filing a notch in the aluminium angle "rail" that slides over the outside of the track. Simple and reliable but needs a bit of care with the filing. It is sown on page 5 of Scalefour News 176.

Terry Bendall

Colin Parks

Re: Brettell Road

Postby Colin Parks » Mon Oct 23, 2017 9:59 pm

jim s-w wrote:Funny you say that Colin as that was the original plan. You might notice the holes in the 'trench' the plan was to pass pins through the cassettes and fox some large headed buffers in the holes, wired to the bus.
I didn't realise I'd need the vertical control when I designed the cassettes so it seemed ok to shelve that for the moment. If I do need an option 4 then everything is in place already.


Hi Jim,

Perhaps if you were to go for 'option four', you could use locomotive plunger pick ups instead of pins to make contact with the buffer heads in the cassette deck. Such lightly sprung plungers should not interfere with the vertical alignment of the cassettes. (It is a rather bizarre use of components, but it could work!)

All the best,

Colin

DougN
Posts: 1253
Joined: Wed Sep 01, 2010 9:57 am

Re: Brettell Road

Postby DougN » Tue Oct 24, 2017 2:05 am

What about the plungers from Hornby locomotives that pickup through the chassis. I had one set I needed to bypass due to the little spring not working

http://www.petersspares.com/hornby-x670 ... pickups.ir

above is a link to the beasty that I am talking about.
Doug
Still not doing enough modelling

Colin Parks

Re: Brettell Road

Postby Colin Parks » Tue Oct 24, 2017 4:43 pm

Hi Doug,

That look like the sort of thing that I meant - or at least the plungers are. Such things must be relatively softly sprung so that if just the tips were protruding on the underside of the cassette, they would not interfere with its vertical alignment.

All the best,

Colin

User avatar
jim s-w
Posts: 2189
Joined: Wed Jul 30, 2008 5:56 pm

Re: Brettell Road

Postby jim s-w » Tue Oct 24, 2017 5:52 pm

Erm thanks chaps but the buffers would be sprung, that was kind of the point. :thumb

Cheers

Jim
Jim Smith-Wright

http://www.p4newstreet.com

Over thinking often leads to under doing!

Colin Parks

Re: Brettell Road

Postby Colin Parks » Tue Oct 24, 2017 6:46 pm

jim s-w wrote:Erm thanks chaps but the buffers would be sprung, that was kind of the point. :thumb

Cheers

Jim


Ah!

Colin

User avatar
jim s-w
Posts: 2189
Joined: Wed Jul 30, 2008 5:56 pm

Re: Brettell Road

Postby jim s-w » Wed Oct 25, 2017 10:49 am

I currently have 3 projects lined up that involve taking a razor saw to old Hornby models. This is the first one and to be fair there's a lot more Bachmann in it than Hornby.

Class 25/0

This has been on my to do list for years. When we used to help my friend David exhibit Amlwch we had all of the main variations of class 24 and 25 except for the 25/0. But then David sold the layout and it just went in to the abandoned project pile. With class 25's being one of my favourite classes it made sense to resurrect the project for Brettell road so...
Image
...following the same pattern as my late body style class 25s this is a hybrid of Hornby cabs on a Bachmann body. The Bachmann model having the correct raised bodyside grills for a 25/0 but the wrong cab roof shape while the Hornby cabs having the right shaped windows (more of that in a moment) and the headcode boxes. As I am doing an original condition loco with valances the effect of chopping up the underframe as I did on my other 25s isn't so much of a win but I did rearrange the bits of underframe you could see to better match my prototype. The original 25/0's had no steam heating so there is no water tank.

The beading on the roof was redone in the correct place and the panel Bachmann missed off was added. These panels seemed to vary a lot. The grill is from Shawplan. Moving on to the cabs the comment of the windows being correct isn't strictly accurate. The important thing is that the top of them is right but the center window is too small and the main windows, although right for a later 25 are too big for a 25/0. The side window is also a bit high and a bit too far forward. Filing and microstrip sorted them out. I re-used the bottom section of the Bachmann cab and but the buffer beams off and mounted them to the body.
Image
After a blast of primer to check that the joins were good I set to work adding in panel lines, the tail lights, cab front handrails and the row of rivets around the base of the base of the cab (archers transfers). The cab vents and exhaust are from the Brassmasters etch. Next stage will be paint.
Jim Smith-Wright

http://www.p4newstreet.com

Over thinking often leads to under doing!

User avatar
jim s-w
Posts: 2189
Joined: Wed Jul 30, 2008 5:56 pm

Re: Brettell Road

Postby jim s-w » Fri Nov 03, 2017 10:36 pm

My class 25/0 is now done. Here are some pictures.
Image
Image
Image
I don't normally like a pre-weathering shot as its not finished yet. But some people do. Below some now customary moody shots.
Image
Image
Image
(well you kind of expected the last one didn't you?)

Wagon News

As I mentioned in one of the post scaleforum posts I found i had more wagons than really necessary. So I'm planing to just finish off those in the to do pile and try to resist adding any more.
Image
Nearest is a diagram 2049 wooden ended open with steel reinforcement. this uses the Parkside sides and underframe with a Rumney Models kit for the ends. Behind is another standard 20 ton brakevan, this time from Bachmann.
Jim Smith-Wright

http://www.p4newstreet.com

Over thinking often leads to under doing!


Return to “jim s-w”

Who is online

Users browsing this forum: No registered users and 2 guests