Hi
I'm trying to find a 1 mm milling cutter with a Clarkson thread on it (not Top Gear). Can anyone suggest where I might find such a beasty. Complete novice asking for help, please.
TIA
Mike
In search of...
-
Terry Bendall
- Forum Team
- Posts: 2427
- Joined: Sun Jul 27, 2008 7:46 am
Re: In search of...
Mike
Try Chronos Engineering Suppliers, Unit 14, Dukeminster Estate, Church Street, Dunstable, LU5 4HU
01582 471900 www.chronos.ltd.uk
Terry Bendall
Try Chronos Engineering Suppliers, Unit 14, Dukeminster Estate, Church Street, Dunstable, LU5 4HU
01582 471900 www.chronos.ltd.uk
Terry Bendall
-
Mike Garwood

- Posts: 618
- Joined: Sun Aug 03, 2008 4:51 pm
Re: In search of...
Thank you Terry, very helpful
MIke
MIke
-
steves17
Re: In search of...
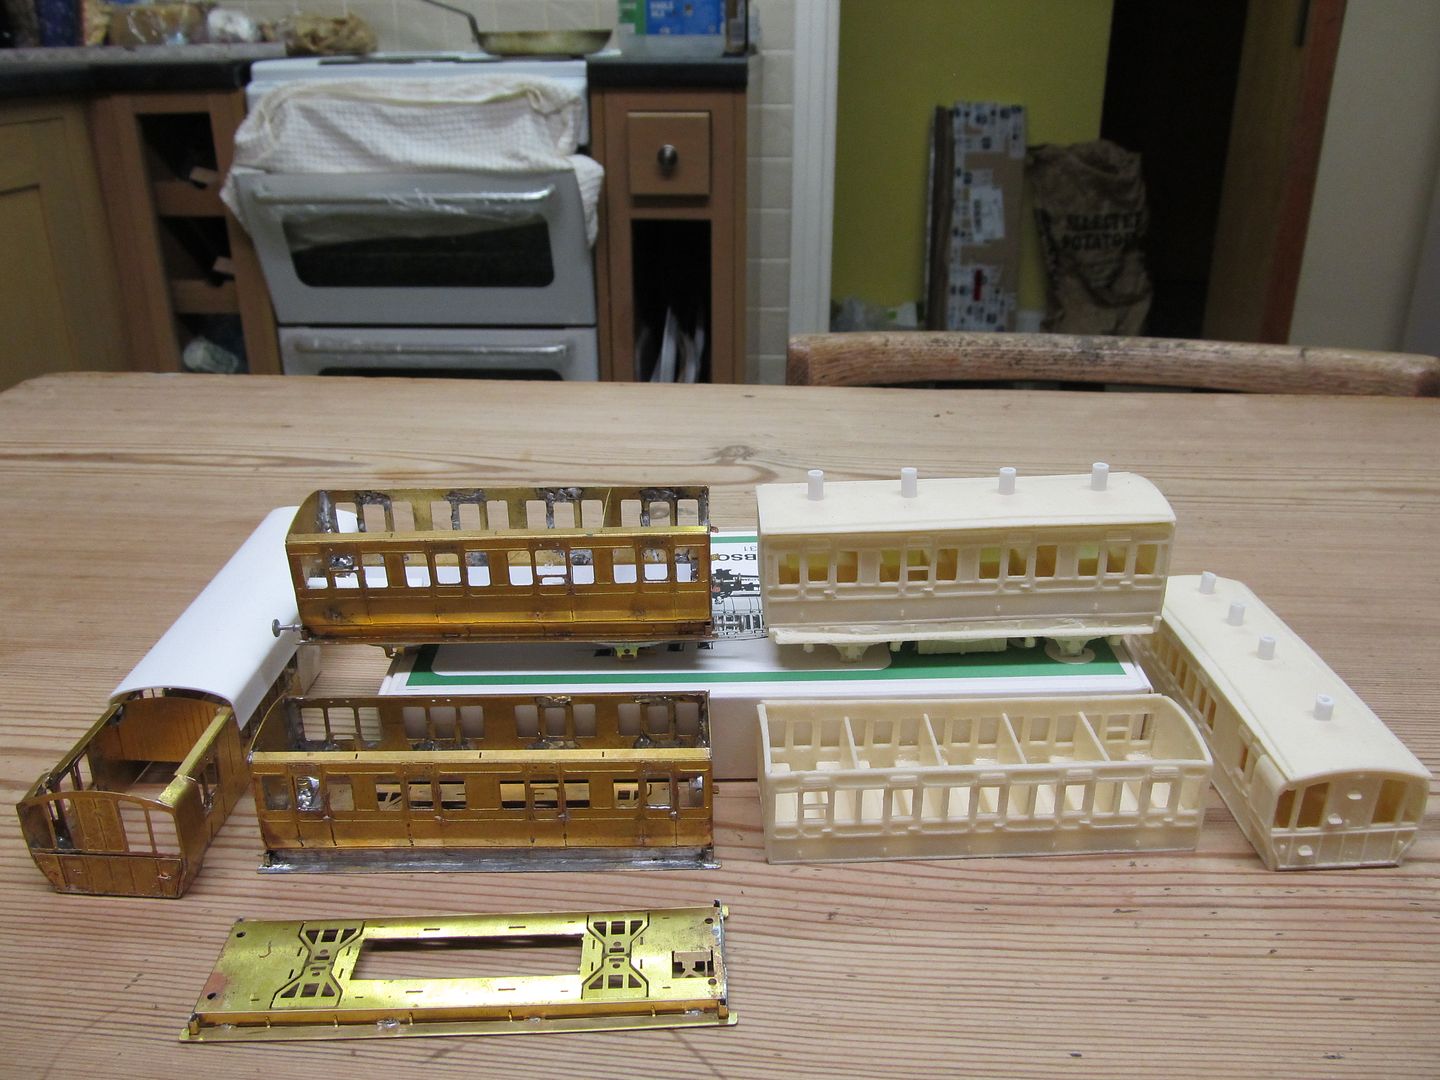
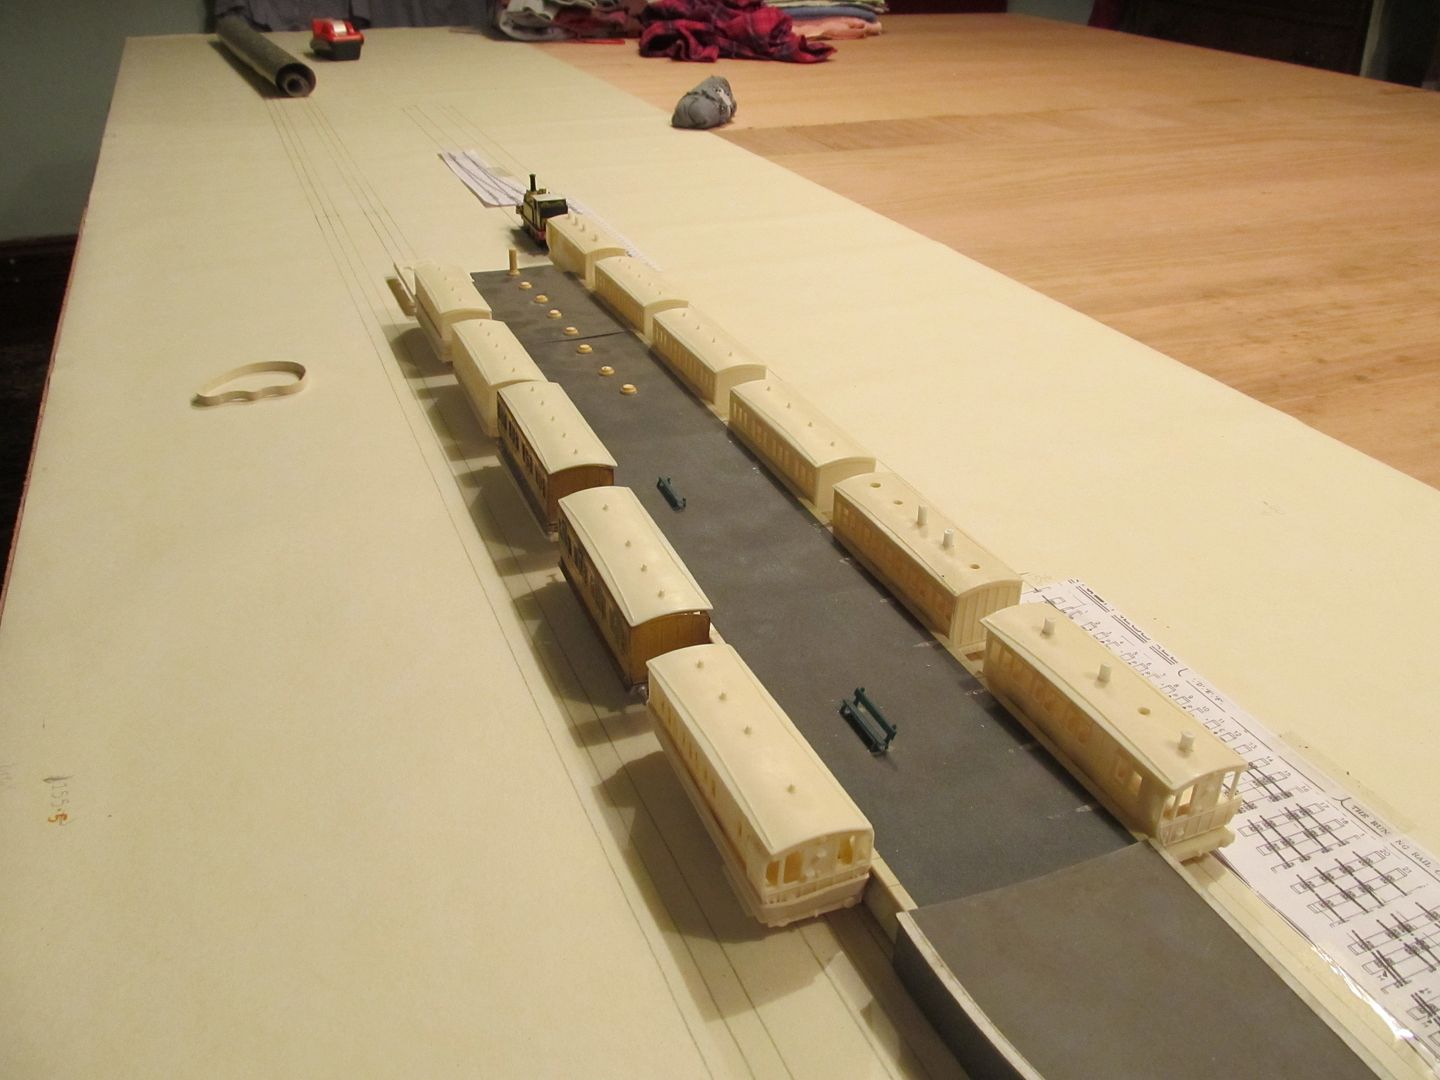
I've had a look around a few threads but this is about as close I could find for a related theme. In a nut shell i'm braking into making my first coaches with some Isle of Wight resin kits by Smallbrook Studio. They are for a semi freelance layout but the idea is to more or less adapt them to how they were in earlier LB&SC days. I'm aware of the superior brass ones that Roxey Mouldings offer but personally I found these a little too time consuming, as I think i'm going to be making a fair few in the fullness of time ( working on 12 for now ).
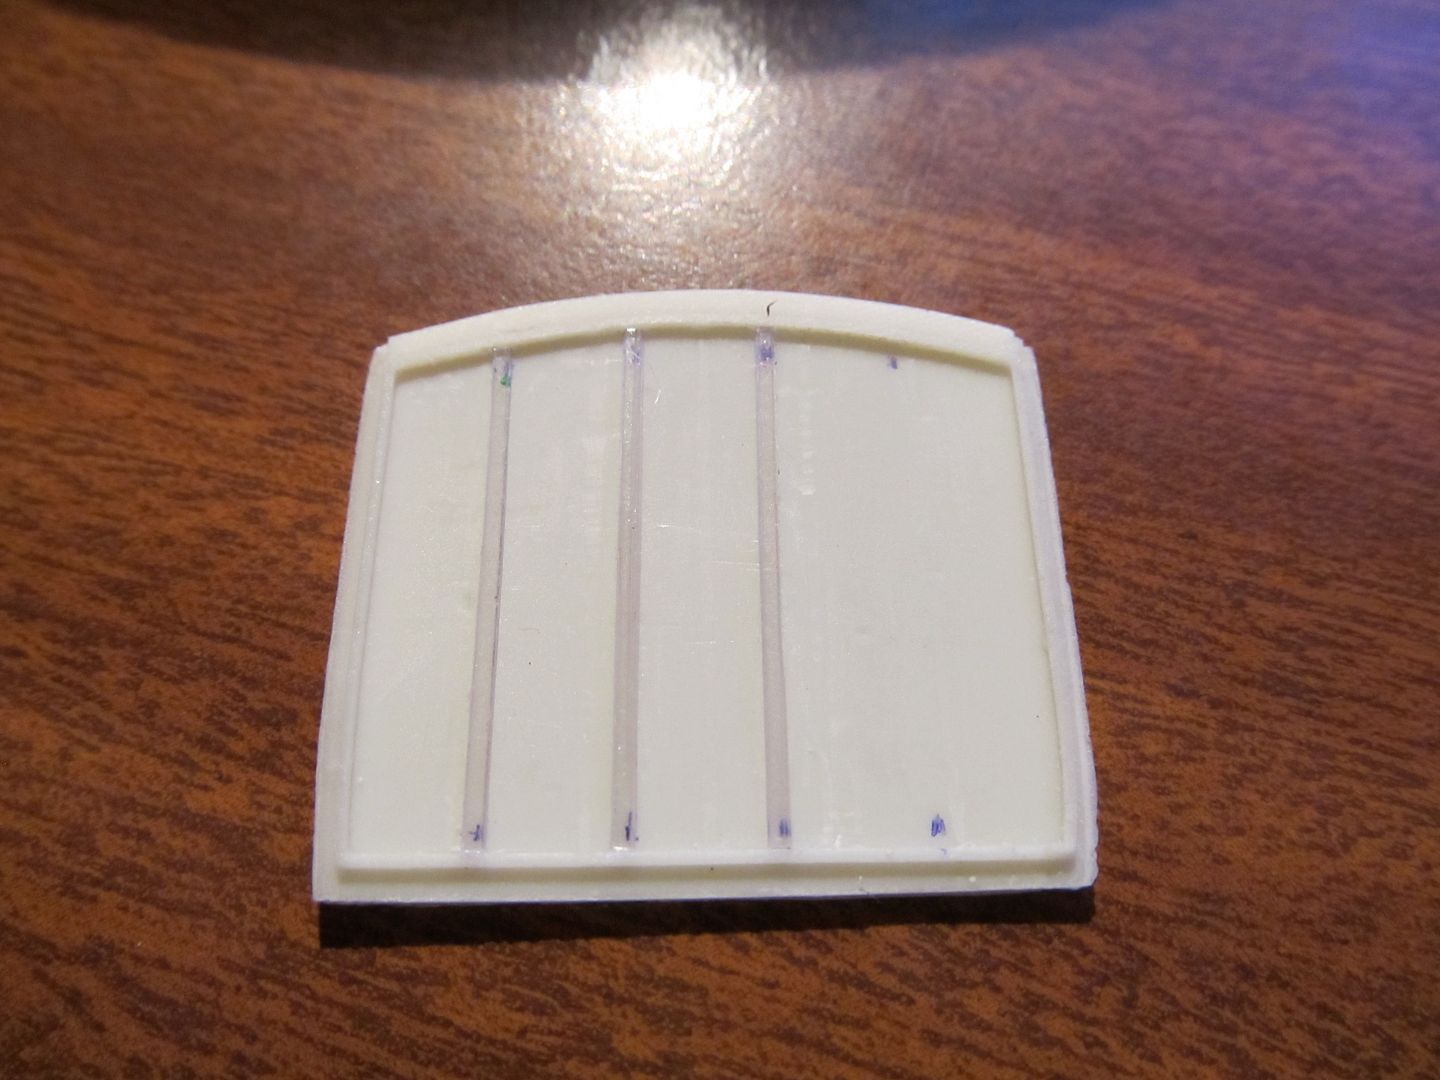
One of the obvious differences with the later refurbished coaches are that they gained an extra bead? on the face ends and so i've been shaving them off.
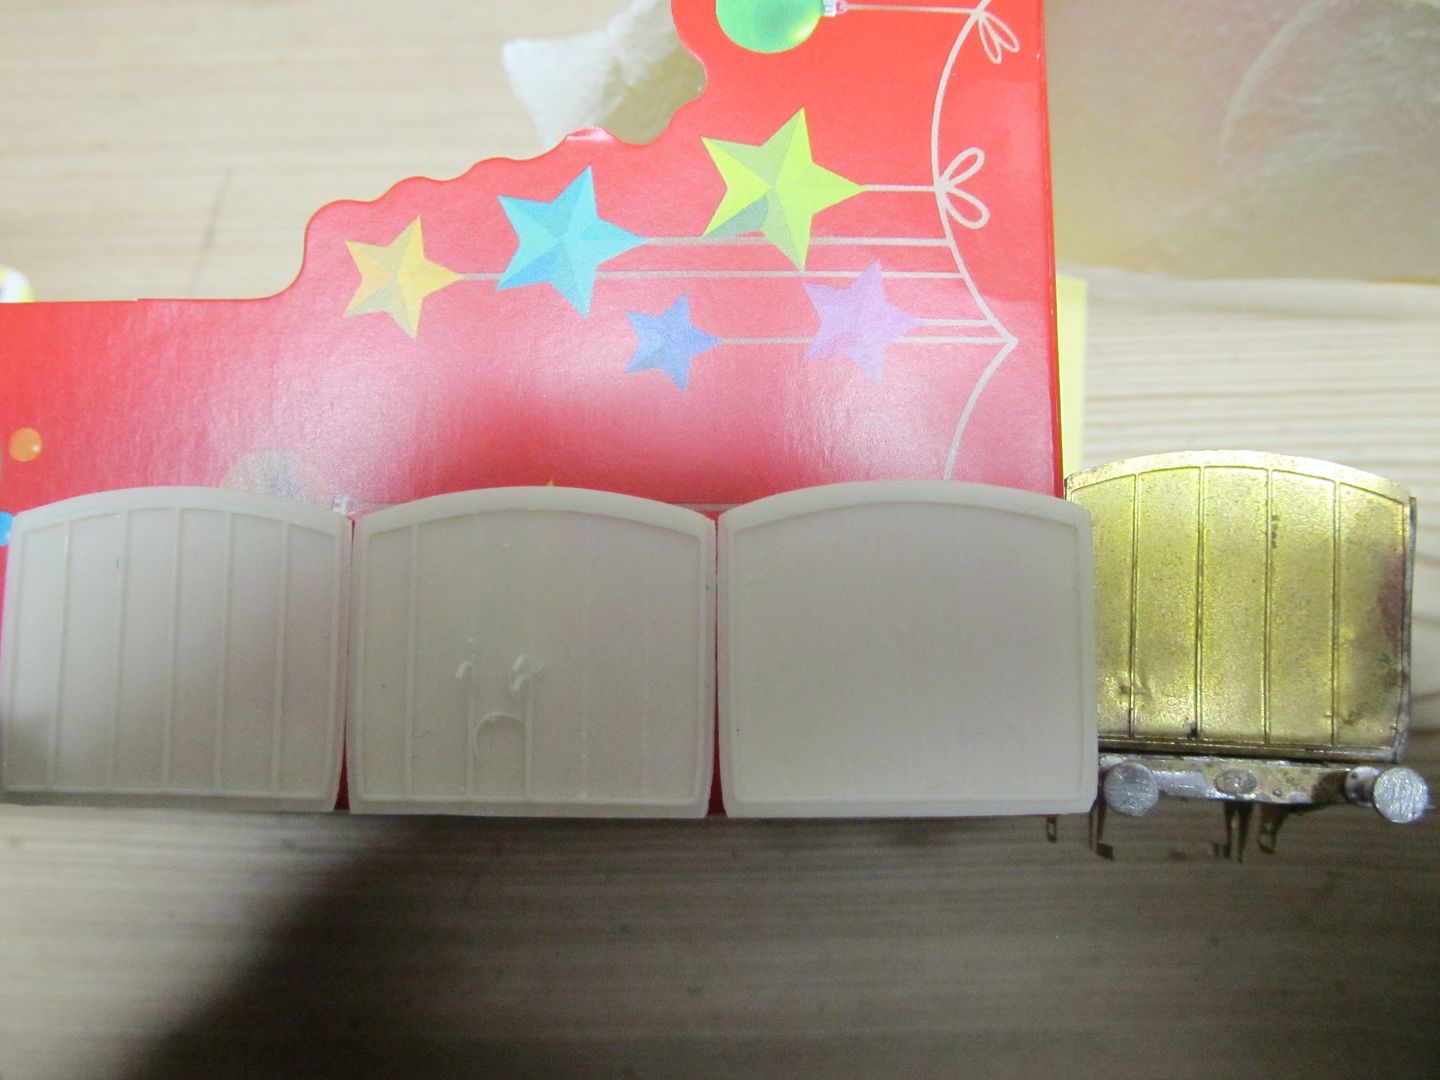
My problem now is how to restore them. Unless i'm missing something with the imperial measurements in my online searches Evergreen & Slaters don't go down small enough ( I need them to be somewhere between 0.8 and 1mm wide and thick ). After a few failed notions I tried cutting some Tree Scenics packaging with a blade and a steel rule which is doing the trick.
I'm finding them quite fiddly and time consuming to make enough for multiple coaches though and I feel like i'm missing a trick here. Does anyone have a better idea of how to go about this? Also what would be the best way to permanently stick them down-a spot of superglue?
Sagely advice appreciated for this novice
Steve
One of the obvious differences with the later refurbished coaches are that they gained an extra bead? on the face ends and so i've been shaving them off.

My problem now is how to restore them. Unless i'm missing something with the imperial measurements in my online searches Evergreen & Slaters don't go down small enough ( I need them to be somewhere between 0.8 and 1mm wide and thick ). After a few failed notions I tried cutting some Tree Scenics packaging with a blade and a steel rule which is doing the trick.

I'm finding them quite fiddly and time consuming to make enough for multiple coaches though and I feel like i'm missing a trick here. Does anyone have a better idea of how to go about this? Also what would be the best way to permanently stick them down-a spot of superglue?
Sagely advice appreciated for this novice
Steve
-
dal-t
- Posts: 654
- Joined: Mon Jan 11, 2010 8:06 pm
Re: In search of...
Bush engineering suggestion (sorry to all the 'right method' people who'll be offended by this) - thought of using a balsa stripper? Apart from it's intended use (I make old-style wood and tissue aircraft from time to time) I've used one to score plasticard, and if your material is thin enough (which it seems it should be) and the blade sharp enough (which they usually are, because they don't get much wear unless they're mistreated - easily replaced anyway) you ought to be able to rip off enough even for your dozen coaches (presume that's 24 ends?). Just a word of warning if you're tempted to buy new - I see Amazon.uk are offering the Master Aircrew version from some rip-off (sic) merchants at over £30. US price is around $7.50, so you ought to be able to get one for under a tenner, probably better on evil-bay.
David L-T
-
Alan Turner
- Posts: 643
- Joined: Sun Jul 20, 2008 4:24 pm
Re: In search of...
steves17 wrote:My problem now is how to restore them. Unless i'm missing something with the imperial measurements in my online searches Evergreen & Slaters don't go down small enough ( I need them to be somewhere between 0.8 and 1mm wide and thick ).
Sagely advice appreciated for this novice
Steve
Both do strip of 30x30 thou and 40 x40 thou which is .75mm and 1mm.
Regards
Alan
-
steves17
Re: In search of...
Thanks Dal. There are a lot of gadgets that i'm oblivious to and the one you mentioned sounds handy-this one I trust?
http://www.ebay.co.uk/itm/Master-Airscr ... xyUrZS1AB9
If so i'll buy it up shortly as i'm sure it will come in handy for the future.
It would be 24 ends except the guards compartment fortunately ( minus the style of the ducket ) remained the same
and i'm planning to have one at both ends for two fixed rakes to save on marshalling time for the short-medium distance trains.
Cheers Alan, I found what you mentioned and i've ordered both so I can judge them in the flesh-just find it odd they are using imperial measurements for such small widths and it was throwing my search engines off
I tried gluing my strips above but could quickly see it was not practical given the tiny surface area. I trust Humbro Liquid Poly or Plastic Weld is what you lot use for these kind of things right?
http://www.ebay.co.uk/itm/Master-Airscr ... xyUrZS1AB9
If so i'll buy it up shortly as i'm sure it will come in handy for the future.
It would be 24 ends except the guards compartment fortunately ( minus the style of the ducket ) remained the same

and i'm planning to have one at both ends for two fixed rakes to save on marshalling time for the short-medium distance trains.

Cheers Alan, I found what you mentioned and i've ordered both so I can judge them in the flesh-just find it odd they are using imperial measurements for such small widths and it was throwing my search engines off
I tried gluing my strips above but could quickly see it was not practical given the tiny surface area. I trust Humbro Liquid Poly or Plastic Weld is what you lot use for these kind of things right?
Last edited by steves17 on Thu Dec 31, 2015 6:22 pm, edited 4 times in total.
-
Will L

- Posts: 2524
- Joined: Sun Jul 20, 2008 3:54 pm
Re: In search of...
steves17 wrote:... Also what would be the best way to permanently stick them down-a spot of superglue?
Super glue would be as good as anything. You need a very thin one, rather than the gels that many super glues are these days
- clean the surfaces carefully and thoroughly,
- put a drop of super glue on a bit of shiny paper/cardboard (so it doesn't soak in and stand as a drop),
- place the strip carefully and ensure it is in close contact with the coach end, you may well need to hold it down.
- use a bit of thin wire, or a very small jewellers screwdriver, to pick up a small amount of glue and run into the joint between strip and coach end by capillary action.
- One or two applications should do the whole strip, the trick is to use as little glue as possible, when the bond will be instant. Too much and it will take a long time to go off.
-
Tim V

- Posts: 2870
- Joined: Tue Jul 29, 2008 4:40 pm
Re: In search of...
I of course would recommend steering well clear of super glue, it isn't permanent. Couple of years, and the bits peel off. Use an epoxy glue.
Tim V
(Not all railways in Somerset went to Dorset)
(Not all railways in Somerset went to Dorset)
-
jim s-w

- Posts: 2189
- Joined: Wed Jul 30, 2008 5:56 pm
Re: In search of...
I've got models well over 20 years old that still have superglued joints as good as the day they were set. Perhaps you are doing something wrong Tim?
Jim
Jim
-
Will L
- Posts: 2524
- Joined: Sun Jul 20, 2008 3:54 pm
Re: In search of...
Tim V wrote:I of course would recommend steering well clear of super glue, it isn't permanent. Couple of years, and the bits peel off. Use an epoxy glue.
I'd disagree with that too, properly made super glue joints will last at least 45 years. I can't say longer than that because that's roughly how long the stuff has been available. Not only that but I find using epoxy on a job like this is inclined to be a very messy processes, while running superglue into the joint is easy and gives very neat and tidy results.
-
andrewnummelin
- Posts: 374
- Joined: Mon Jul 21, 2008 9:43 am
Re: In search of...
Steve,
I wonder if you are looking at material that is too thick. Most mouldings I've come across are 3/8" thick, and a quick look at a GA drawing of an old LBSCR coach (from the HMRS) showed 1/4" - (length over mouldings being 1/2" greater than length over body) - so you should probably be looking at something around 0.083-0.125mm (3.3 to 4.9 thou) which will be very much easier to cut. (Of course, when modifying an existing model it may be easier to use the same thickness as is already there...)
I like the look of the coaches with oil lamps, are you modelling the period before automatic continuous breaks?
Regards,
Andrew Nummelin
Andrew Nummelin
-
John Palmer
- Posts: 825
- Joined: Fri Jul 15, 2011 11:09 pm
Re: In search of...
Couldn’t see any 1mm end mills on the Chronos site. Looked at Tracy Tools site (http://www.tracytools.com/metric-endmills), but they only go down to 2mm. If you really want to go down to 1mm, try http://uk.rs-online.com/web/p/end-mills/5230436/. In fact, I’d hate even to attempt a cut with so small a diameter cutter!
If I were planning on a plunge cut I’d be looking for a slot drill rather than an end mill - Tracy Tools also sell 2mm diameter slot drills.
If I were planning on a plunge cut I’d be looking for a slot drill rather than an end mill - Tracy Tools also sell 2mm diameter slot drills.
-
steves17
Re: In search of...
Thanks for the glue tips-will try a few different approaches and see what works, though the superglue I tried prior is a little stodgy and dries before I can stick down the fiddly strips.
Andrew I agree the resin beads do look a shade thick but I imagine i'll be using Slaters 30 thou when it arrives in the post, as John Palmer mentions its a little tricky to cut plastic at 1mm or less. To be honest though it not a major concern for me as theses ends of the coaches will only be facing each other within the LB&SC style rakes, so just the guards compartment will be exposed. If going for show stoppers I would whole heartily recommend Roxey Mouldings kits as they are crisp in detail and they are designed with compensated units, along with EM & P4 units ( except for the guards coach as it takes up more of the brass sheeting ) but you can more or less get a free coach for every four if using the Smallbrooke Studio Isle of Wight ones. I'm 29 and still newish to modelling so don't know a lot of the ins and outs but these resins kits are perhaps something akin to the old horror stories I hear about, as these do have a fair bit of flash for you to tidy up and do not always fit square. I've found using a rubber band a good way to preform a dry assembly and then you can see if anything additional needs shaving off before you get the glue out or if you'll need to include a bit of padding against the interior support that comes from the seating mould.
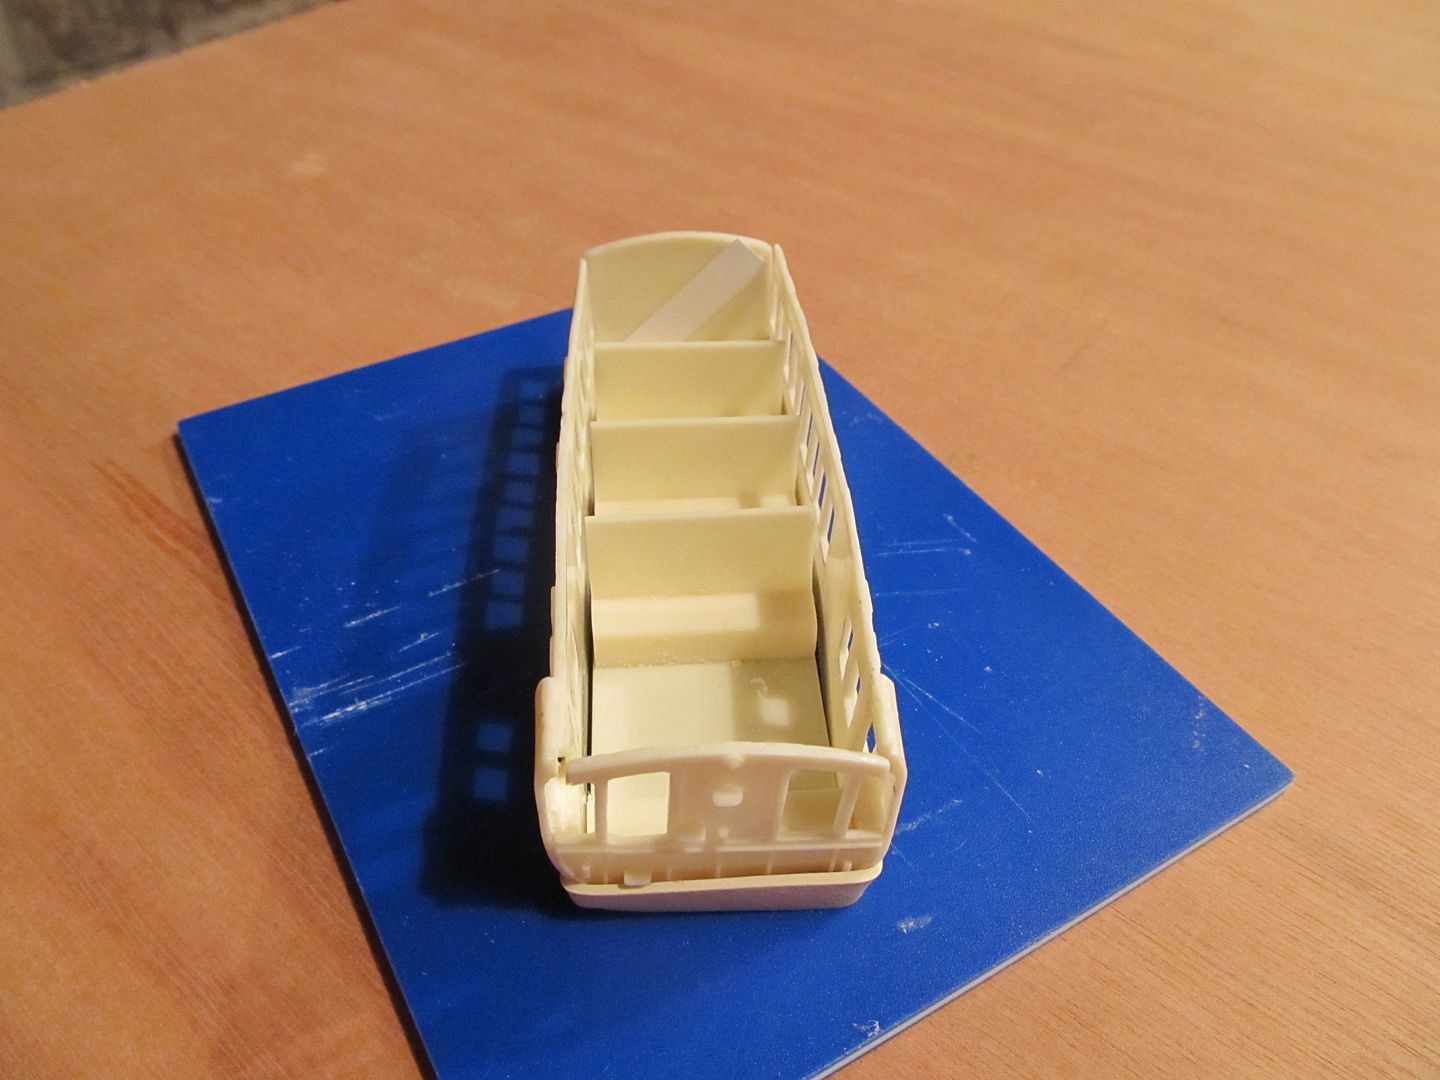
* My elastic band technique looks a bit bad here, but thats only because the duckets are offsetting the normal rectangle shape.
That aside I could see this particular one was fairly square, needing only a bit of thin card to be cut and slotted at the far end to bring the corners in line.
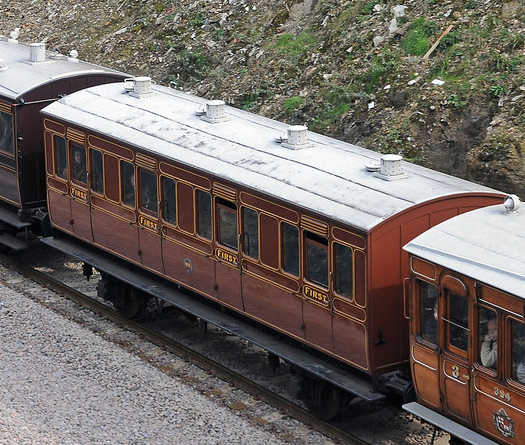
The fictional railway I mentioned opened up in 1870, which as it happens happy coincides with the start of Stroudley era stock on the LB&SC, which i'm just using for a bit of fun as much as anything else. This stock will be built as original, so there will just be a brake on the guards coach only

and all the coaches will have the 'Top hats' and bungs? that went hand in hand with the oil lamps.
I'm looking to a call up a firm for some layout baseboards when the hols are over but decided to try and press on with these coaches in the mean time-got 3 bodies left to make, though after that i'm being held up for some detailing parts that are on order.
The plan was to replace these with Clerestories in the later period but I quite like seeing these come together and if they look decent after painting etc I'll see about duplicating the rake but for said later period, when they would of been fitted with Westinghouse brakes and gas/electric lighting The brass guards coach i've already part built might stand out amongst the rest, so I think i'll turn it into a bothy/ground unit, or even part of some engineering stock.
Andrew I agree the resin beads do look a shade thick but I imagine i'll be using Slaters 30 thou when it arrives in the post, as John Palmer mentions its a little tricky to cut plastic at 1mm or less. To be honest though it not a major concern for me as theses ends of the coaches will only be facing each other within the LB&SC style rakes, so just the guards compartment will be exposed. If going for show stoppers I would whole heartily recommend Roxey Mouldings kits as they are crisp in detail and they are designed with compensated units, along with EM & P4 units ( except for the guards coach as it takes up more of the brass sheeting ) but you can more or less get a free coach for every four if using the Smallbrooke Studio Isle of Wight ones. I'm 29 and still newish to modelling so don't know a lot of the ins and outs but these resins kits are perhaps something akin to the old horror stories I hear about, as these do have a fair bit of flash for you to tidy up and do not always fit square. I've found using a rubber band a good way to preform a dry assembly and then you can see if anything additional needs shaving off before you get the glue out or if you'll need to include a bit of padding against the interior support that comes from the seating mould.

* My elastic band technique looks a bit bad here, but thats only because the duckets are offsetting the normal rectangle shape.
That aside I could see this particular one was fairly square, needing only a bit of thin card to be cut and slotted at the far end to bring the corners in line.
The fictional railway I mentioned opened up in 1870, which as it happens happy coincides with the start of Stroudley era stock on the LB&SC, which i'm just using for a bit of fun as much as anything else. This stock will be built as original, so there will just be a brake on the guards coach only

and all the coaches will have the 'Top hats' and bungs? that went hand in hand with the oil lamps.

I'm looking to a call up a firm for some layout baseboards when the hols are over but decided to try and press on with these coaches in the mean time-got 3 bodies left to make, though after that i'm being held up for some detailing parts that are on order.

The plan was to replace these with Clerestories in the later period but I quite like seeing these come together and if they look decent after painting etc I'll see about duplicating the rake but for said later period, when they would of been fitted with Westinghouse brakes and gas/electric lighting
Return to “Tools and Techniques”
Who is online
Users browsing this forum: ClaudeBot and 1 guest