Knuckles's Turnout Construction Log

Discuss the prototype and how to model it.
User avatar
Paul Willis
Forum Team
Posts: 3031
Joined: Sun Jul 20, 2008 6:00 pm

Re: Knuckles's Turnout Construction Log

Postby Paul Willis » Sun Apr 29, 2012 11:12 am

Knuckles wrote:they were made slightly offset from eachother, so with files and glass paper I tweaked it. Was worried that it might open things up too much but my 2 wagons went through it both ways a lot happier so I think that bodge worked!


Excellent. That's not a bodge, it's fettling to fit.

If everything went together perfectly first time, the art of railway modelling would be far less interesting...

Nicely done. Proper observation of what was going wrong and the application of the correct solution is far better than ripping it all up and throwing it at the bin :-)

Flymo
Beware of Trains - occasional modelling in progress!
www.5522models.co.uk

User avatar
Russ Elliott
Posts: 930
Joined: Thu Jun 02, 2011 6:38 pm

Re: Knuckles's Turnout Construction Log

Postby Russ Elliott » Sun Apr 29, 2012 2:03 pm

Knuckles wrote:I've about sorted the turnout problem at the 'pinch point' as I call it. (when I remmeber the correct terminoloy I'll start using it)

It's called the knuckle, Knuckles. :)

The radius in the wingrails at the knuckle should be exactly opposite each other.

bh_xing.jpg
You do not have the required permissions to view the files attached to this post.

wally

Re: Knuckles's Turnout Construction Log

Postby wally » Sun Apr 29, 2012 7:10 pm

Beaten to the pun by the last contributor -damn!

The main thing to remember is that both knuckles should be opposite each other as shown in the drawing from Russ, but there should be a continuous (theoretical) line on the running corner of the rails across the flangeway gap between knuckle and nose. This is as important as the flangeway gap dimension which is always emphasised.

What you need is one of these -

DSCF1704.JPG


It is a simple straight edge (I made this one myself) along which you slide the knuckle / closure rail to ensure that the gauge face of the two components are in fact in line. I normally fix the straight road using this and then simply put the divergence road in by eye ensuring the knuckles are opposite each other, remembering to use the flangeway gauge to check that dimension on both roads, if the flangeway gap is incorrect it is most probable that the Knuckle bend is not correct.

Before anyone comments on the un-prototypical track work I must point out that the turnout in the picture is on a 7mm model of Irish 3 foot gauge and not to the standard which is the normal for discussion on this forum.

H T H

Wally
You do not have the required permissions to view the files attached to this post.

craig_whilding

Re: Knuckles's Turnout Construction Log

Postby craig_whilding » Sun Apr 29, 2012 8:58 pm

randallb wrote:Craig,

I really like the colour you've achieved on your sleepers and rail sides - what stain / paints did you use to get it? :)

The plastic track has a mix of Games Workshop acrylics or Humbrol enamels on it depending on who did it. I'm not sure if Dick Petter used any sleeper stain or just the "dirty paint brush washing mix" he has on the WB!

Knuckles, good work on deducing the out of alignment knuckles ;) . I think you've drawn your lines perpendicular to the line through the centre of the crossing which is also correct.

User avatar
Will L
Posts: 2516
Joined: Sun Jul 20, 2008 3:54 pm

Re: Knuckles's Turnout Construction Log

Postby Will L » Sun Apr 29, 2012 9:41 pm

craig_whilding wrote:.. I'm not sure if Dick Petter used any sleeper stain or just the "dirty paint brush washing mix" ...


Dick does not pre stain his sleepers

Will

User avatar
Knuckles
Posts: 1262
Joined: Fri Nov 18, 2011 9:15 pm

Re: Knuckles's Turnout Construction Log

Postby Knuckles » Mon Apr 30, 2012 4:52 pm

It's called the knuckle, Knuckles.
OOOOOHHH! Right! ;) Fair enough then.

Yeah, things run through much happier now. I'm still unsure what I should do to join the point blades as there are too many options and I'm not currently building a layout. Also still completely baffled on what buffers to buy (sprung) I've read the comments in the other thread I made but still really dumb founded on it to be honest. Seems I'm going to have to waste money again with the lottery tactic. Buy a selection of what you think you need and hope for the best. it's sadly the only way I ever learn things sometimes, railway modelling and it's descriptions are always a bane when you don't know what the prototype names, types and looks are. Combine with model catalouges with no photographs and a description that menas nothing to you and you have to guess. Has wound me up for years this. It only seems to happen with detailing and specialist parts.
“He who dares not offend cannot be honest.” Thomas Paine

https://www.sparkshotcustomcreations.com/
Mostly 3D Printed Loco kits etc.

SCC Price list (7/4/22)
https://www.sparkshotcustomcreations.co ... e77d42.pdf

Strandline

Re: Knuckles's Turnout Construction Log

Postby Strandline » Mon Apr 30, 2012 6:44 pm

:D Know exactly what you mean Knuckles! I have bought several brass kits recently thinking I know what they are going to be used for and when they arrive I either realise that I need something else to go with them or something completely different. Made sense when I ordered them!

Really must spend some more time reading rather than doing for now, or take my lack of knowledge to a local group :shock:

User avatar
randallb
Posts: 35
Joined: Sat Dec 06, 2008 4:39 pm

Re: Knuckles's Turnout Construction Log

Postby randallb » Mon Apr 30, 2012 7:17 pm

I know what you mean - it never ceases to amaze me that from a blurry photo, someone can tell you (for eg) the type of carriages, when they were built, what type of axleboxes they had ...... !!!

Truly awesome levels of knowledge - and so ready to share with us newbees :D

Not to mention the sheer quality of what is built........
Randall

User avatar
Andy W
Posts: 884
Joined: Thu May 21, 2009 8:11 am

Re: Knuckles's Turnout Construction Log

Postby Andy W » Mon Apr 30, 2012 7:42 pm

I think having our user names related to what we're working on - as in Knuckles case - is a good idea. I'm changing mine to "Looking-in-the-carpet-for-yet-another-thing-I've-dropped".
Make Worcestershire great again.
Build a wall along the Herefordshire border and make them pay for it.

User avatar
Knuckles
Posts: 1262
Joined: Fri Nov 18, 2011 9:15 pm

Re: Knuckles's Turnout Construction Log

Postby Knuckles » Tue May 01, 2012 5:07 pm

Ealing wrote:I think having our user names related to what we're working on - as in Knuckles case - is a good idea. I'm changing mine to "Looking-in-the-carpet-for-yet-another-thing-I've-dropped".


I read about that obscure carpet god in another thread. Accepts all free will sacrifices of pins, axles, washers, bearings and many etceteras. :D


Anyone have ideas on the my buffer bother?
“He who dares not offend cannot be honest.” Thomas Paine

https://www.sparkshotcustomcreations.com/
Mostly 3D Printed Loco kits etc.

SCC Price list (7/4/22)
https://www.sparkshotcustomcreations.co ... e77d42.pdf

User avatar
Mike Garwood
Posts: 618
Joined: Sun Aug 03, 2008 4:51 pm

Re: Knuckles's Turnout Construction Log

Postby Mike Garwood » Tue May 01, 2012 5:35 pm

What vehicle - diagram number, which company, modelled in what time frame. Or failing that a photo!

Inside leg measurement and length of fore finger :D

Should get a few interesting answers out of this lot...

Mike

User avatar
Knuckles
Posts: 1262
Joined: Fri Nov 18, 2011 9:15 pm

Re: Knuckles's Turnout Construction Log

Postby Knuckles » Tue May 01, 2012 8:11 pm

Mike Garwood wrote:What vehicle - diagram number, which company, modelled in what time frame. Or failing that a photo!

Inside leg measurement and length of fore finger :D

Should get a few interesting answers out of this lot...

Mike


Yeah that's exactly my point! The n00b needs to know everything all at once, and it aint going to happen! I have FINALLY made a teeny bit of headway though. At the Wakefield exhabition I got some 12" wagon buffers and springs (also some shanks but, yup, wrong prototype ones) and so managed to drill through the plastic and spring the existing crude shanks as a test. Wouls still rather some diecent ones though.

It's a Dapol Cattle Wagon I'm making, that's what the modded chassis is in the other thread, the n0b welcome thing.

About 15 minutes ago I found a website that answers a lot of my questions. It shows you a clear photograph of the product with the prototype name, and if you click on the buffers you get more info and the option to see it at another view, as a result I think the type I need are fitted RCH ones. (everything I need seems RCH, why?)
This is what we need, not obscure unhelpful ambigiousness.

http://www.emardee.org.uk/epages/BT2573 ... 683&Page=2

See what you think. :)

I'll post that mini bit of modelling I mentioned later sometime.

After buffers I still need to get that turnout blade connector stretcher/tie bar thing. No idea what I should buy still. *sigh*
“He who dares not offend cannot be honest.” Thomas Paine

https://www.sparkshotcustomcreations.com/
Mostly 3D Printed Loco kits etc.

SCC Price list (7/4/22)
https://www.sparkshotcustomcreations.co ... e77d42.pdf

craig_whilding

Re: Knuckles's Turnout Construction Log

Postby craig_whilding » Tue May 01, 2012 9:19 pm

RCH - Railway Clearing House . A sort of standards body for rail vehicles before BR came into being. When you hear of '1923' mineral wagons for example that was an RCH defined spec of minimum requrements. Standard buffers allowed different companies wagons to be repaired when off system by another company.

Buy the Ambis 'simple' tie bars imho, you can attach a wire and a toggle switch to the side of those once done for above board operation.

Chris Mitton
Posts: 258
Joined: Sun Aug 31, 2008 1:18 pm

Re: Knuckles's Turnout Construction Log

Postby Chris Mitton » Tue May 01, 2012 11:21 pm

craig_whilding wrote:RCH - Railway Clearing House . A sort of standards body for rail vehicles before BR came into being.


That is actually a side effect of what the Railway Clearing House existed for, which is a bit like the present day clearing banks. If a customer paid the Great Western to dispatch a wagon load from, say, Truro to Inverness, the RCH sorted out payments from the GWR to the other companies (perhaps LNWR, Caledonian and Highland) over whose tracks the wagon travelled. To facilitate effective inter-company working they did indeed define some technical standards for the reason Craig indicates. They also published their definitive maps to stop the railway companies fraudulently mis-claiming the mileage run over their own metals.

All gloriously irrelevant to your pursuit!
Regards
Chris

User avatar
Paul Willis
Forum Team
Posts: 3031
Joined: Sun Jul 20, 2008 6:00 pm

Re: Knuckles's Turnout Construction Log

Postby Paul Willis » Wed May 02, 2012 5:28 am

Knuckles wrote:After buffers I still need to get that turnout blade connector stretcher/tie bar thing. No idea what I should buy still. *sigh*

Hi Knuckles,

You were asking about the difference between a functional and a non-functional (cosmetic) tie-bar. The simple answer is, one does, and the other doesn't ;-)

Seriously, the difference is whether the tie-bar between the pointblades above the baseboard surface actually does the driving of the blades to change the route or not.

The classic example of a functional tie-bar is the one on a piece of Peco set-track - it keeps the blades apart, and moves them over. Or a piece of copperclad strip that the blades are soldered to.

A cosmetic tie-bar is used together with a Turnout Operating Unit, or "TOU" in the jargon. This is a device below the baseboard that does the job of keeping the blades the correct distance apart, and driving them from below. This means that the tie-bar on the surface doesn't have to be strong - it only "goes along for the ride". Indeed, cosmetic tie-bars can be built out of things like plastic rod or strip.

You can get commercial TOUs - I believe that there is one available for the Tortoise point motor, for example. Or you can build your own. See my description on my Beer & Buckjumpers thread as an example.

viewtopic.php?f=9&t=425&p=13048&hilit=tou#p13048

HTH
Flymo
Beware of Trains - occasional modelling in progress!
www.5522models.co.uk

User avatar
Paul Willis
Forum Team
Posts: 3031
Joined: Sun Jul 20, 2008 6:00 pm

Re: Knuckles's Turnout Construction Log

Postby Paul Willis » Wed May 02, 2012 5:33 am

Flymo748 wrote:
Knuckles wrote:After buffers I still need to get that turnout blade connector stretcher/tie bar thing. No idea what I should buy still. *sigh*

Hi Knuckles,

You were asking about the difference between a functional and a non-functional (cosmetic) tie-bar.

And I've just realised that I didn't answer your question properly...

First of all, decide what you want! Do you want something that sits above the baseboard (which may be useful for a piece for a text track, or a fiddle yard where the cosmetics don't matter) or something that is hidden and the tie-bar looks absolutely prototypical.

Then ask us for a good recommendation :-)

Whatever you do, decide, and fit the tie-bar to the point before you lay the track. Otherwise it's a total PITA - DAMHIK...

Cheers
Flymo
Beware of Trains - occasional modelling in progress!
www.5522models.co.uk

User avatar
Jol Wilkinson
Posts: 1111
Joined: Mon Jul 21, 2008 7:39 pm

Re: Knuckles's Turnout Construction Log

Postby Jol Wilkinson » Wed May 02, 2012 7:37 am

You can get cosmetic tie bars (or stretchers) that are also functional. Mike Clark's Masokits version provides this and with a simple addition of a piece of looped wire, can be easily used with Tortoise or Cobalt TO motors.

They are on page 8 of his catalogue in the Society's Hosted traders section of the website.

Jol

craig_whilding

Re: Knuckles's Turnout Construction Log

Postby craig_whilding » Wed May 02, 2012 9:01 am

Jol Wilkinson wrote:You can get cosmetic tie bars (or stretchers) that are also functional. Mike Clark's Masokits version provides this and with a simple addition of a piece of looped wire, can be easily used with Tortoise or Cobalt TO motors.

Jol

You can do the same with the Ambis one which I think is better than the Masokits hence me recommending it earlier.

Unfortunately as soon as you go beyond RTR Peco track things do become more complex as everyone has their own ideas as to the 'best' compromise between reliability, robustness and scale. I was recommending the functional above board designs on the assumption you want to just attach this to a board for now to play with and avoid complexities like sliding bars sitting underneath.

Thanks for the additional info on the RCH Chris, I learn something new all the time on here :).

User avatar
Jol Wilkinson
Posts: 1111
Joined: Mon Jul 21, 2008 7:39 pm

Re: Knuckles's Turnout Construction Log

Postby Jol Wilkinson » Wed May 02, 2012 11:54 am

craig_whilding wrote:
Jol Wilkinson wrote:You can get cosmetic tie bars (or stretchers) that are also functional. Mike Clark's Masokits version provides this and with a simple addition of a piece of looped wire, can be easily used with Tortoise or Cobalt TO motors.

Jol

You can do the same with the Ambis one which I think is better than the Masokits hence me recommending it earlier.

Unfortunately as soon as you go beyond RTR Peco track things do become more complex as everyone has their own ideas as to the 'best' compromise between reliability, robustness and scale. I was recommending the functional above board designs on the assumption you want to just attach this to a board for now to play with and avoid complexities like sliding bars sitting underneath.

Thanks for the additional info on the RCH Chris, I learn something new all the time on here :).


Craig,

I too use the Ambis stretcher as the "second" tiebar. There are two types, but the assembly of one version completely defeats me. The other, simpler version, I can cope with.
Don Gilliland, of the N&SAG, suggests using the second bar cosmetically with only one end actually soldered to the switch rail to reduce the stress between the switches and tie bars.

The Masokits unit, despite Mike's typically detailed instructions that can be a bit daunting to start with, goes together quite easily. I used the Masokits before I looked at the Ambis version and I think I'd still stick with it for the drive tiebar.

Jol

User avatar
Mike Garwood
Posts: 618
Joined: Sun Aug 03, 2008 4:51 pm

Re: Knuckles's Turnout Construction Log

Postby Mike Garwood » Wed May 02, 2012 2:50 pm

Glad you got the buffers sorted, just ordered a set from Mr Carr myself, along with a set of brake etches - for my ongoing 6t fruit van!

Mike

User avatar
Knuckles
Posts: 1262
Joined: Fri Nov 18, 2011 9:15 pm

Re: Knuckles's Turnout Construction Log

Postby Knuckles » Wed May 02, 2012 4:28 pm

Well, I come back from work and have eight lovely posts to read, thanks guys. :) I might just crack on with the other point kit soon without the tie-bar becasue I don't know what I am going to do with the turnout currently. Naturally I'm hoping to be able to incorpirate it into a layout but that won't be for a while.

I did a test last night that I think went rather well.

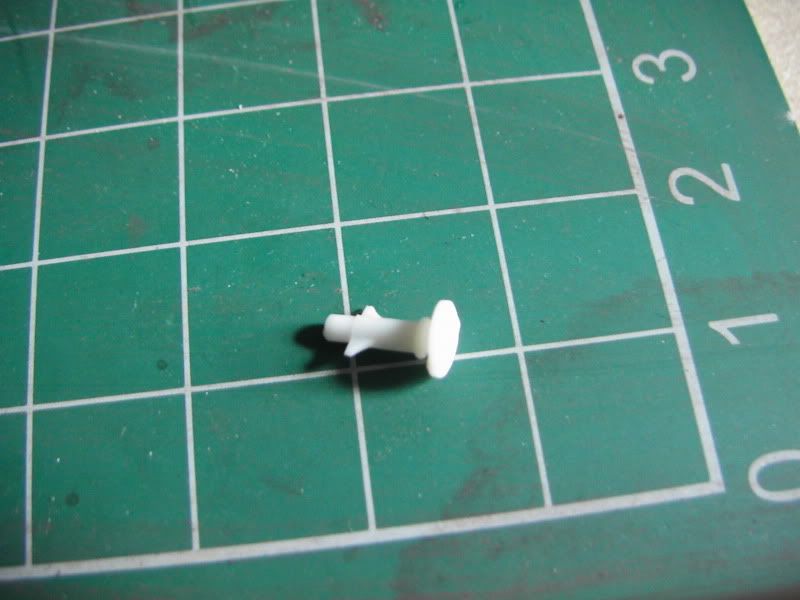
I got the Dapol buffer (RCH type judging by that website I showed above, I think I'll compile all that info you know, then I should always know what buffers I need!!! Brill)
that was in the cattle wagon kit and had a play, by reading the instructions from the 51L 12" sprung Oleo buffers I did similar with the plastic dapol. Results are quite pleasing and the modelling took all of a few minutes. It is however in my opinion grossely crude being plastic, that and the fact that I either didn't drill straight or I drilled the 1st hole too big, I think the latter.

This:
Image

To this:
Image


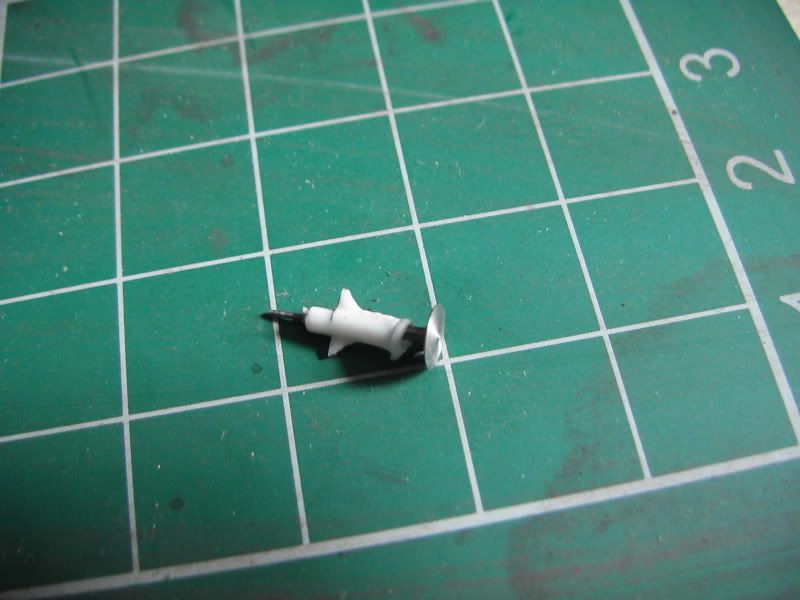
Not bad for a 1st attempt, I had to snip the springs length too.
------------------

Ok, next thing, I found these arrived at last...
Image

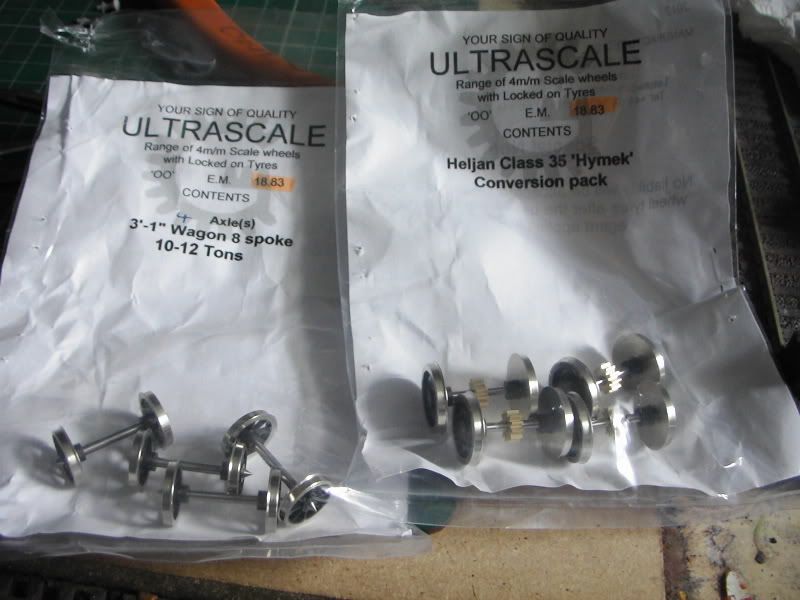
Nearly £50 for that with the postage! :idea: :idea: :o

But anyway, I have a Heljan Class 35 to convert sometime. :mrgreen: Know any good tutorial / blog links or anything to help?
“He who dares not offend cannot be honest.” Thomas Paine

https://www.sparkshotcustomcreations.com/
Mostly 3D Printed Loco kits etc.

SCC Price list (7/4/22)
https://www.sparkshotcustomcreations.co ... e77d42.pdf

User avatar
John Donnelly
Web Team
Posts: 1091
Joined: Fri Mar 16, 2012 7:03 pm

Re: Knuckles's Turnout Construction Log

Postby John Donnelly » Wed May 02, 2012 4:40 pm

Out of curiosity, when did you place your order with Ultrascale - just trying to get an idea on when my order might arrive ;)

John

John Fitton

Re: Knuckles's Turnout Construction Log

Postby John Fitton » Wed May 02, 2012 5:02 pm

Knuckles,

I have been using the ultrascale conversion sets for about 30 years and I converted my Heljan class 35 last year. The instructions U/S provide are very good, you shouldnt have any issues, and the result runs like a charm over very rough track, with good roadholding.

The only issue you may have is the securing of the bogie sideframes. They are not very secure to begin with and mine have fallen off during normal running. A drop of superglue on the spigots helps.

User avatar
Knuckles
Posts: 1262
Joined: Fri Nov 18, 2011 9:15 pm

Re: Knuckles's Turnout Construction Log

Postby Knuckles » Wed May 02, 2012 5:04 pm

I just checked my emails for you...

Your Ultrascale Online Order Acknowledgement - 31/01/2012


A while ago. ;)


EDIT:

Knuckles,

I have been using the ultrascale conversion sets for about 30 years and I converted my Heljan class 35 last year. The instructions U/S provide are very good, you shouldnt have any issues, and the result runs like a charm over very rough track, with good roadholding.

The only issue you may have is the securing of the bogie sideframes. They are not very secure to begin with and mine have fallen off during normal running. A drop of superglue on the spigots helps.


Hey, thanks :) I haven't opened the pack yet but there arn't instructions. Need to check those back to backs first though I guess.

EDIT again: Scrap my whinge about no instructions, upon reflection I mused you may be refering to the website, indeed!

https://www.ultrascale.com/sites/defaul ... _Hymek.pdf

EDIT again again: Nope, doesn't really 'tell' you anything, just says remove the keeper place, drop 'em in and adjust pick ups. I already knew that, question is how to get the plate off without knackering it. Hmm... It looks liek there are squeeze lugs under but squeezing them seems futile. I found the bogey sides come off, but that still doesn't remove keper plate. HELP!

EDIT again again again: OK, brute force won out. I lost my temper and forced it off worrying about repairs later, THEN, found out that was what you were supposed to do. :o Whatever. Conversion is done now, had to file a wee bit of a couple axle housings but other than that fine. Will make a new thread on it.
Last edited by Knuckles on Wed May 02, 2012 6:19 pm, edited 4 times in total.
“He who dares not offend cannot be honest.” Thomas Paine

https://www.sparkshotcustomcreations.com/
Mostly 3D Printed Loco kits etc.

SCC Price list (7/4/22)
https://www.sparkshotcustomcreations.co ... e77d42.pdf

User avatar
John Donnelly
Web Team
Posts: 1091
Joined: Fri Mar 16, 2012 7:03 pm

Re: Knuckles's Turnout Construction Log

Postby John Donnelly » Wed May 02, 2012 5:09 pm

Knuckles wrote:I just checked my emails for you...

Your Ultrascale Online Order Acknowledgement - 31/01/2012


A while ago. ;)


I see, still got a while to go for mine then :shock:

John


Return to “Track and Turnouts”

Who is online

Users browsing this forum: ClaudeBot and 0 guests