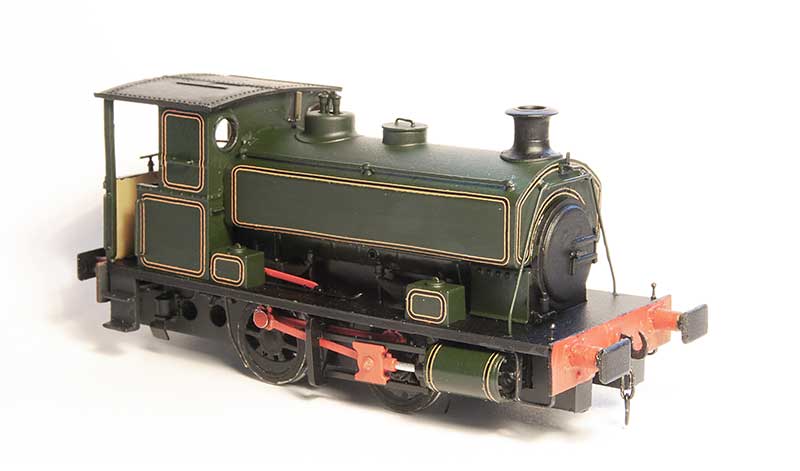
Hattons have done several versions of this diminutive little tank but the main differences are the cylinder sizes. To make a somewhat complicated story very basic theres a 14 inch and a 16 inch version. My model is the 14 inch but the EoD had both types. The other main differences to the cylinders are the wheel size and wheelbase, the 14in version having 3'4" wheels set at 5'6" centres and the 16in version having 3'8.5" wheels at 6' centres. The tank on the 16' version was also taller. I don't know if Hattons have accounted for the wheel sizes and wheelbase in their models but the smaller loco checks out with the known dimensions. One little feature I liked was the pick up arrangement. The bottom keeper plate has traditional wipers bearing on the backs of the wheels but the chassis has sprung plungers that bear on the keeper plate. This means the keeper plate can be removed completely with out any wires to faff about with. A neat little bit of thinking.
Converting to p4
First up, no one does the right wheels. So fancying a bit of a challenge I brought a cheap as chips lathe from Amazon and had a go at turning the RTR wheels down. I had in my wheel stash some old Sharman wheels of the right diameter and salvaged the tyres. I haven't done anything with a lathe since I was in school and I have to admit I did quite enjoy doing this. Ive always found those 'someone makes something from rubbish' DIY engineering videos that pop up in youtube strangely therapeutic. Im just worried now that I want a much better lathe and I'm going to get sucked into turning things next! The axles are a little odd being 2mm but stepped down at the ends for the wheels. A couple of 2mm axles were turned down to match and the wheel sets reassembled with suitable washers. I didn't secure the drive gear in place at this point.
The clearance between the top of the tyre and the metal chassis was very tight so some time was spent shunting the loco around (without rods and powered by a class 20) to see if it would short and cause any problems. No problems showed themselves.
Despite the rods being too thin (as seems to be the way with RTR steam locos) things wouldn't fit now the wheels were p4. Handily the cylinders are a separate moulding so they were removed, cut in half and refitted with a 20 thou plasticard spacer either side. The front coupling rod was mounted with the crank pin backwards so that the screw is on the outside of the wheel. This enables the screw head to be flush with the face of the coupling rod. The rear of the coupling rod and the connecting rod were opened up so that a Gibson crank pin nut could be use the wrong way round in fit inside the rods. Both rods were secured with their own nut and the reason for his is thats how they looked on my prototype pictures. More shunting test were carried out and once happy the finals drive gear was secured and the model tested on its own.
DCC
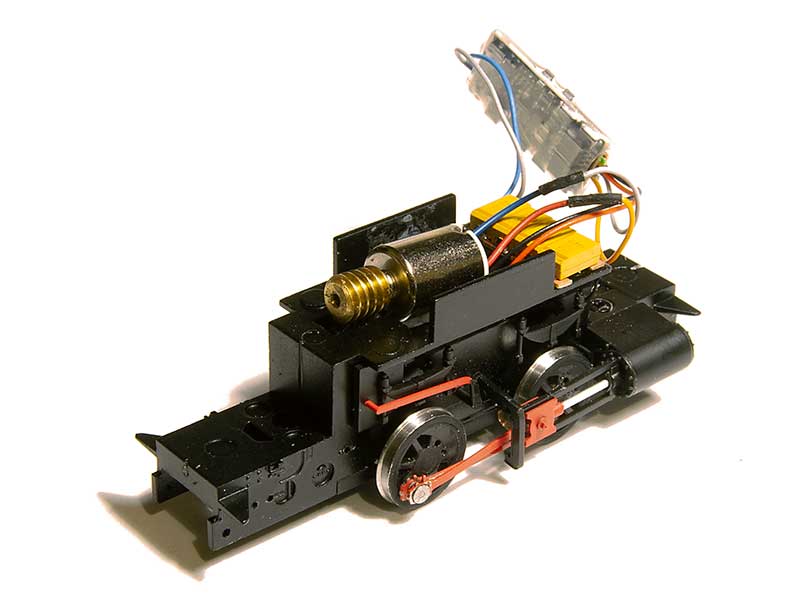
The model accepts a 6 pin decoder and you could simply bung one in and off you go. However with a 0-4-0 a little extra help is never going to hurt. My usual small model arrangement of a Zimo mx633 decoder and a TCS KA1 was not going to fit. I'd seen mention of swapping the motor for something smaller so a little 12volt motor was ordered from Nigel lawton along with an adapter for the worm. For some degree of stay alive 4 Zimo Tantalum capacitors were wired in parallel and everything shoe horned back into the tiny body. It doesn't give the 'pick it up and it keeps going for 10 seconds+' effect that a TCS Kam 4 does but it seems to make a noticeable enough difference to make it worth doing.
Detailing the chassis.

As can be seen in the previous picture there's quite a noticeable gap between the chassis and the wheels. Of the limited detail on the chassis a lot of it pugs in as separate bits so its a relatively easy job to make some new overlays from 60thou plasticard and plug the bits back in.
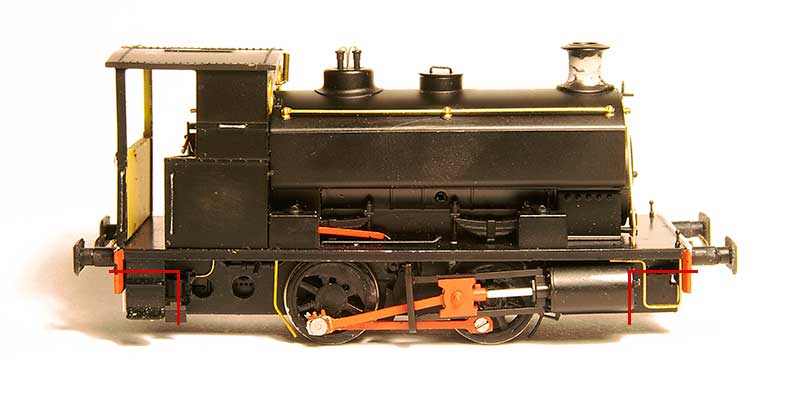
One thing I would advise though is to cut away the original chassis at the points shown (where the NEM coupling pocket is) as you will end up with very chunky and visible frames at the ends of the loco. Might be better to do 20 thou overlays and space them out so they are nice and thin. The arrangement of the brake shoes on the EoD locos seems the opposite way round to the way Hattons had modelled them with the shoes in front of the wheels not behind them and the linkages not visible at all. so these were rearranged. You can see the front crank pin screw in this picture. I also changed the front step to match prototype photos.
The Body
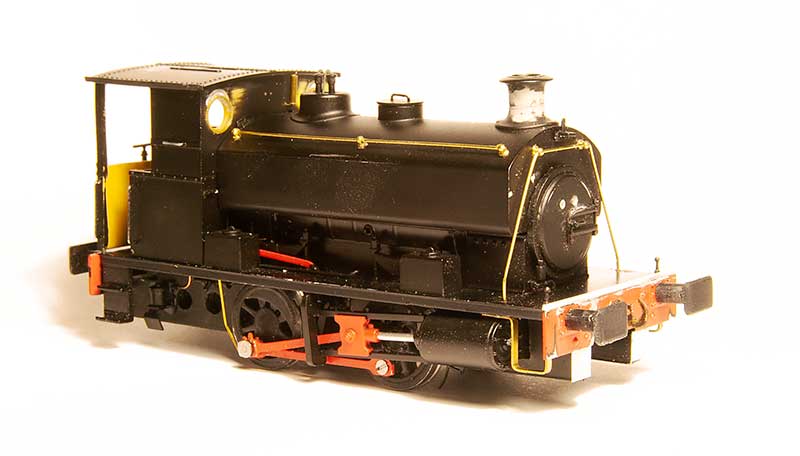
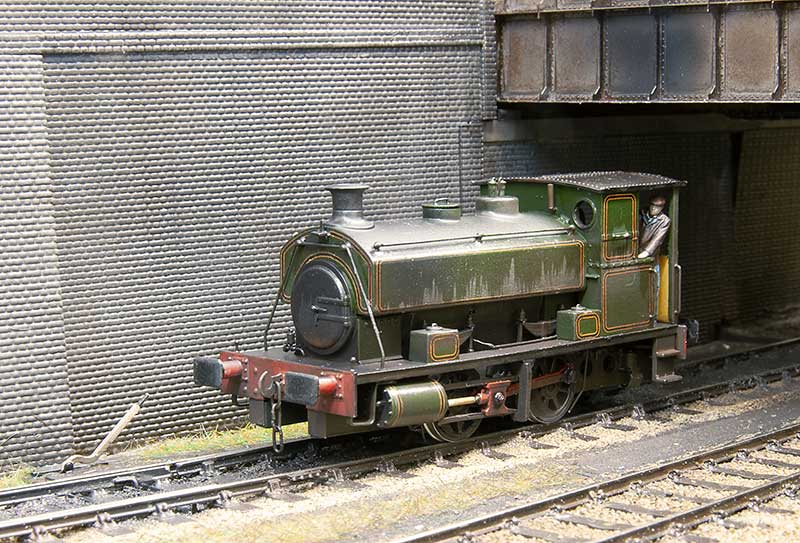
The boiler handrails are separate as supplied but they are plastic, a little wibbly and in a vulnerable place so I swapped them for brass. The weird shaped front handrail was copied from photos. Buffers are Roco HO ones reduced in size. The EoD locos seemed to be set up for lower clearance than the version Hattons supplied so the chimney was reduced in height as were the safety valves while the whistle was relocated from the cab roof to the cab front. The original cab front windows were filled then re-drilled lower down. Some of the EoD locos had a big coupling on the front under the bufferbeam. I suspect this was some sort of auto coupling for when they were working inside the Round Oak steel works. It seems that when some of them lost this they retained the mounting plates which conveniently meant I didn't have to cut the chassis away as mentioned earlier.
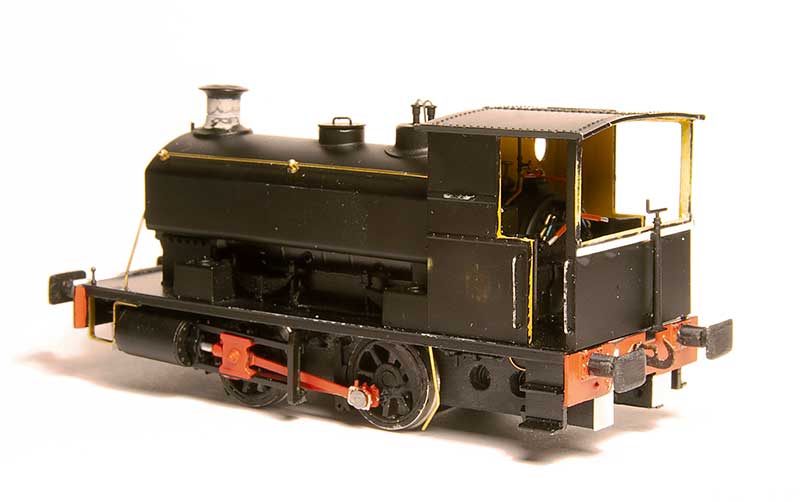
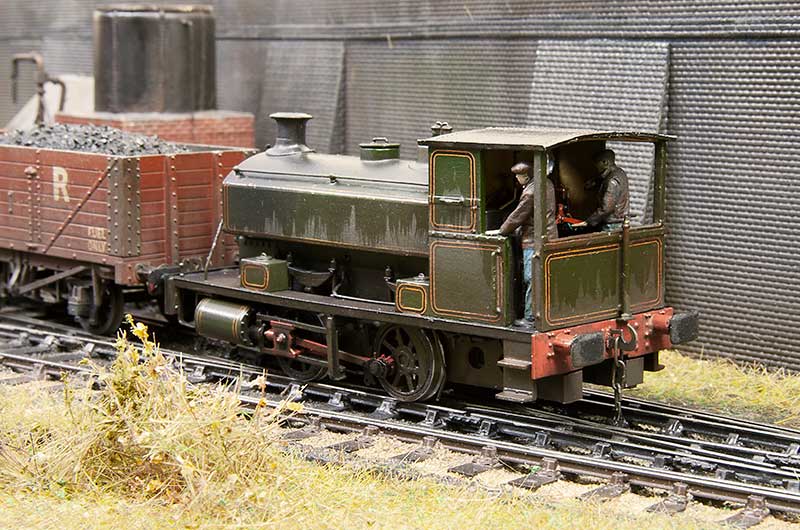
The rear of the cab. EoD locos had 2 types of cab, an enclosed one with 3 windows and this open version. The enclosed one is available from Planet industrials as a detailing kit. Given the layout is set in the rain my mini driver and fireman must be cussing me for not going for that one! My first thought was to scratchbuild a new rear cab from brass for strength but I decided to cut away the RTR one first to see if that would work instead, as can be seen it did. The handbrake is the supplied RTR one
http://www.nigellawton009.com/PayPal.html
https://www.lightrailwaystores.co.uk/products/pil-002c