Brettell Road - Back to wagons - and a correction.
-
- Posts: 2189
- Joined: Wed Jul 30, 2008 5:56 pm
Re: Brettell Road
The Airfix meat van I did a short while ago has peaked my interest just a smidge. There is a little bit of local interest for this (or a well sketchy excuse for me to go waffling on for a minute or two!).
Meat products moved by rail were probably most famous for the Palethorpes vans that operated out of the Dudley area but Brierley Hill was also famous for another processed meat producer, Marsh and Baxter. Founder, Alfred Marsh brought a pork butchers shop (with slaughter house) from E.J. Smart on Brierley Hill High Street in 1867 and initially started out curing ham and manufacturing sausages. By 1912 he brought the A.R Baxter factory in Dale End, Birmingham. Alfred Marsh died in 1918 and the business passed to his son Alfred Edward Marsh. After WW1 the company continued absorbing smaller firms and was eventually granted a Royal Warrant for its York Hams, which they supplied to Harrods.
In 1927 They began using their own siding at Brierley Hill Station and at their peak employed some 1500 workers and slaughtering approximately 2000 pigs per day. It was quite famous locally for an advert featuring a pig pulling a trailer loaded with sausages and the strap line 'Drawing his on conclusion'. In 1954 a modern office building was built on Church Street, Brierley Hill which being slighter higher than the Round Oak steel works did tend to dominate the town somewhat. They also took a keen interest in investing in and promoting local sports and social interests and had both a cricket and football teams (both mens and womens).
In 1962 the company was brought out by Falstock Marketing Corporation although the Marsh and Baxter name was retained. It would survive another 16 years until December 1978 when the company was closed.
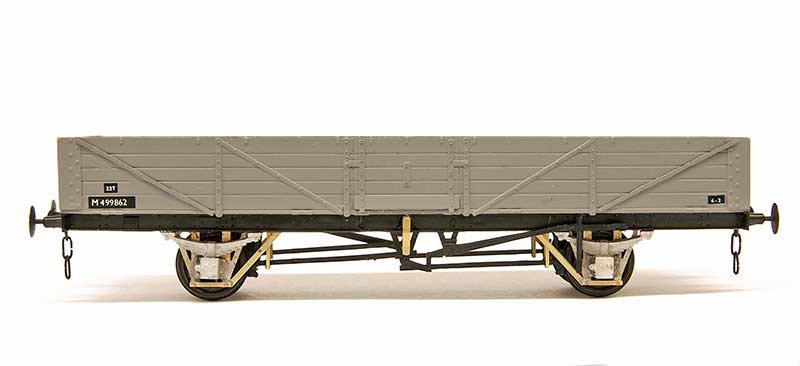
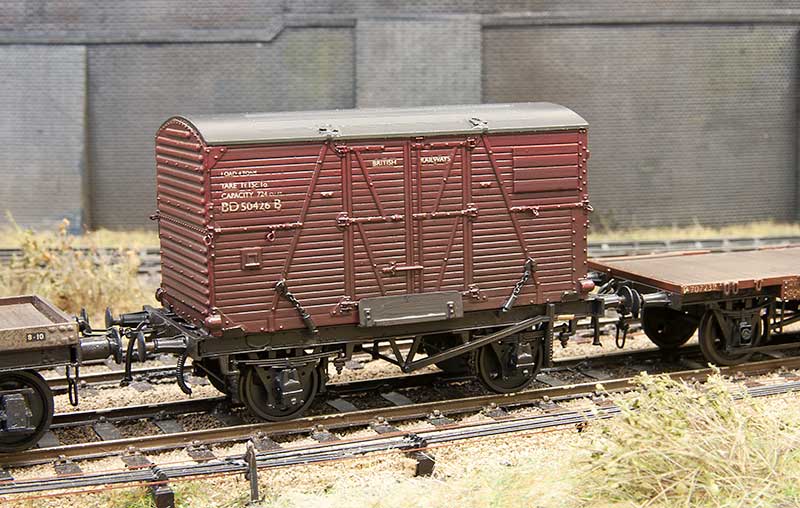
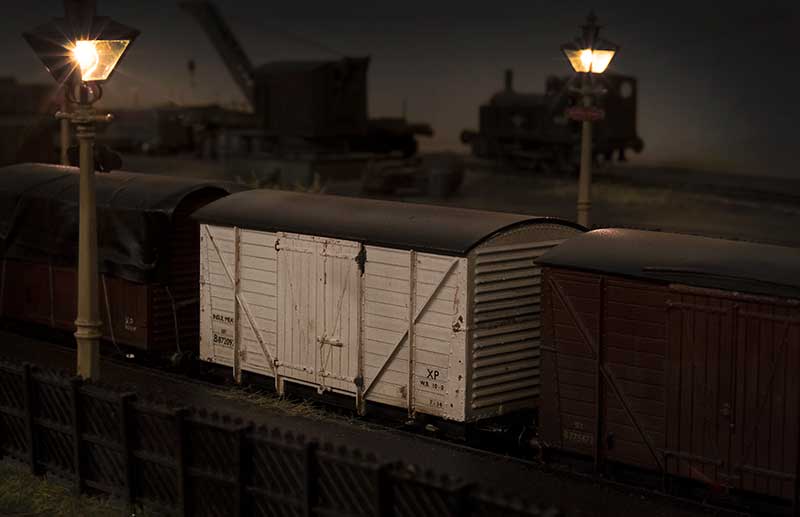
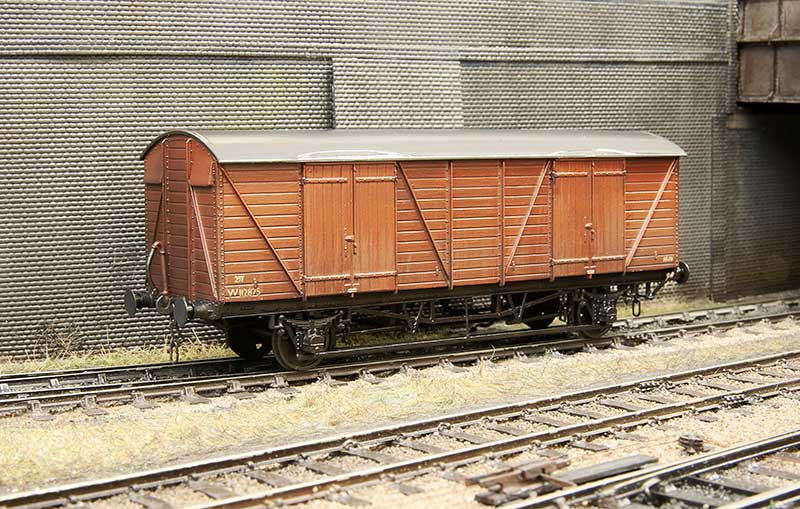
Anyway enough of the history Lesson. 2 Parkside Meat van kits were sourced and the one above built as per the instructions. The white livery being a little different to the sea of grey and Bauxite.
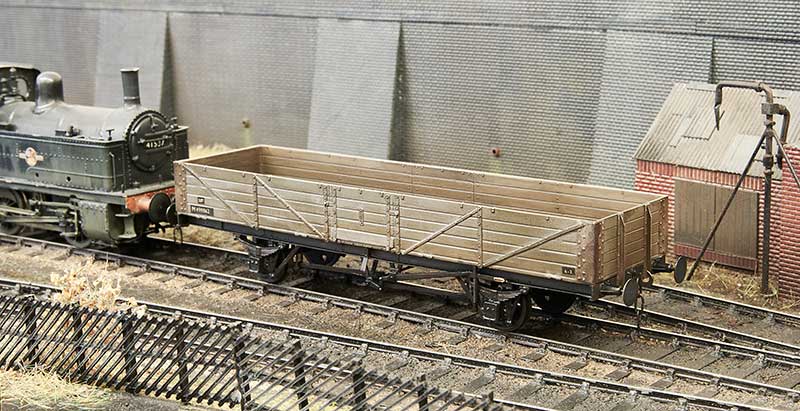
This one is a Diagram 1/250 example using Airfix ends kindly supplied by my friend Ian. Knowing what I know now it would have been better to use a parkside standard 12t van as the meat van has different doors. Luckily I still had some suitable doors in my spares box. The ens needed chamfering to 45 degrees to match the ends and the floor needed shortening a little as the Airfix ends are thicker. I also used some spare underframe mouldings to get the BR welded plate fronted axle boxes.
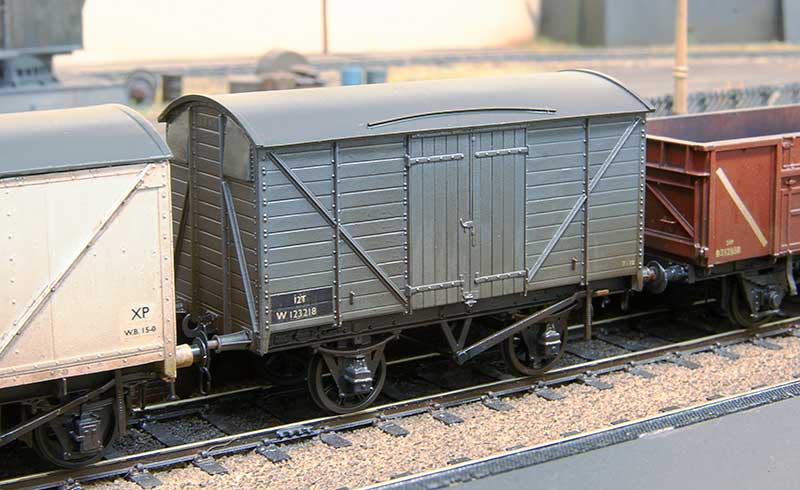
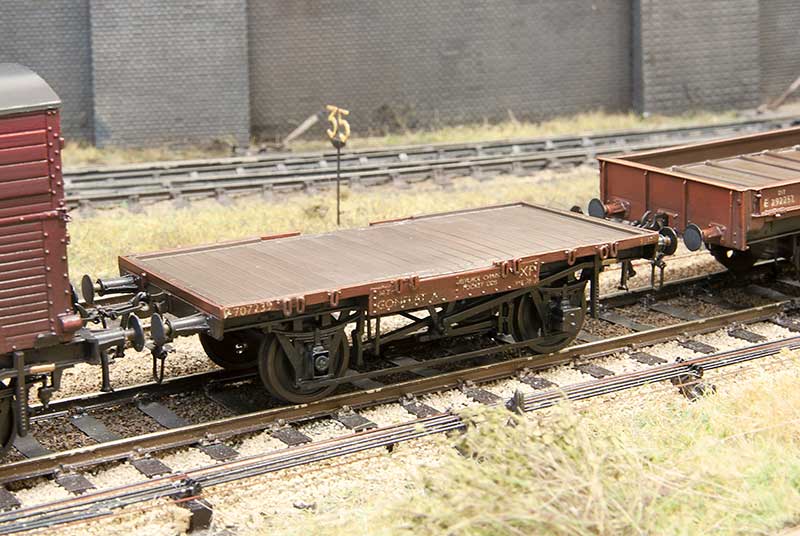
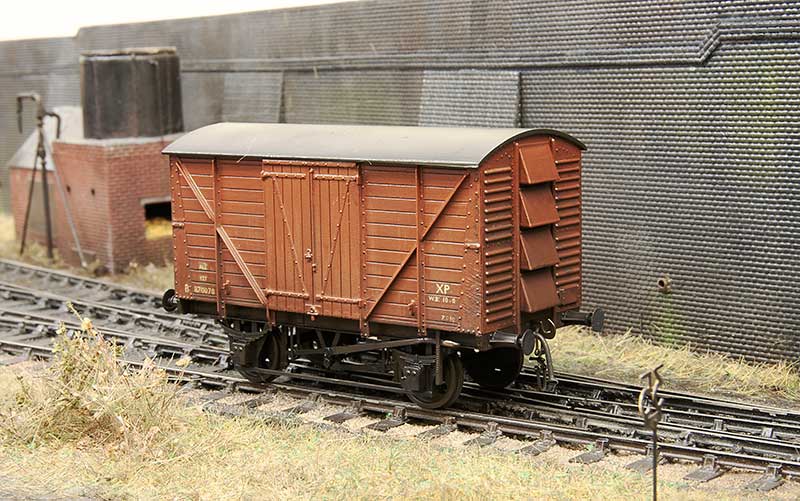
On the subject of vans I quite like these ex GWR mink Gs. Another Parkside kit with Bill Bedford springing and some other etched bits and bobs to refine the underframe a little.
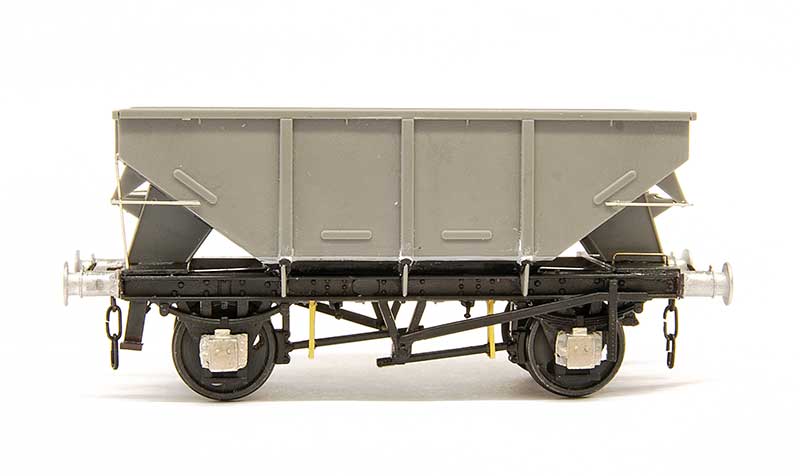
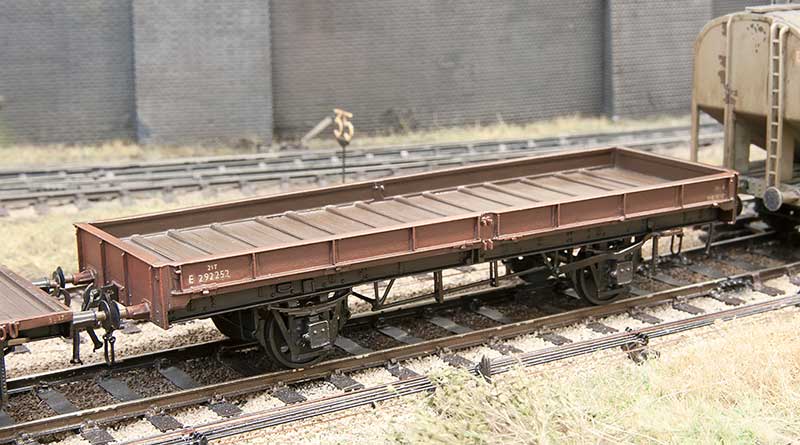
Moving on to Parkside's latest effort. The BR 13t hopper. You can feel the Peco in this one! The underframe has similar feel (both in the way it's done and the plastic its done in) to the old wonderful wagons tank kits. I needed to get the scalpel out to get it to fit together the way it was intended but once done it does result in a pretty solid chassis. I don't know what happened with the supplied axleboxes but they seemed unfinished to me, almost as if there should have been an overlay as per the palvan kit. As there wasn't I cut them off completely and replaced them with Wizard Models castings.
The body isn't the best fit to the chassis either and the ends needed trimming to fit. Peco supply wire and a bit of plastic rod for the handrails and underframe but its all a bit overscale so I used 0.6mm brass wire on the underframe and 0.3mm nickel silver for the handrails. Speaking of which theres no way you are going to get the required long handrail into the plastic brackets on the end uprights without breaking them so its easier to snip them open and pop the wire in that way than to try.
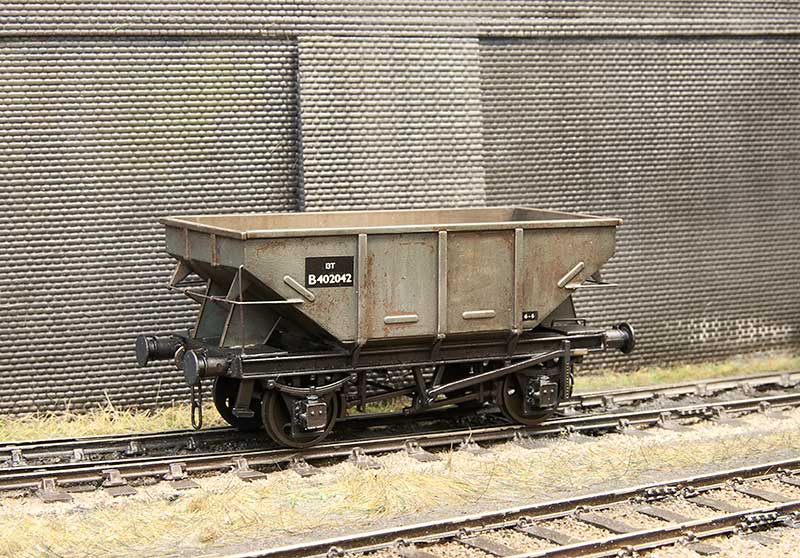
Knowing what to look out for it does build into a nice looking wagon and its pretty quick to bung one together. The model features some nice moulding on both sides of the hopper doors but with no where to really put any decent amount of weight I suspect many (like i will) will run them loaded.
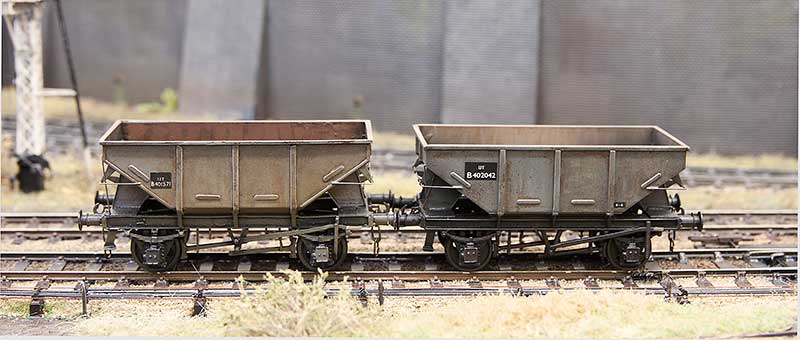
The inevitable comparison with my previous model from the Dave Bradwell kit. Draw your own conclusions.
-
- Posts: 850
- Joined: Fri Jul 25, 2008 12:01 pm
-
- Posts: 2189
- Joined: Wed Jul 30, 2008 5:56 pm
Re: Brettell Road
Just missing out on my last post is this model
An LMS diagram 1945 Long tube. It uses a Parkside BR tube kit which has been shortened to 30ft 6in over the body (122mm) and 17ft 6in wheelbase (70mm). The corrugated metal ends have been replaced with planked ones from plasticard.
A bit of a family tree starting at the top with an old Ian Kirk kit for the diagram 1675 wagon. The wheelbase for the top 2 are the same.
Just a couple of pics for the hell of it!
-
- Posts: 2189
- Joined: Wed Jul 30, 2008 5:56 pm
Re: Brettell Road
I was pleased to find that given the recent high temperatures and the layout living in a shed, that there appears to be no ill effects and all the rails are still straight and pointing in the right direction. I hope everyone reading this can say similar.
The above is a major blast from the past. Years ago when the West Midlands Area Group of the Scalefour Society was active, its organiser, Les, one week supplied us all with a parkside fish van kit. I think (memory is fuzzy if I'm honest) the idea was some sort of little competition to see what we would do with it. I don't recall that anyone did but since then its sat in my kit stash contemplating its place in the world. As you can see it's finally been built. I must admit the very long wheelbase produces a pretty ugly proportioned vehicle but its ready for service on Brettell Road. A note of thanks to Andy Hanson for kindly supplying the transfers.
Above is a V33 van again from my spares box. It uses Ratio sides and a Cambrian 9ft wheelbase underframe. I don't know how I ended up with the sides and while all the bits had, obviously, been paid for at some point I'm calling this one a freebie!
Added a couple of pre-Worboys road signs from Shirescenes. These are inspired by a picture of a Barclay tank crossing Level Street that I found. I made the furthest one about 80% the size of the nearer one to force the perspective a little.
Finally a couple of milk churns from Modelu. To get the galvanised effect I painted them silver. Then a very light dusting of Halfords grey primer (holding the churn at arms length from the spray can) followed by matt varnish. I think it worked but if anyone will ever notice, who knows?
-
- Posts: 912
- Joined: Sun Feb 01, 2009 10:16 pm
Re: Brettell Road
Liking the new wagons Jim, do you use Smiths 3 link couplings? I'm looking to find something more manageable for the Watermouth stock which are largely fitted with home-made fusewire links. The thought of converting some 200 items to anything fills me with trepidation!
Steve
Steve
-
- Posts: 2189
- Joined: Wed Jul 30, 2008 5:56 pm
Re: Brettell Road
I do indeed Steve
Yes they are overscale but thats a trade off for usability.
-
- Posts: 2189
- Joined: Wed Jul 30, 2008 5:56 pm
Re: Brettell Road
Construction has started on the latest building for Brettell Road. I've tried to incorporate some lessons learned from the previous efforts.
The main lesson being to do something more robust with the corners as these have been slightly problematic in the past. I decided to laser cut the main carcass and overlay it with plasticard. It may have been easier in the long run to laser cut everything but I like working with plasticard and scalpels and i didn't fancy a huge session on my computer drawing bricks. As usual Tim kindly did the cutting for me. As you can see from the picture I've cut recesses in the corners and mounted some evergreen strip to give something solid for the overlays to stick too. It's early days but it seems very solid so far.
Turning the part around and moving on a bit, this is the front. Ive built this in a kind of modular way. I drew up the windows and arches and had them etched. There are 3 of these sections required for the building.
This is another section. Ive used the admin building from Round Oak as my inspiration but moved things around and adjusted them to suit. It's an 'inspired by' model rather than an exact replica. This section was on a different face to the one I am modelling as it overlooked Dudley Road.
To join these bits together are some flat wall sections. These are the smaller ones. Ive missed some bits off at this stage as I figured it would be easier to add them once its all together.
And the larger one.
I didn't manage to find a huge number of images of the real building. Theres one in Ned Williams book on Brierley hill and this one that my friend Frank collins sent me. Sadly Frank passed away very recently and I missed showing him how I was getting on by only a month or so. I sincerely hope he would approve of my efforts. The model will be dedicated to him.
Progress so far roughly plonked in position.
And from the other end. Much still to do!
-
- Posts: 850
- Joined: Fri Jul 25, 2008 12:01 pm
-
- Posts: 2189
- Joined: Wed Jul 30, 2008 5:56 pm
Re: Brettell Road
Dunno Rod. There was one on the real building with an external staircase. Perhaps it was a fire escape? Whatever it was I liked it.
-
- Posts: 406
- Joined: Tue Apr 07, 2015 9:41 pm
Re: Brettell Road
Is it fair to assume that the building is long gone?
-
- Posts: 2189
- Joined: Wed Jul 30, 2008 5:56 pm
Re: Brettell Road
Yep - Everything cleared away for the Merry Hill complex in the 1980s
-
- Forum Team
- Posts: 2427
- Joined: Sun Jul 27, 2008 7:46 am
Re: Brettell Road
Very nice Jim and good to see some traditional skills in the use of plasticard and scalpels being employed.
Terry Bendall
Terry Bendall
-
- Posts: 2189
- Joined: Wed Jul 30, 2008 5:56 pm
Re: Brettell Road
Breaking away from the current building works for a moment a little wagon based diversion. As per normal mundane stuff with a few little bits of tweaking that most people will likely never notice.
Conflat A from the Parkside kit. As per the last time I built some of these I beefed up the links a bit as I thought they were far too subtle. I fancied an empty one for a change and also added a missing (yeah sounds a bit weird that doesn't it?) axlebox cover.
Next up an LMS diagram 1838 container flat. Built from the parkside fitted LMS chassis kit with extra bits and bobs.
Finally an eastern region plate. When i did my fish van a few posts ago someone on the clearing house facebook group (highly recommended if you are on facebook and like wagon building) pondered if the chassis could be used to do an eastern region plate. Personally i thought it easier to go with the supplied chassis and replace the brake gear. Another Parkside kit.
-
- Posts: 2189
- Joined: Wed Jul 30, 2008 5:56 pm
Re: Brettell Road
Work continues on my latest building. Gutters are from Modelu. When I last used Modelu guttering I found getting it stuck on was quite problematic however this time I tried Ultraglue from MIG (which I've mentioned here before) and I am pleased to report it works very well.
Fire escape from Langley Models. A few people noticed the upper door in my last post.
I've started to work on the base for the building to sit. The fence is Knightwing security fencing modified to resemble that seen in pictures of the real Round Oak. The sign was part of the etch I drew up for the building windows. I decided not to call it Round Oak as its not a model of the real place but Acorn Steel works had a nice ring to it as its smaller. Acorn was the name of the company magazine issued at Round Oak.
Moving along the fence we find an area where someone has made a hole! Perhaps it was kids trying to get in or perhaps it was a worker looking for a short cut to the station?
The other end. I decided some remnants of an internal line into the works would be an Idea. For the surface behind i have tried out some AK interactive concrete. Theres areas of the building that will need to be concrete or stone however the texture is too heavy for 4mm scale. It would work as very, very rough concrete or as a base for rough ground perhaps. In this case I sanded it pretty much flat.
Finally I couldn't resist a little test run of the buildings lighting.
-
- Posts: 174
- Joined: Wed Jan 30, 2013 12:18 pm
Re: Brettell Road
I'm always impressed with the sheer get on with it attitude that you clearly have.
Always enjoy your posts.
Do Keep On.
Always enjoy your posts.
Do Keep On.
-
- Posts: 74
- Joined: Mon Nov 15, 2021 4:48 pm
Re: Brettell Road
Some inspirational modelling going on here! Loving your work, Jim.
Check out my modelling activity here: https://www.instagram.com/4mm_dave/
-
- Forum Team
- Posts: 2427
- Joined: Sun Jul 27, 2008 7:46 am
Re: Brettell Road
BrockleyAndrew wrote:I'm always impressed with the sheer get on with it attitude that you clearly have.
Indeed. There is a place for reading and thinking about things but the only way to learn and achieve anything is to just get on and do it!
All very nice Jim.
Terry Bendall
-
- Posts: 2189
- Joined: Wed Jul 30, 2008 5:56 pm
Re: Brettell Road
Thanks chaps
-
- Posts: 2189
- Joined: Wed Jul 30, 2008 5:56 pm
Re: Brettell Road
In an attempt to keep some momentum going I've been doing more building work. This time for the right hand end of the new bit.
This building is based roughly on the office building from Birmingham central goods. Same method as before but this time using Brassmasters etched windows.
Originally the area in question was the end backscene of the original layout and this drawing was based very loosely on the Harris and Pearson building on the real Brettell Lane (see https://wmhbt.org.uk/blog/the-harris-pearson-office-building/ for more info). The original basic drawing was modified and sent to Tim to be turned into an MDF carcass.
And here is the result so far. Windows are a combination of my own and Brassmasters etches.
This is the much less ornate but somehow at least as interesting rear view.
A rough idea of where it all goes.
-
- Posts: 2189
- Joined: Wed Jul 30, 2008 5:56 pm
Re: Brettell Road
Ive been busy painting. Not a huge amount to say really so I will let the images do the talking. Next will be roofs and tiling. Lots and lots of tiling!
-
- Posts: 2189
- Joined: Wed Jul 30, 2008 5:56 pm
Re: Brettell Road
After working my way through a lot of laser cut strips of tiles I can call my building(s) project effectively done.
There are several schools of thought when it comes to what to do with low relief buildings. The easiest is to keep them parallel to the backscene however if you don't (as I haven't) then the roof can actually become a little bit of a problem area. Theres 2 main ways to address this, Keep the pitch of the roof the same and cut the top at an angle. Or keep the top parallel to the rest of the building and adjust the pitch. My personal opinion is that the latter is the better option. The pitch on my acorn building is significantly different from the left end to the right end. One advantage of using tile strips over embossed plasticard is you can adjust the rows to compensate for this and hopefully no one will notice what trickery you've been up to!
The same applies to this building although it's not quite as dramatic.
The thing with lighting buildings is they look a bit weird if they are just empty boxes. I don't feel you need to model everything inside though, just enough clutter to give a hint of something inside. The shelving and cardboard boxes are from scale model scenery. I have found its something people at shows to look for and I think is nice to have some little 'treasures' that people can discover for themselves.
The Higgs and Co. building also has some 'officey' clutter. In the late 50s offices seemed to be laid out more like a school classroom than the more ergonomic arrangement we see now.
The roof of the rear of the Higgs building has some weird shapes that were a bit of a faff to work out if I'm honest.
I do feel that the middle of the layout has a suitable black country-ish feel to it now.
One little building I bunged together is this little weighbridge that will sit behind the main station building. Its based on the one at Wombourne (see
http://www.railaroundbirmingham.co.uk/S ... omborn.php) and I was initially attracted to its over the top chimney and the way it's just stuck in a corner. I did have to reel my enthusiasm in a little as the chimney at Wombourne matches the station so to model it exactly as it was when the ones on my station don't look anything like, would have been a little weird.
Below a few pictures, I feel the last one really captures the feel I want for the layout.
-
- Posts: 174
- Joined: Wed Jan 30, 2013 12:18 pm
Re: Brettell Road
Really atmospheric.
Is Brettel Road/nightscene unique on the exhibition rounds? Presumably your problem is keeping external light out and you ask for a position away from windows/bright lighting? At Scaleforum, Bankside had dramatic backlight from the sun coming directly in from a window and gave the scene a dramatic late afternoon feel but so contrast-y that it made the rolling stock very much silhouettes. Still, gave it lots of atmosphere. The light coming out of your night-time buildings similarly is very visually evocative.
Andrew
-
- Posts: 2189
- Joined: Wed Jul 30, 2008 5:56 pm
Re: Brettell Road
Theres a few night layouts i've seen. A 00 gauge loco depot one, an American one (that I think is set in the snow) and in P4 theres Splott. I haven't seen anyone else model a layout that is wet though.
This is a rough version of the roof for the layout. It will actually be higher and the built in pelmet has now gone.
Who is online
Users browsing this forum: ClaudeBot and 2 guests