
Great stuff Jim and thanks for the tip on the book.
Your wagon philosophy coincides with mine with regards to wagons. Congratulations on the article in MRJ, very atmospheric.
Robin
Brettell Road - Back to wagons - and a correction.
-
Terry Bendall
- Forum Team
- Posts: 2427
- Joined: Sun Jul 27, 2008 7:46 am
Re: Brettell Road
Philip Hall wrote:So ignore the critic(s) and congratulations on doing something very different, and doing it rather well
In my way I also enjoy doing things a bit differently Definately ignore the critics Jim and in my view it is done very well indeed.
Terry Bendall
-
Tony Wilkins
- Posts: 818
- Joined: Tue Mar 20, 2012 3:57 pm
Re: Brettell Road
Hi Jim.
I too have a similar philosophy when it comes to my wagons although not to quite as high a degree of detail for passing trains making do with refining the plastic parts supplied as much as is practicable.
I often find it interesting what appeals to modellers about a particular subject. I have seen several derogatory descriptions of Brimsdown, the real station not my model, I hasten to add. It is true that it suffered war damage and some of the repairs were of poor quality and by the 1960s it was rather run down, yet that is part of its appeal to me along with its grimy industrial surroundings.
Keep up the good work.
Regards
Tony.
Inspiration from the past. Dreams for the future.
-
Phil O
- Posts: 364
- Joined: Sun May 05, 2013 5:23 pm
Re: Brettell Road
Rundown and near to closure is what you have depicted and was the atmosphere you were after and you have achieved that in bucket loads, enhanced by the miserable weather to go with it. I look forward to seeing it at a show in the near future.
Cheers
Phil.
Cheers
Phil.
-
jon price
- Posts: 641
- Joined: Mon Jun 07, 2010 2:34 pm
Re: Brettell Road
Personally I find Brettell Road to be excellent. Building an immaculate model based on a real location, making it run, and then lighting it to look like a rainy night looks like magic to me. I am particularly in awe of the lighting because it has to exactly replicate the real thing (rainy UK midlands night). I came across a French example of this which shows the skill involved. They replicate a northern French nightime, which means their lighting has to be quite different. (I was elways excited by the alien nature of French railways at night). The layout seems to be a similar size (there is a video of them setting up at an exhibition). They have replicated (on the video, I suspect not necessarily at an exhibition!) a foggy day for the first half of this video, and then night time from about 8.30 mins in). The night lighting that Jim with Brettell Road and these guys with Poinzeraut achieve is amazing.https://www.youtube.com/watch?v=Xk2HKjSgOhw&t=603s
Connah's Quay Workshop threads: viewforum.php?f=125
-
BrockleyAndrew
- Posts: 174
- Joined: Wed Jan 30, 2013 12:18 pm
Re: Brettell Road
Excellent as always. Great to see the layout and stock and the glue mention is something I'm following up on, thanks. And thanks Jon for the Poinseraut reference. Very much enjoyed watching the videos.
-
jim s-w

- Posts: 2190
- Joined: Wed Jul 30, 2008 5:56 pm
Re: Brettell Road
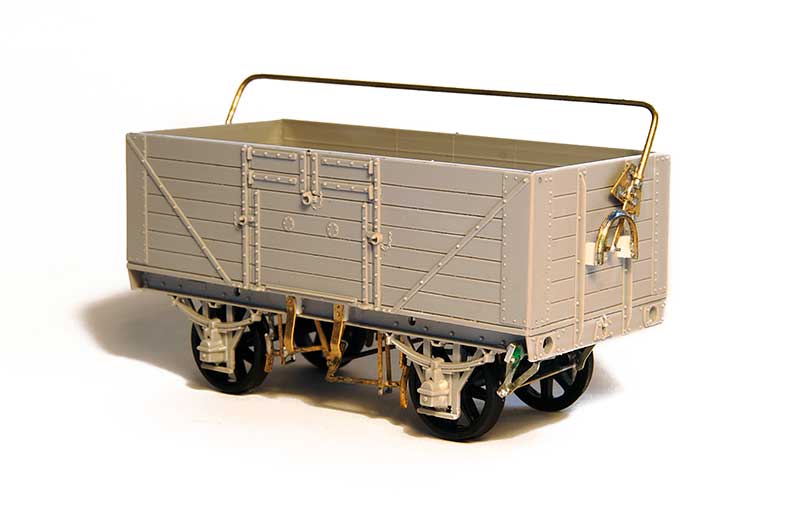
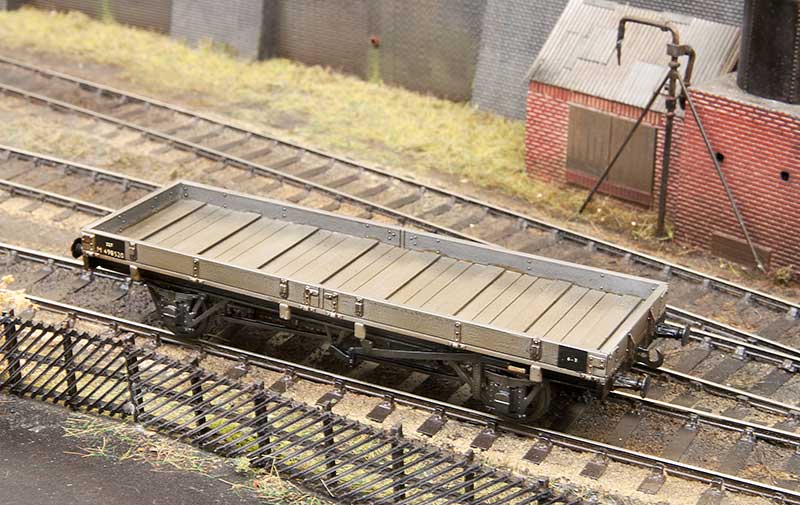
Pictured above is a Cooper Craft kit for a GWR diagram 02 open wagon. I found that if you use the bearing holes supplied in the kit the wagon sits too high so the holes were enlarged vertically a bit at a time, checking the wagon on a bit of glass to ensure all 4 wheels stayed square. The rail is a modified Rumney models kit and the brake gear from MRD.
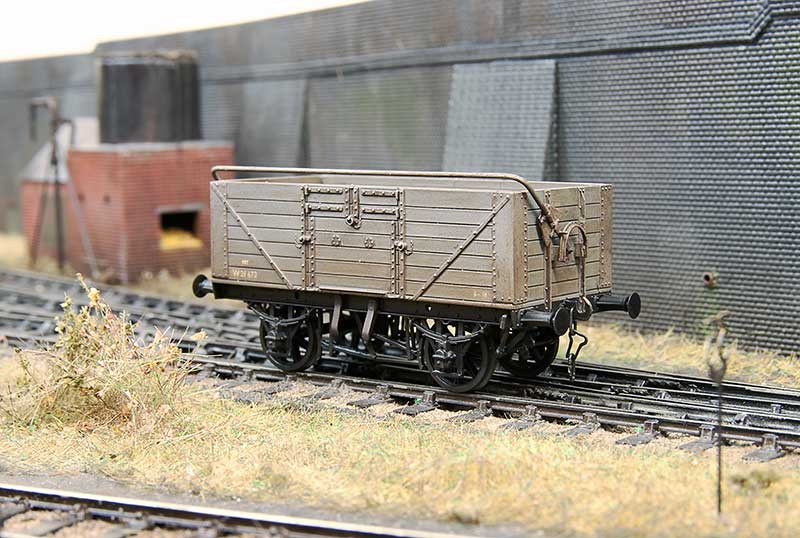
The infamous Airfix meat van. Quite why Airfix picked this and not a standard 12 ton van is anyones guess. I replaced the gimmicky opening doors and the underframe with Parkside bits from my spares box. The transfers were cobbled together from what I had and those that were white were painted with revel clear yellow (730). Buffers on this and the GWR open were from Accurascale. Basically cheap and cheerful!
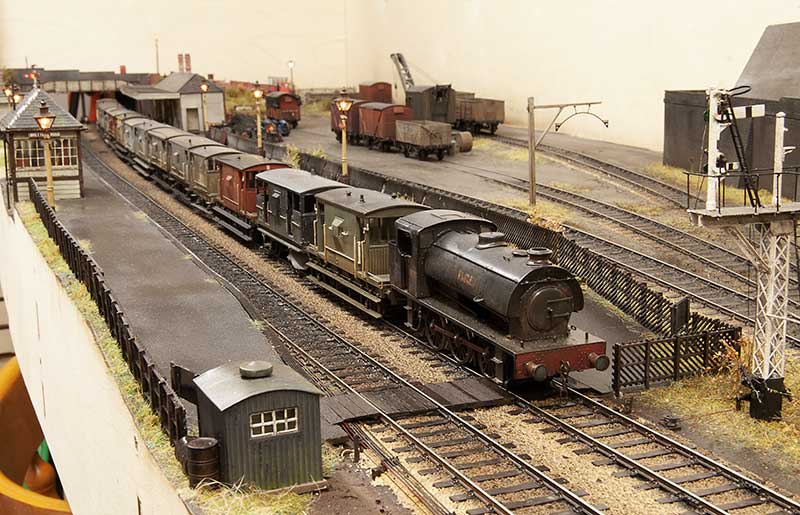
A private railway favourite and an exhibition last hour staple, the good old brake van special! I think i might have overdone it a bit!
-
DougN
- Posts: 1253
- Joined: Wed Sep 01, 2010 9:57 am
Re: Brettell Road
Jim, it may be time for you to attend the Brakevans anonymous (BA for sufferers) again... 
Doug
Still not doing enough modelling
Still not doing enough modelling
-
Terry Bendall
- Forum Team
- Posts: 2427
- Joined: Sun Jul 27, 2008 7:46 am
Re: Brettell Road
jim s-w wrote:A private railway favourite and an exhibition last hour staple, the good old brake van special! I think i might have overdone it a bit!
Quite possibly Jim - I think I can count 12 vans but the hobby is supposed to be fun! All very nice.
Terry Bendall
-
Captain Kernow

- Posts: 482
- Joined: Sat Jul 26, 2008 8:08 pm
Re: Brettell Road
I love the brake van special, Jim and it's something I've done from time to time at shows, but what I've never managed to depict is each brake van crammed full of camera-wielding, grey gaberdine raincoat-clad gricethusiasts!
Tim M
Member of the Devon Riviera Area Group.
Member of the Devon Riviera Area Group.
-
Noel

- Posts: 1983
- Joined: Wed Jun 23, 2010 1:04 pm
Re: Brettell Road
Captain Kernow wrote:I love the brake van special, Jim and it's something I've done from time to time at shows, but what I've never managed to depict is each brake van crammed full of camera-wielding, grey gaberdine raincoat-clad gricethusiasts!
Brake vans tended to accumulate in some places, so had to be moved to where they were wanted from time to time, sometimes in considerable numbers, and the Engineers also used ordinary goods trains to move their stock on occasion. Enthusiasts were paying passengers, so whether in brake vans or standing in open wagons [photographs show you can get at least 20 people in an open!] the usual rules about continuous automatic brakes still applied.
Regards
Noel
Noel
-
jim s-w
- Posts: 2190
- Joined: Wed Jul 30, 2008 5:56 pm
Re: Brettell Road
Thanks chaps
Still pondering what to do about tail lamps. Now that Brettell road is 2 tracks it makes it a tad easier for trains to enter and exit the scene in the same direction where as before we tended to come on from the left. Shuffle some wagons around and exit back to where it started.
Through trains could be remarshalled and I could replace the lamp irons on the units and rail cars with steel ones sneaking a little magnet into the lamps but then the operators might want to kill me after a weekend of that sort of nonsense.
What do others do?
-
Porcy Mane
- Posts: 133
- Joined: Wed Apr 11, 2012 4:55 pm
Re: Brettell Road
jim s-w wrote: I could replace the lamp irons on the units and rail cars with steel ones sneaking a little magnet into the lamps
I've found two magnets with opposing poles facing towards the lamp iron works well. The two magnets prevent the lamp rotating on the brake lamp iron.
https://www.youtube.com/watch?v=htVMsV38MnM
P
-
jim s-w
- Posts: 2190
- Joined: Wed Jul 30, 2008 5:56 pm
Re: Brettell Road
That’s the sort of thing.
-
andrewnummelin
- Posts: 374
- Joined: Mon Jul 21, 2008 9:43 am
Re: Brettell Road
Porcy Mane wrote:jim s-w wrote: I could replace the lamp irons on the units and rail cars with steel ones sneaking a little magnet into the lamps
I've found two magnets with opposing poles facing towards the lamp iron works well. The two magnets prevent the lamp rotating on the brake lamp iron.
https://www.youtube.com/watch?v=htVMsV38MnM
P
Very neat idea. Some details about the magnets would be interesting.
Regards,
Andrew Nummelin
Andrew Nummelin
-
Captain Kernow
- Posts: 482
- Joined: Sat Jul 26, 2008 8:08 pm
Re: Brettell Road
jim s-w wrote:What do others do?
Prior to the thought of using magnets, nothing! Life's too short and it has often been a 'challenge' to persuade my operators us even use 3-links!
Magnetic links have changed all that, so perhaps that's the way to achieve some kind of representation of tail lamp management as well.
So if we can address that in a practical manner, what's next? I'd pay good money for a RTW (Ready-to-walk) shunter, who can wield his scale shunting pole...
Tim M
Member of the Devon Riviera Area Group.
Member of the Devon Riviera Area Group.
-
ClikC

- Posts: 113
- Joined: Wed Jun 13, 2012 10:15 am
Re: Brettell Road
Captain Kernow wrote:jim s-w wrote:What do others do?
Magnetic links have changed all that, so perhaps that's the way to achieve some kind of representation of tail lamp management as well.
Hi Tim,
I’m not familiar with these magnetic links, how do they operate?
Regards
Matt
Matt Rogers
-
Porcy Mane
- Posts: 133
- Joined: Wed Apr 11, 2012 4:55 pm
Re: Brettell Road
andrewnummelin wrote:Very neat idea. Some details about the magnets would be interesting.
Thanks,
Magnets are: Neodymium 1mm dia x 1mm thick N42 Magnet - 0.025kg Pull.
I got mine from a UK supplier but it's that long ago I can't remember whom. A quick google turned up this with a min. quantity of 100 (0.07 p each).
https://www.first4magnets.com/circular- ... 1|ps_1_919
I'd imagine they can be had quite cheaply from the likes of Amazon & Ebay.
I've still to test if Jackson uncoupling magnets have any effect on pulling lamps from Brake vans & loco buffer beams.
P
You do not have the required permissions to view the files attached to this post.
-
Captain Kernow
- Posts: 482
- Joined: Sat Jul 26, 2008 8:08 pm
Re: Brettell Road
ClikC wrote:I’m not familiar with these magnetic links, how do they operate?
Hi Matt,
Steel end link for 3-link and Instanter couplings and steel end 'D' link for screw link couplings. A small magnet of the type described immediately above, mounted on the end of a brass rod acts as a coupling pole (I attach mine to a pen torch).
Tim M
Member of the Devon Riviera Area Group.
Member of the Devon Riviera Area Group.
-
ClikC
- Posts: 113
- Joined: Wed Jun 13, 2012 10:15 am
Re: Brettell Road
Captain Kernow wrote:Steel end link for 3-link and Instanter couplings and steel end 'D' link for screw link couplings. A small magnet of the type described immediately above, mounted on the end of a brass rod acts as a coupling pole (I attach mine to a pen torch).
Ahh! Instead of a fiddly hook, use a magnet, avoids the issue of trying to exchange hooks. I can see the benefits already.
Thanks Tim
Regards
Matt
Matt Rogers
-
andrewnummelin
- Posts: 374
- Joined: Mon Jul 21, 2008 9:43 am
Re: Brettell Road
Porcy Mane wrote:andrewnummelin wrote:Very neat idea. Some details about the magnets would be interesting.
Thanks,
Magnets are: Neodymium 1mm dia x 1mm thick N42 Magnet - 0.025kg Pull.
...
Thanks, I’ve ordered some and look forward to experimenting.
Regards,
Andrew Nummelin
Andrew Nummelin
-
Triode

- Posts: 149
- Joined: Thu May 16, 2019 10:20 am
Re: Brettell Road
I suppose this might work for the brake van side lamps too if the lamp iron was made from a magnetic material or had a bit of steel wire soldered to it?
-
Porcy Mane
- Posts: 133
- Joined: Wed Apr 11, 2012 4:55 pm
Re: Brettell Road
Triode wrote:I suppose this might work for the brake van side lamps too
It does. It may not be clear from vid and pic I posted as it shows a dual lens BV lamp but they are yet to be further modified by the addition of red & clear lens. By swapping the lamps from side to side alternate clear or red can be shown to rear. Ideal for rule 121 & propelling moves.
Triode wrote: if the lamp iron was made from a magnetic material or had a bit of steel wire soldered to it?
I've used 0.4mm dia. enamelled soft iron wire with the coating scraped off, then squashed flat in the vice to mimic lamp irons.
Having said all that, I've still to carry out some real world impact testing to prove the "stick-ability".
Apologies to JSW for thread drift. (It's something I seem to excel at).
P
-
Porcy Mane
- Posts: 133
- Joined: Wed Apr 11, 2012 4:55 pm
Re: Brettell Road
Triode wrote:I suppose this might work for the brake van side lamps too
One more quick hijack. More testing of the magnetic head/tail lamps. They seem to be durable enough.
https://www.youtube.com/watch?v=2ZWuz_4HkV8
Jackson uncoupling magnets have no effect on these higher mounted lamps. I've still to test the lamps on lower, buffer beam mounted lamp irons as used on BR fitted rolling stock etc.
P
-
jim s-w
- Posts: 2190
- Joined: Wed Jul 30, 2008 5:56 pm
Re: Brettell Road
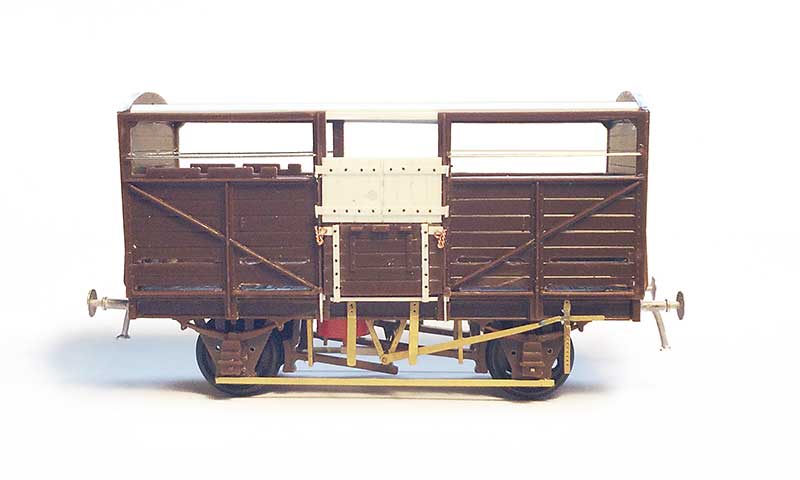
The good old Airfix cattle van. When I was a kid my dad built one of these so I decided Brettell lane should probably have one too. I deleted the opening doors (it was easier to replace the top ones completely than modify what was in the kit) and detailed the underframe with Mainly Trains, Bill Bedford and Rumney models parts.
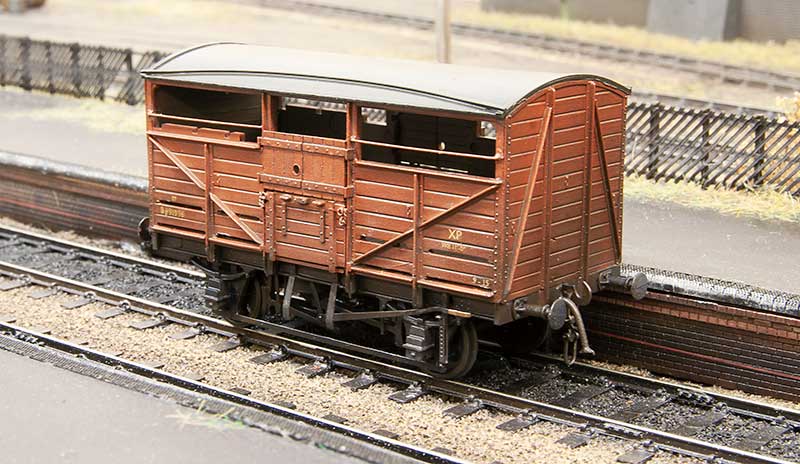
As with all Airfix kits of the time the roof was pretty clunky so that was replaced with a new one from 30thou plasticard and microstrip.
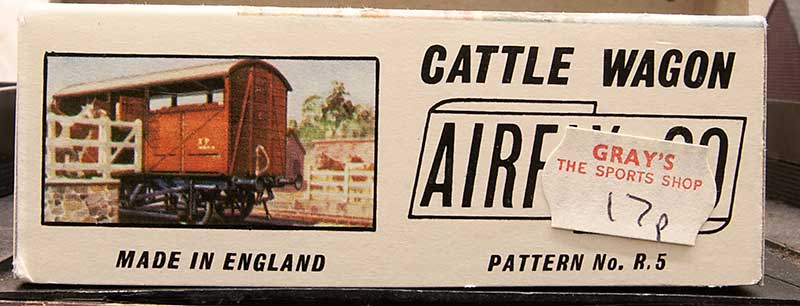
Ive no idea when this kit was first sold but even with modern eyes this looks like it was bit of a bargain!
Moving on to a more recent kit. The Chivers model for an LMS long low thats been in my stash for a few years now.
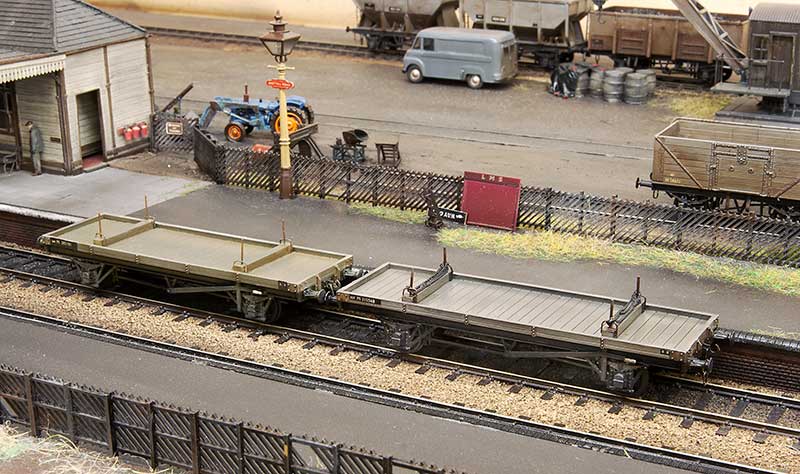
Also from Chivers, and also from my stash, I've finished off another LMS double bolster. Chivers kits seem to have quite chunky underframe mouldings and while this isn't noticeable on most of their kits I've built it was kind of more obvious on the first double bolster I built (on the left). Potentially the use of sprung suspension adding to the problem I felt the underframe looked too wide and the w irons were too far from the wheels, giving a kind of 00 look to the wagon. On the new one (and the long low pictured above) I thinned the w irons to about half thickness and I'm happier now. It might very well that its only something I notice though!
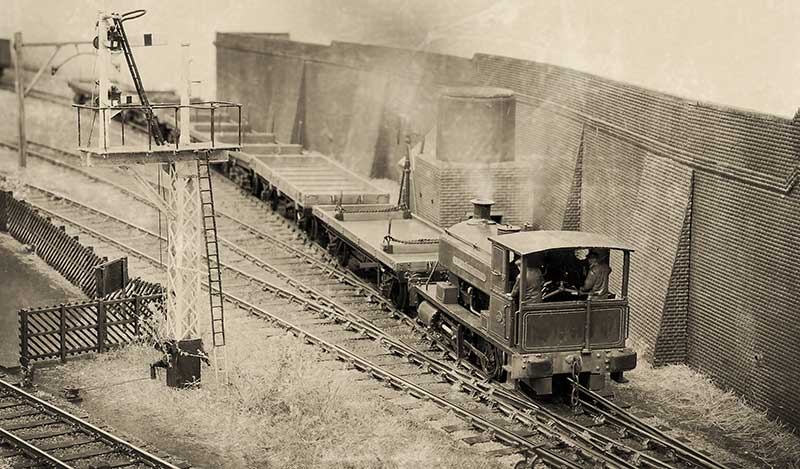
A 'historic' photo of the Barclay tank shuffling a steel train.
Who is online
Users browsing this forum: ClaudeBot and 2 guests